

Accounting is tedious and time-consuming. As a business owner, if you lack the skillset or expertise to help you with your business finances and accounting, you can always hire a bookkeeper to help you solve your accounting dilemma. Or, you can hire a certified accountant to oversee, track and verify all your business transactions.
In addition to that, you need accounting software that can help you store and manage your accounting data, whether as a regular user or as a bookkeeper. Deskera Books is here to help.
There are two different approaches when using Deskera Books as your ultimate accounting software;
- the bookkeeping practice
- the accounting practice
So, what is the difference between the bookkeeper practice and the accounting practice?
The bookkeeping practice allows you to sign up for a bookkeeper account and onboard your clients to Deskera Books. You help your clients with their business entries, verify discrepancies, and perform tax filing on their behalf without needing their participation in the daily operational tasks. The bookkeeper will pay for the subscription plan.
On the other hand, the clients will deal with the day-to-day business operations using Deskera Books without worrying about accounting. The accounting firm will then verify all the entries at the end of the month and help file your tax. The client will pay for the subscription.
How to sign-up for a bookkeeper account?
Follow the steps below to sign-up for a bookkeeper account:
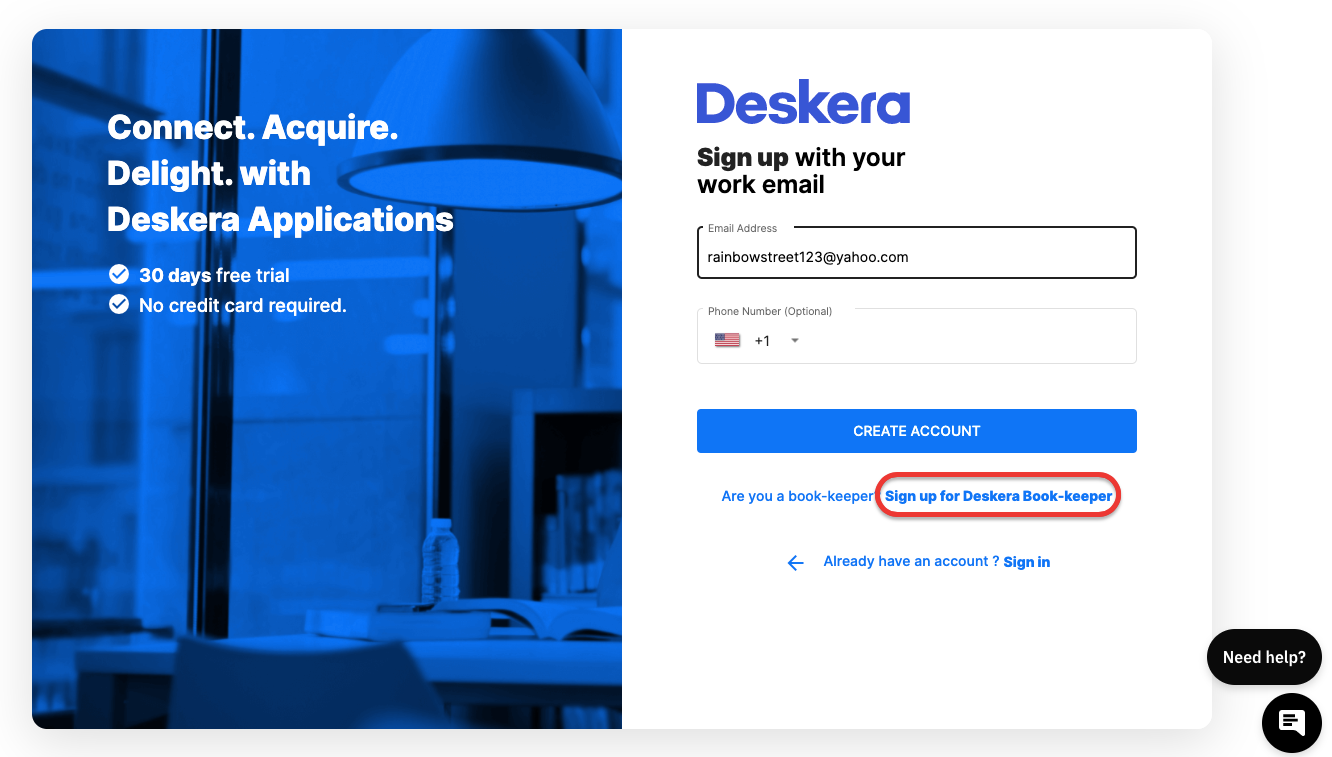
- Go to the Deskera portal here. Click on the sign-up for bookkeeper account on the page. Click on the sign-in button if you already have an existing Deskera Bookkeeper account with us.
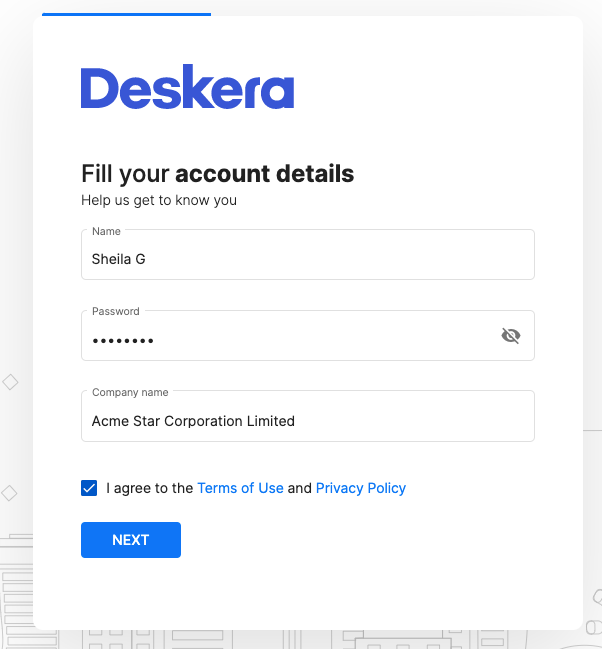
2. Enter your name, password, company name, and agree to the terms of use to sign-up for a bookkeeper account. Click Next.
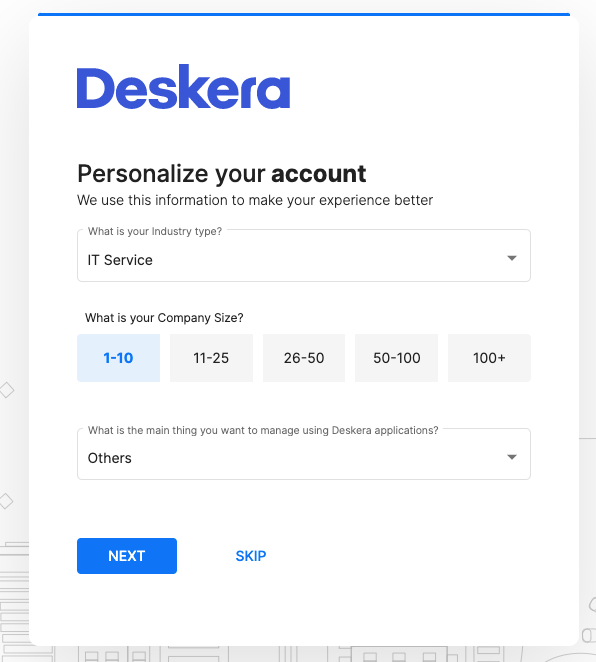
3. On the following page, select your industry type, company size and the reason you're using Deskera application. Click Next. You can always skip this step if you're not interested.
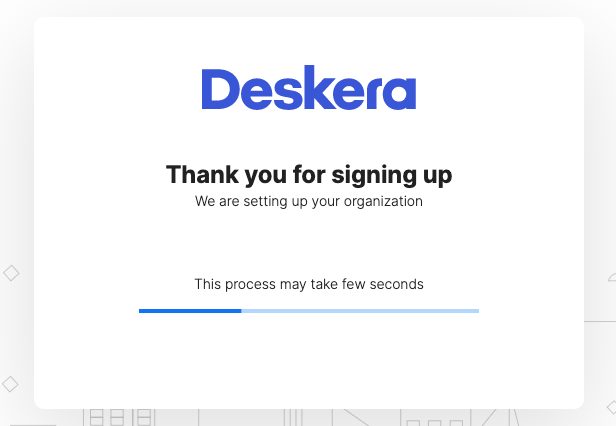
4. You have successfully sign-up for a bookkeeper account. Check your inbox or junk folder. You should receive a verification email from us.

5. Click on the verify email address button.

6. Your email is successfully verified. Next, click on the login button using the credentials saved earlier.

7. Once you are logged-in, you will view Deskera Console as per the image above. Click on Deskera Books and the system will re-direct you to Deskera Books Main Dashboard.
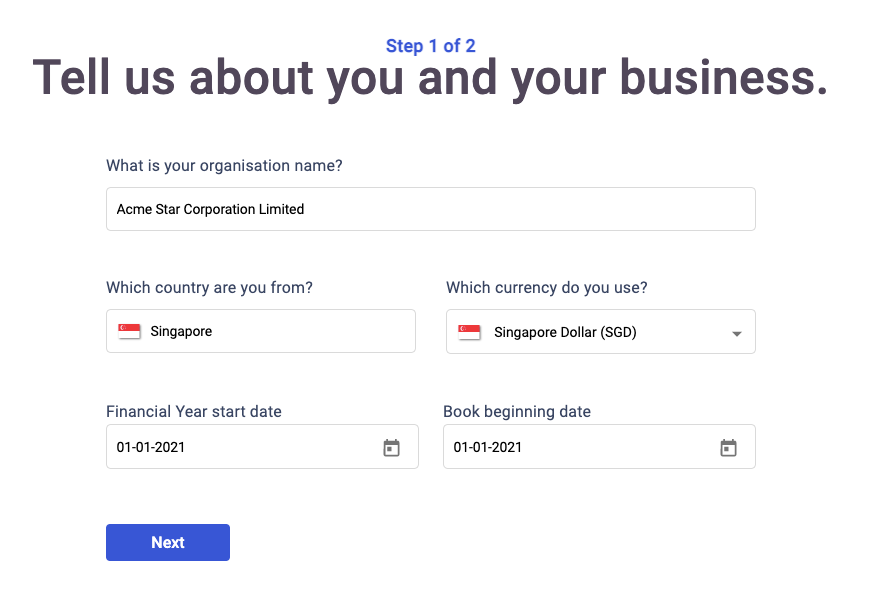
8. You are required to set-up your bookkeeper organization. Your company name will be auto-populated. Enter the country you are from, the currency use, your financial start date and book beginning date. Click Next.
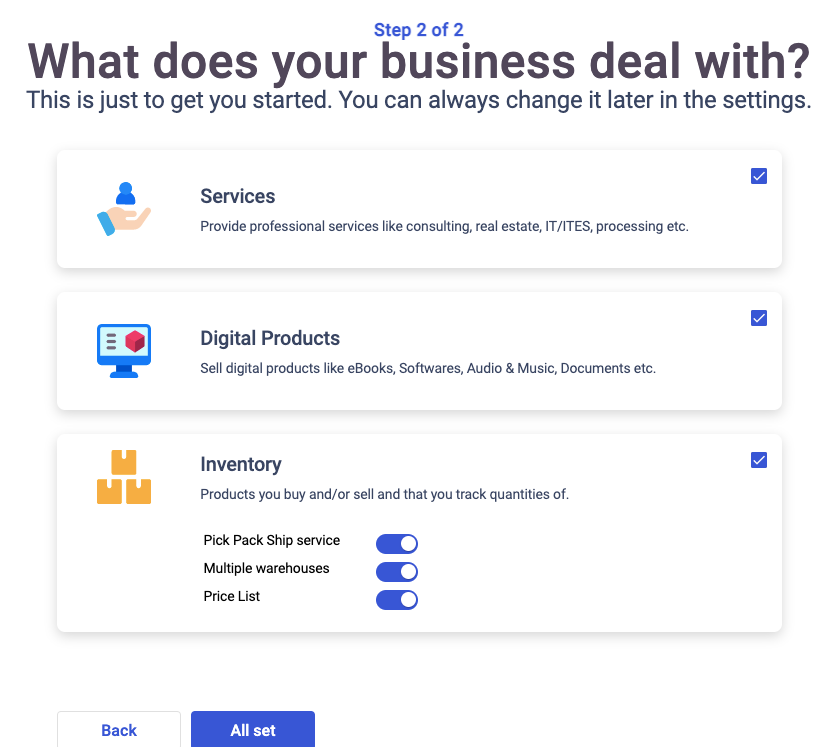
9. Next, enable the respective checkboxes if you provide services, digital products, or inventory. Click on the All Set button.
Congratulations! You have successfully setup your bookkeeper organization.
How can I add my client?

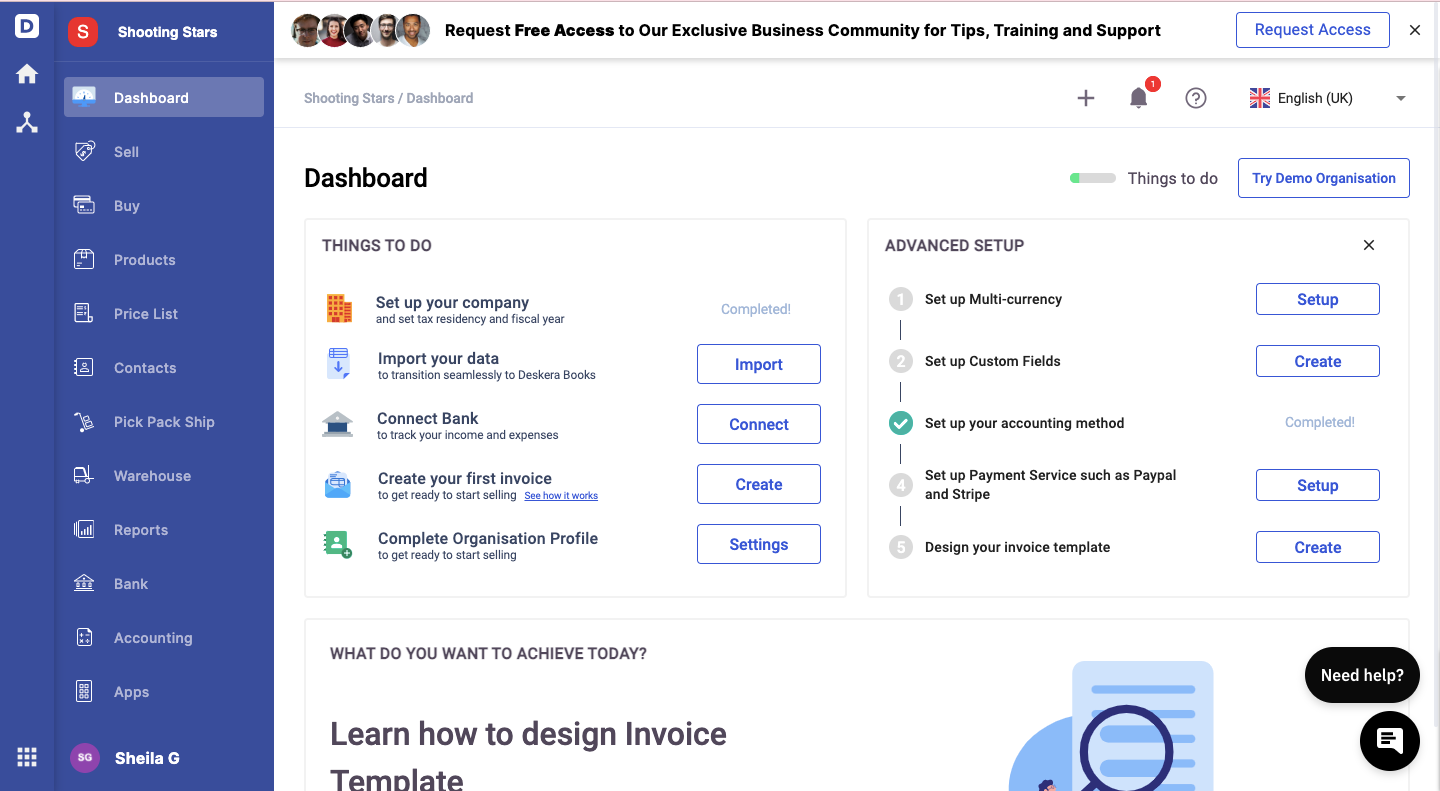
After you have successfully setup your bookkeeper account, your Deskera Books Dashboard should look like the image above. There are two additional modules for the bookkeeper account such as the client and team modules.
As a bookkeeper, you are required to add your clients to your organization. Follow the steps below:
- Click on the Client Module on the sidebar menu.
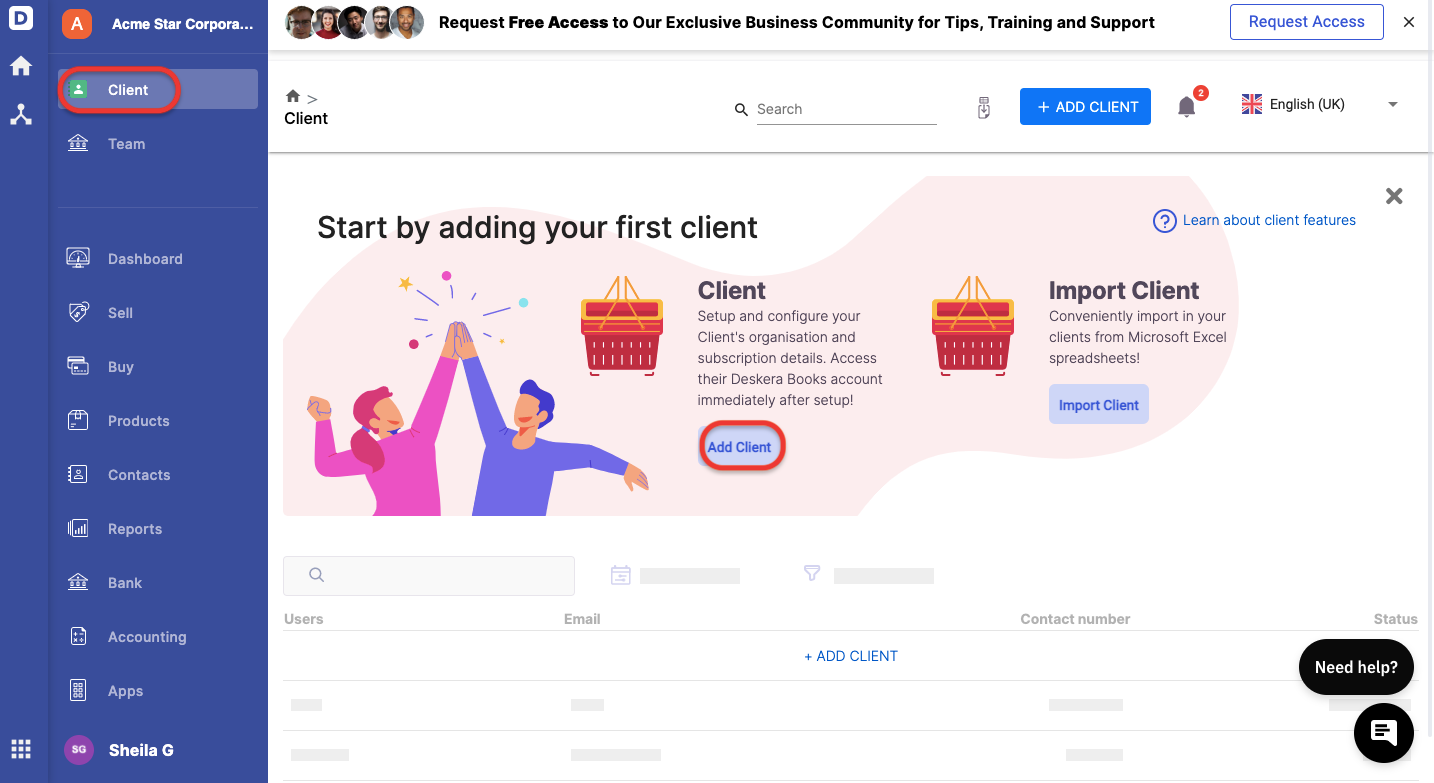
2. Next, click on the Add Client button.
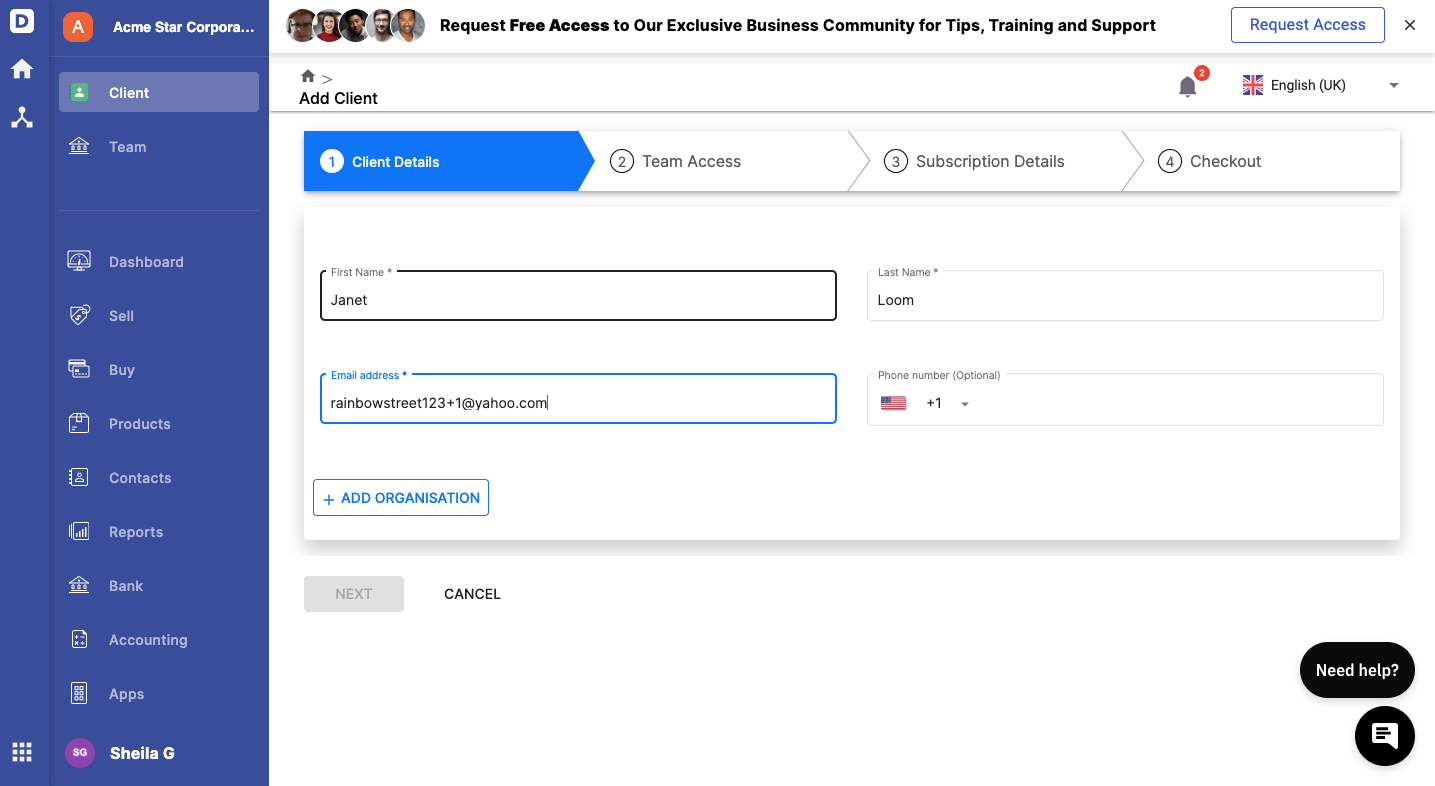
3. Enter your client first and last name, their email address and contact number (this field is optional). Click on the Add Organization button.
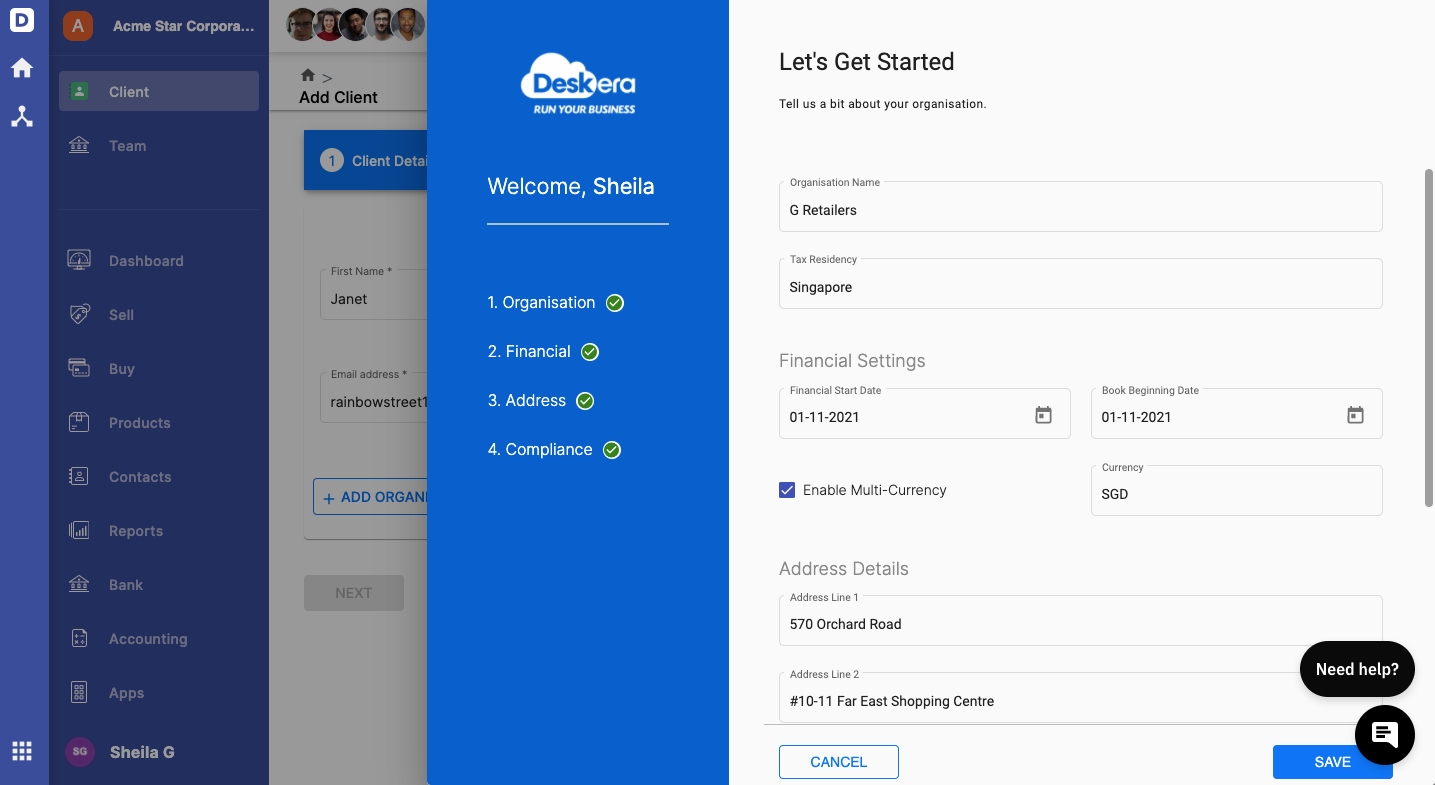
4. A slider will appear on the right-hand side screen. Enter your client's organization details such as;
- organization name
- tax residency
- financial start date and book beginning date
- enable multi-currency checkbox, if applicable
- company address
- timezone
- tax identification number
5. Click Save.
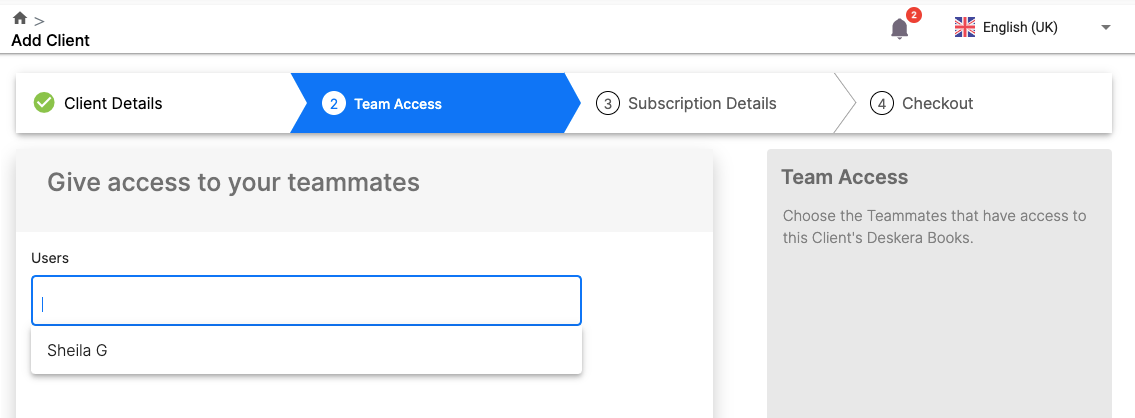
6. Next, give access to your teammates to the client's Deskera Books account. Click Next.
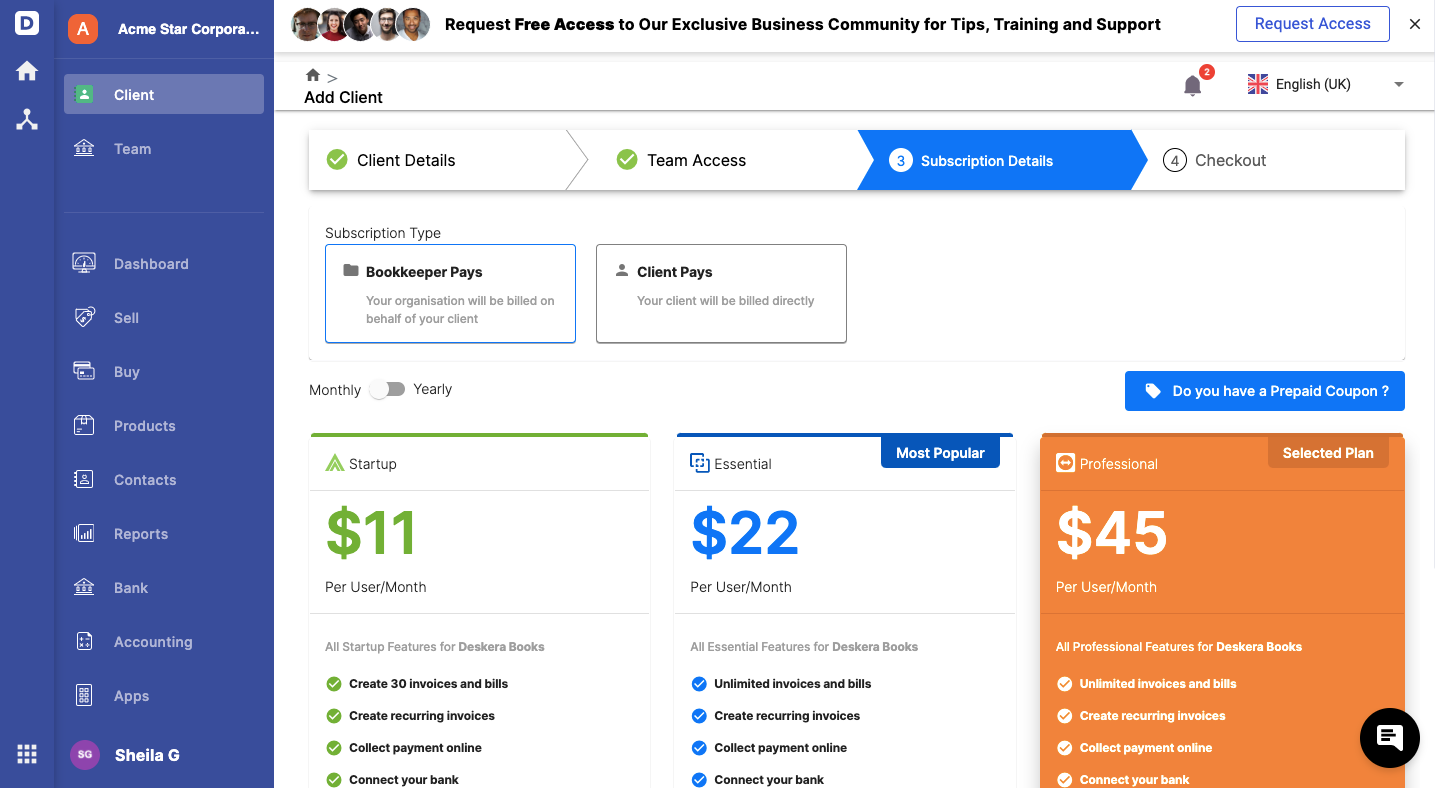
7. After that, choose the subscription type - bookkeeper pays. Choose the subscription plan accordingly and click Next.

8. Proceed to make payment by adding the card payment details and billing address. Click on the Checkout button.
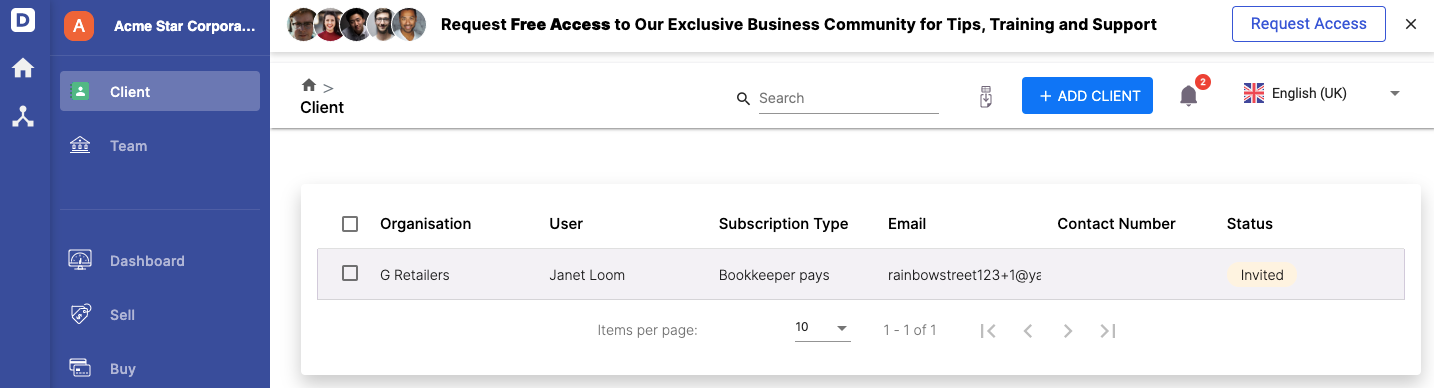
9. The status of your client will be reflected as "invited" until they have accepted the invite email.
How do I add teammates to my bookkeeper organization?
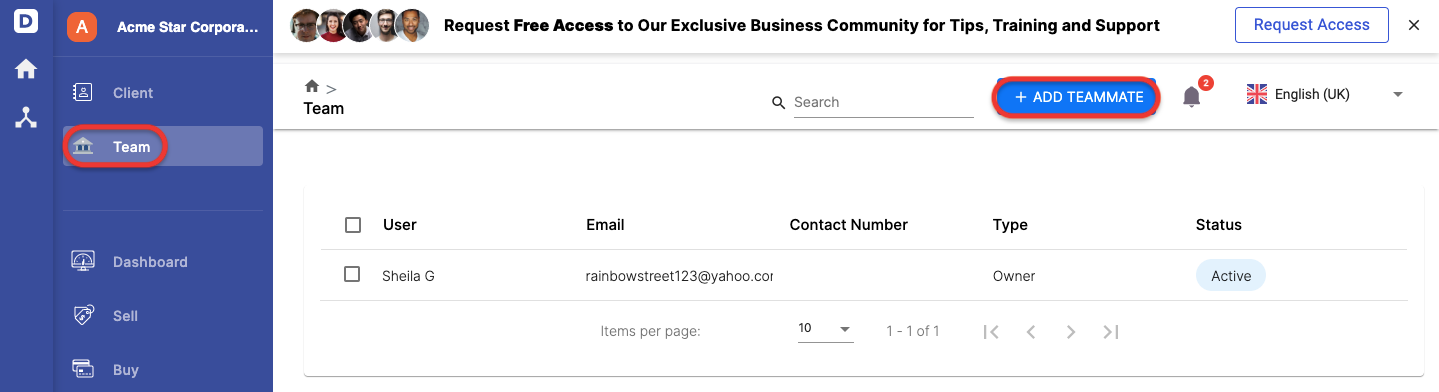
- Go to Team Module via the sidebar menu.
- On the Team page, click on the + Add Teammate button.
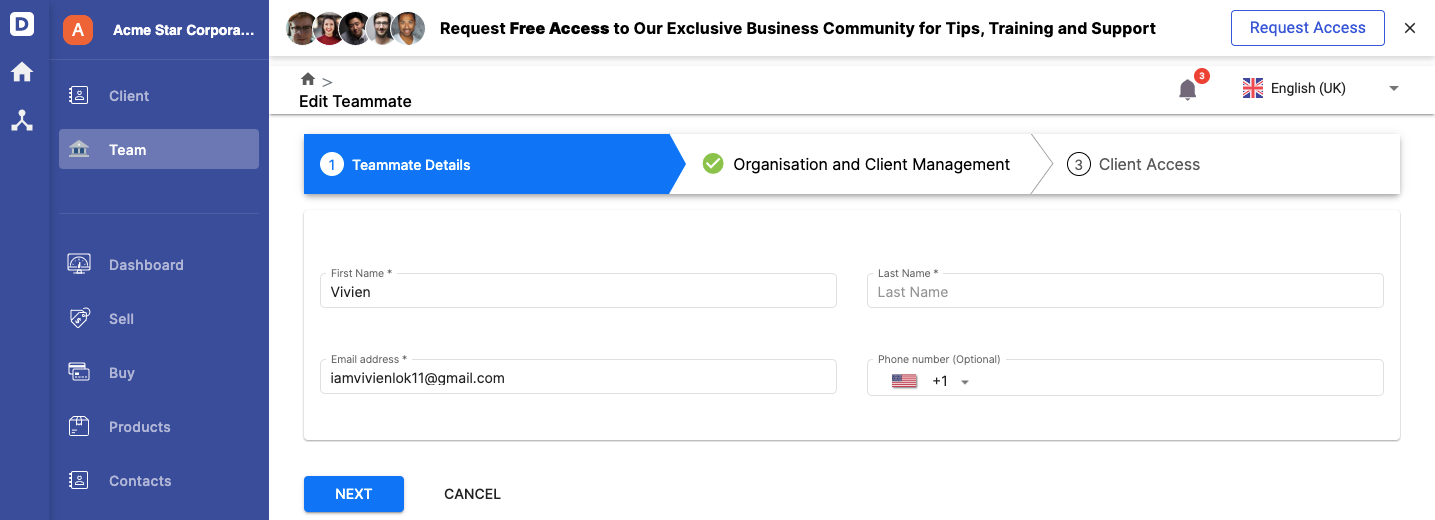
3. Enter the teammate's first and last name, email address, and phone number. Click Next.
4. Assign a role for this user; can be admin, accountant, or auditor. Enable the client management toggle if you wish to allow this user to add new clients, edit, and deactivate clients in the organization. Click Next.
5. Under the Client Access tab, click on the Save button.
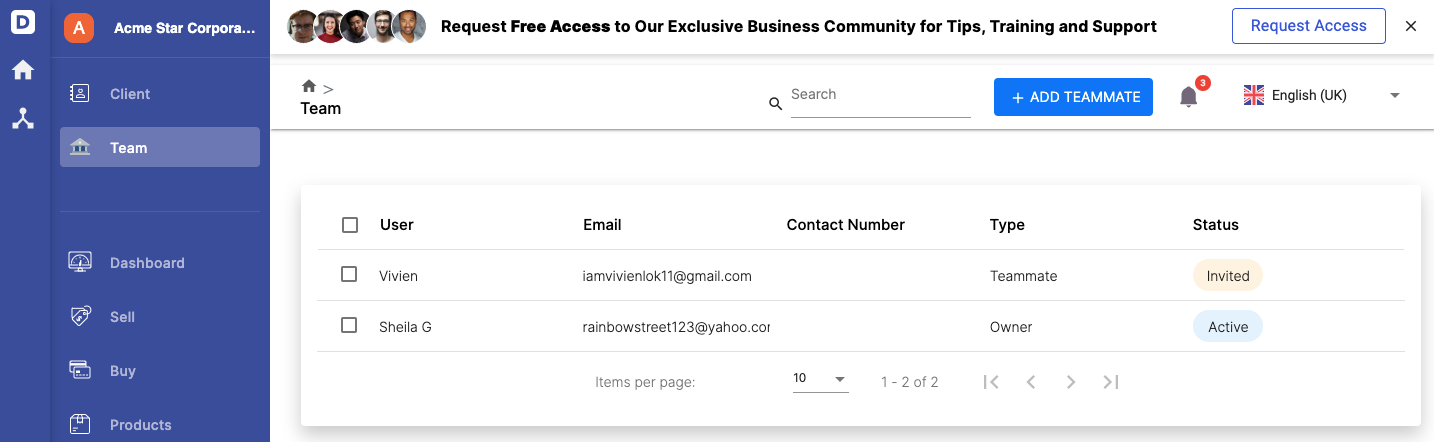
6. You can view the teammate added under the Team Summary List.
How can I view my client's organiztion?
Once your clients have accepted your invite, you can view your client's organization on the sidebar menu.
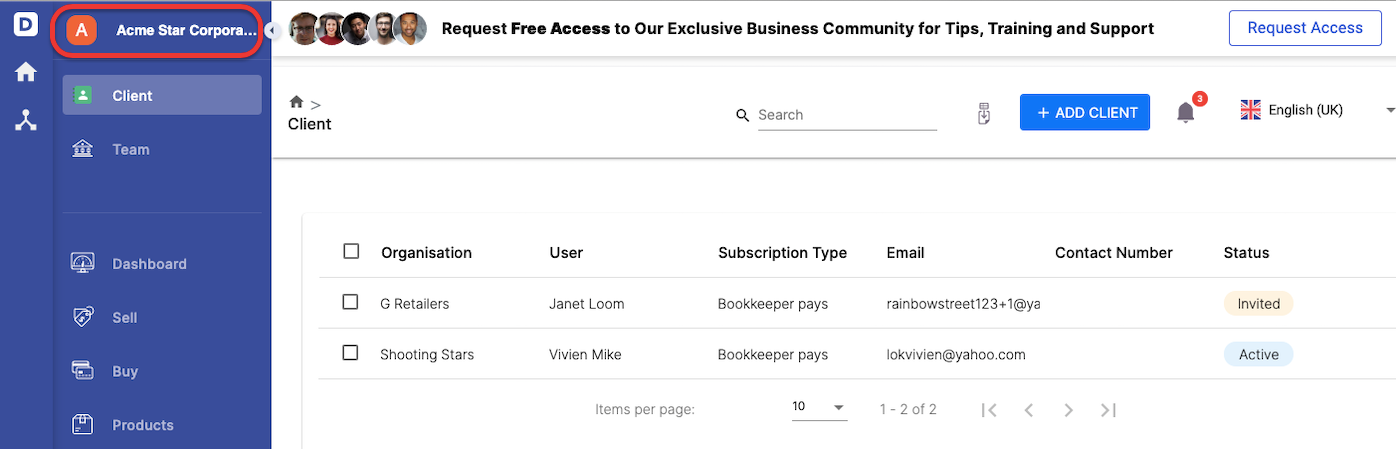
Click on your bookkeeper organization name.
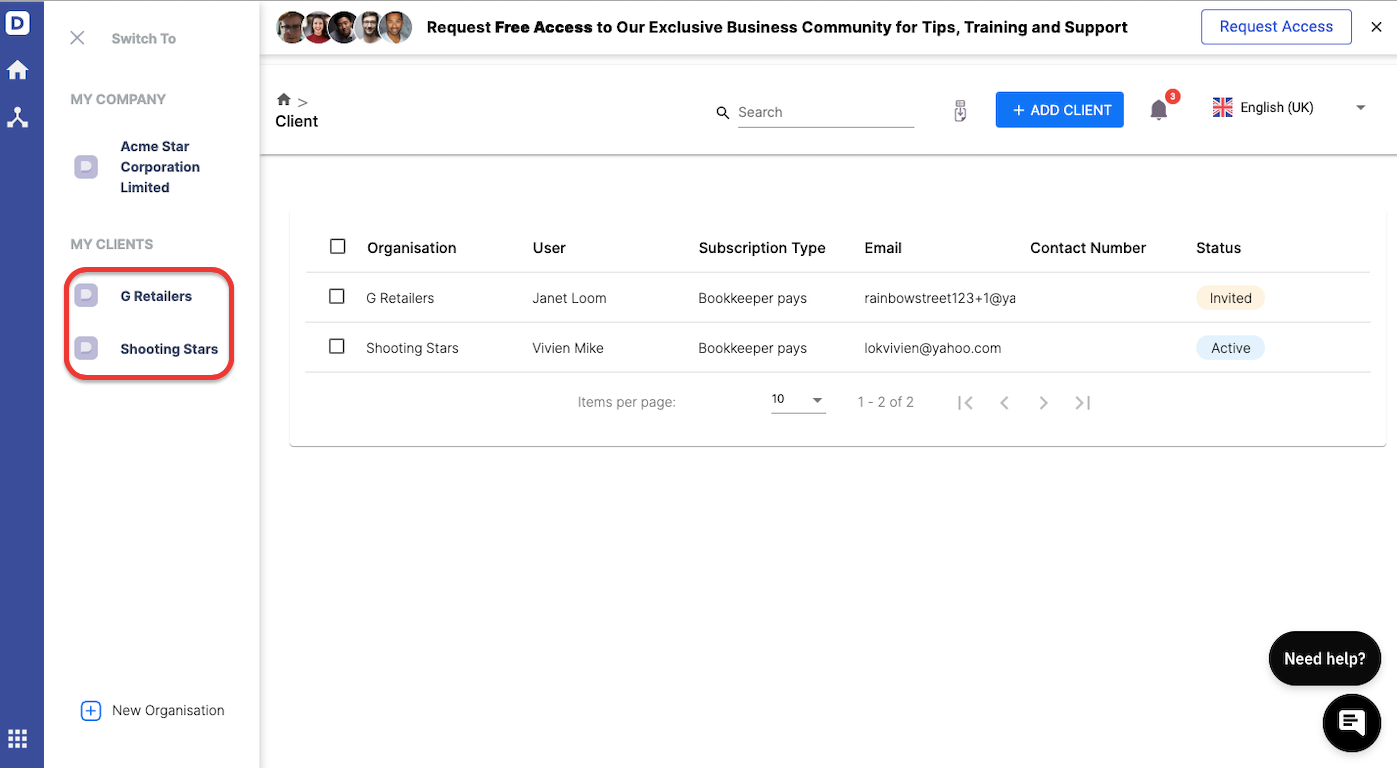
A slider will appear. You can view all your client's organization here.
Clicking on your client's organization will re-direct you to their organization dashboard.
As a bookkeeper, you can help your clients;
- create and connect to the client's bank account
- perform bank reconciliation
- create a quote, invoice, bill, and order
- add contacts and products
- verify financial statements such as balance sheet, profit and loss statement, and cashflow report
What about the accounting practice?
You can also help your client create their organizations via your bookkeeper account and send the bill to your clients directly.
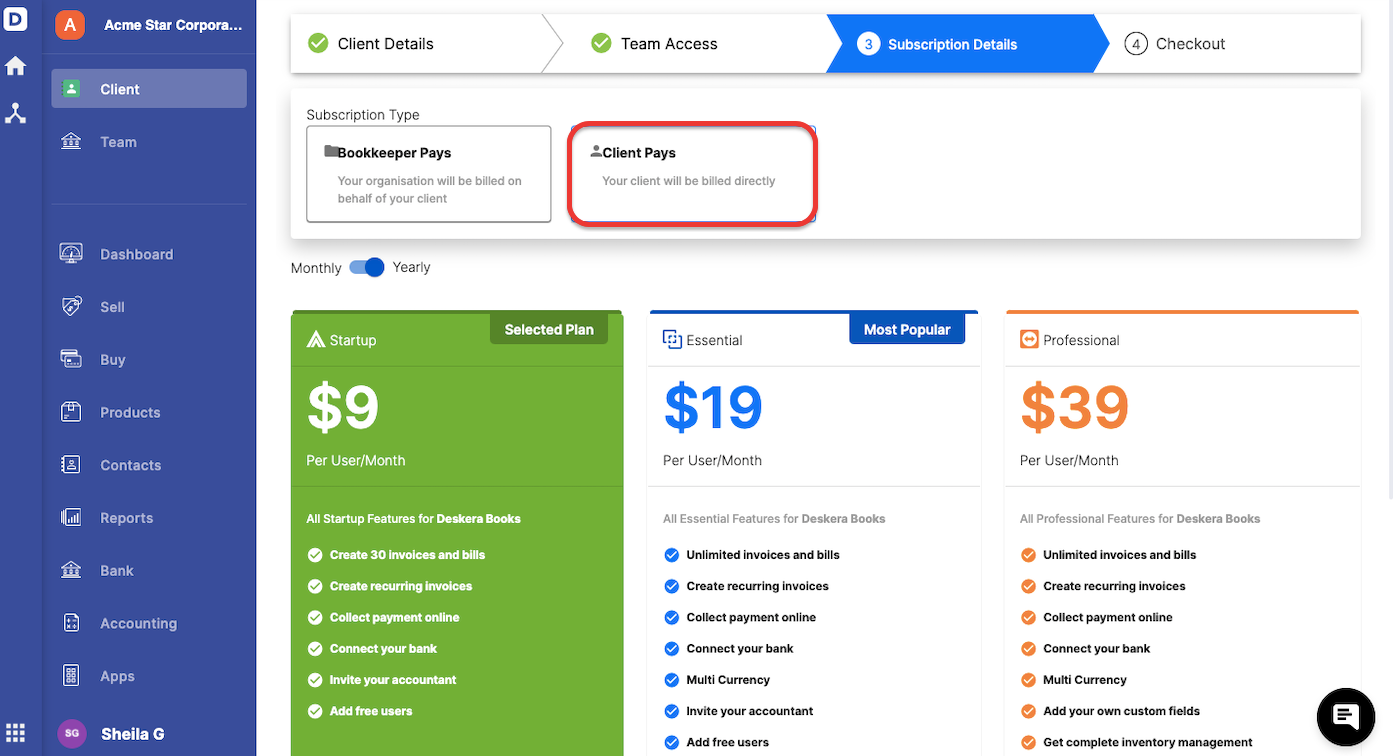
During client creation, you have the option to bill your client directly via the Subscription Details Tab.
Select Client Pays option.
Next, choose the Subscription Plan and click Next.
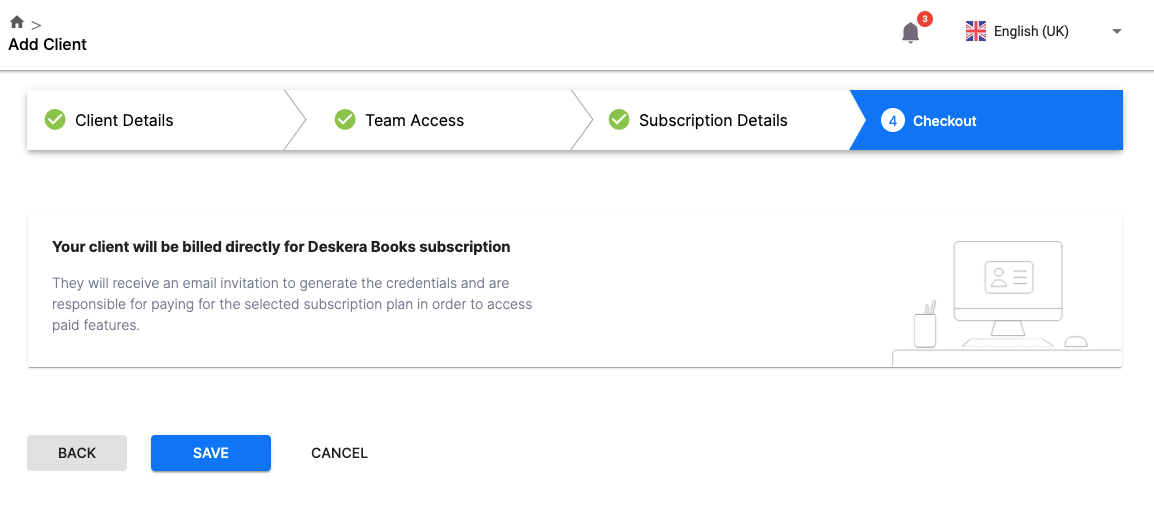
Click Save to proceed.
Your client will receive an invitation email and they will have to pay for the plan subscribed.
Your client can start using the software after making the payment.