

Section is the collections of the related articles grouped under the same umbrella.
Why do you need to create sections?
Creating different sections enables the end-users to sort their articles based on a different category.
This enables the end-users to manage, track, and oversee the articles more effectively.
Once you have set up your help center page, you can start adding sections in your help center.
How to Create a Section?
Follow the steps stated below to create a section on Deskera CRM:
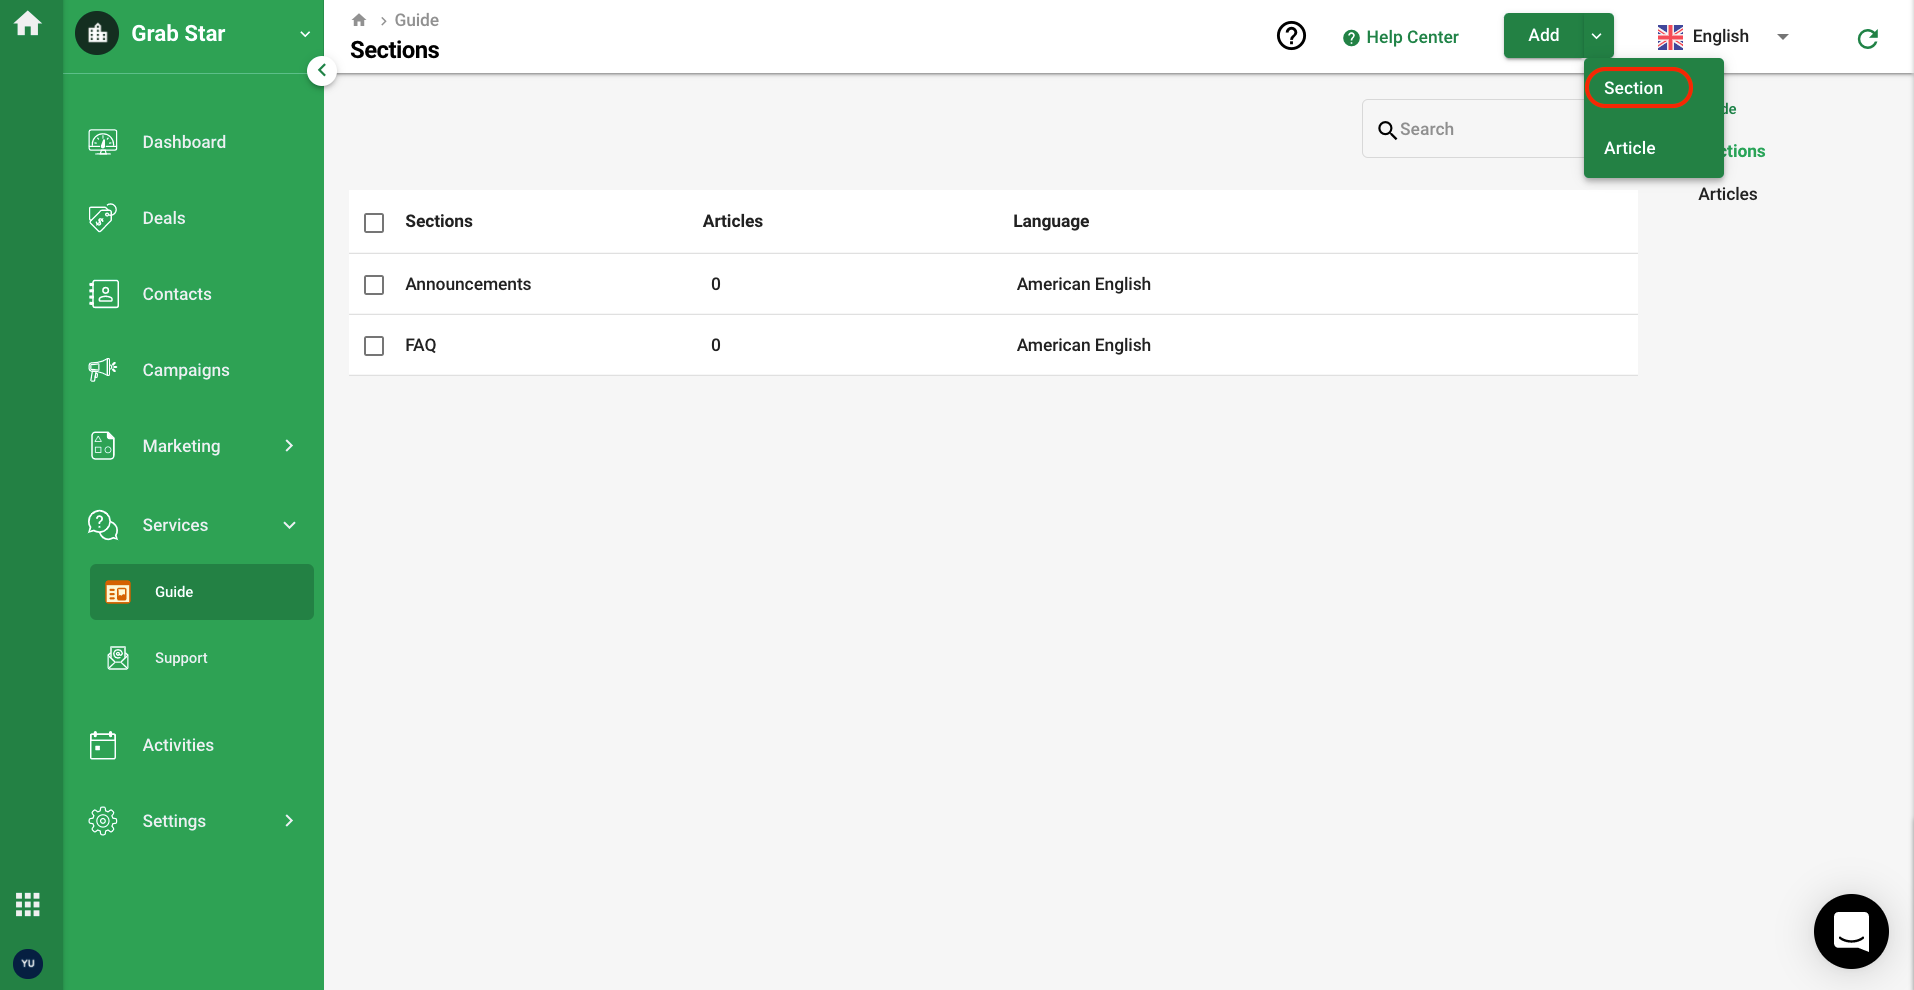
- On the sidebar menu, click on Services.
- Click on Guide.
- At the top right of the screen, click on the Add button
- Then, select Add Section from the drop-down menu.
6. A pop-up will appear and you need to fill in the Section Name and Description.
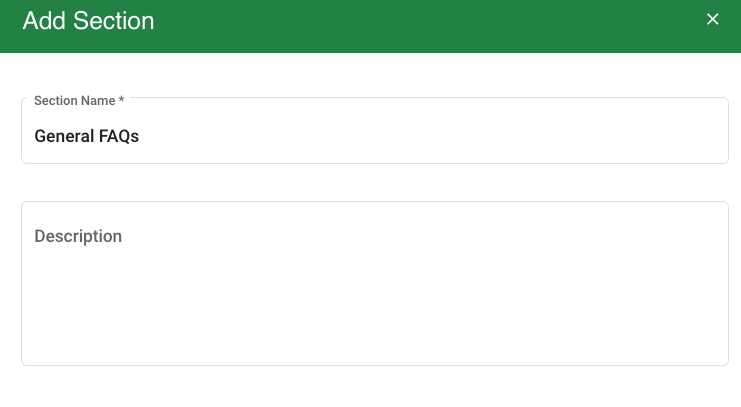
7. Click on the Add button to save.
8. Once you Save the Section, it will appear in the Section List. You can view the number of articles saved in each section.
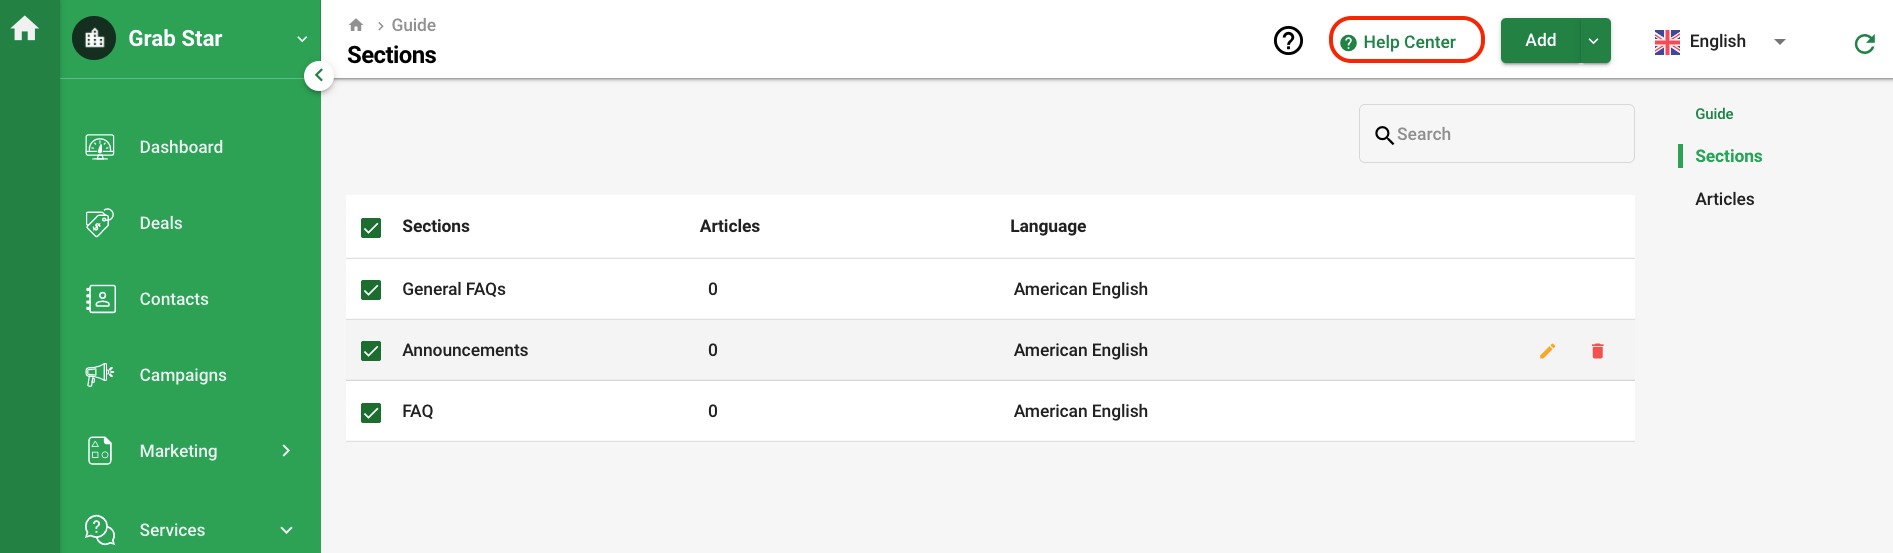
9. If you click on the Help Center button at the top right, this will direct you to your support domain.
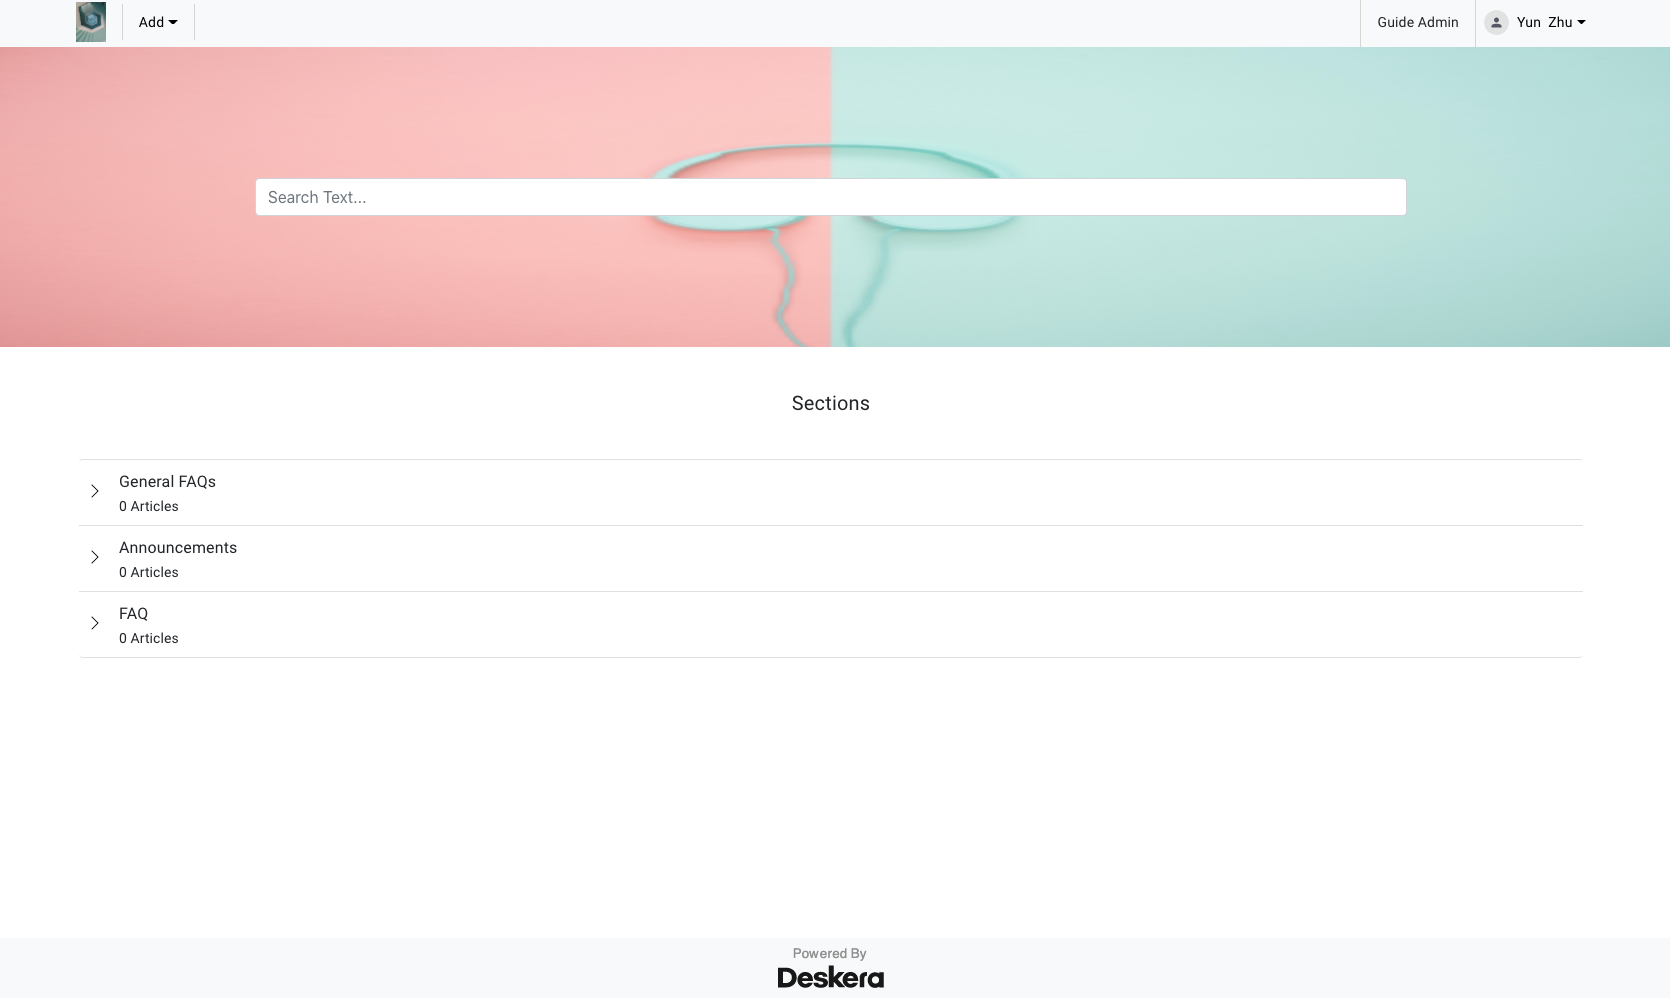
10. In your help center site, the end-users will be able to view the sections as shown above.
How to Edit and Delete a Section?
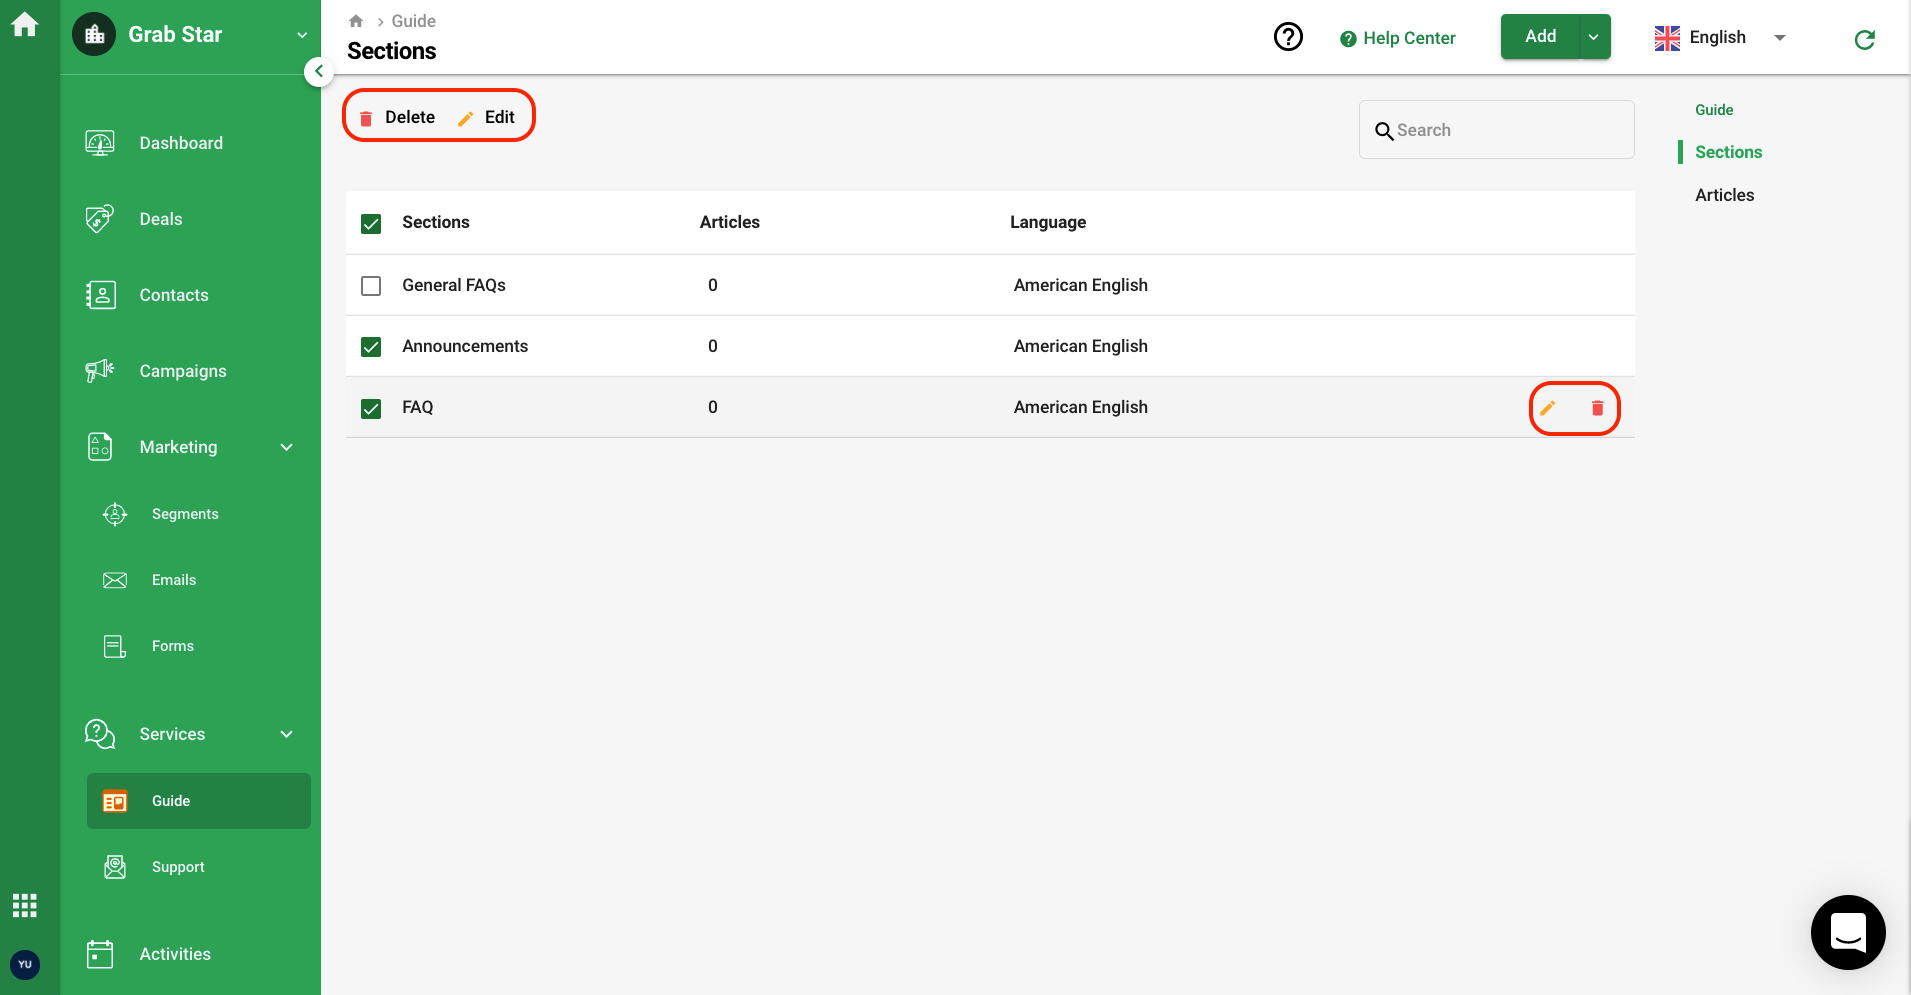
You can choose to edit and delete the existing section on Deskera CRM.
To edit and delete the section, hover your mouse on each row, the edit and delete icon will appear.
If you click on the Edit icon, the pop-up will appear, you can amend the section name and description and click Save.
You can also remove the section by selecting the Delete button.
Do note that you cannot delete the sections with articles in it. You will need to delete all the articles saved in each section before you can successfully remove the section.