

In Books +, all the expenses that you have incurred will automatically appear on the Expense page. Also, you have the flexibility to create direct expenses as well.
There are two types of expenses in Books+; direct expense and prepayment.
Direct expense is any expense related to the purchase of products. Some examples of direct expenses are the materials used to build a product for sale, the cost of freight, wages and salary, etc.
Prepayments are any future expenses you paid in advance but are not used up or expired yet.
Follow the steps below to create a direct expense and prepayment in Books+:
- Login to your Books+ account.
- Click on Accounting Module > Select Expense option.
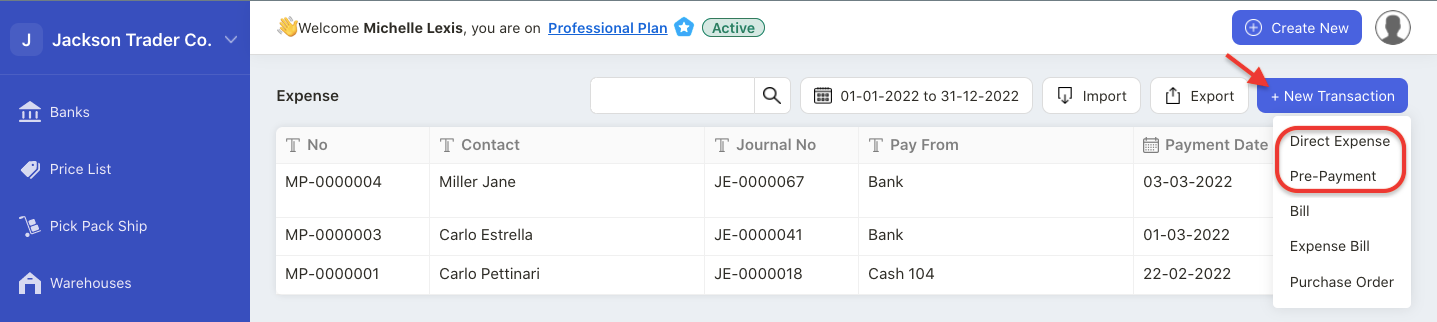
3. On the expense page:
- select “+ new transaction” > select direct expense to create a new direct expense record
- select “+ new transactions” > select pre-payment to create a new prepayment record.
4. A pop-up menu will appear. Fill in the fields in the pop-up menu.
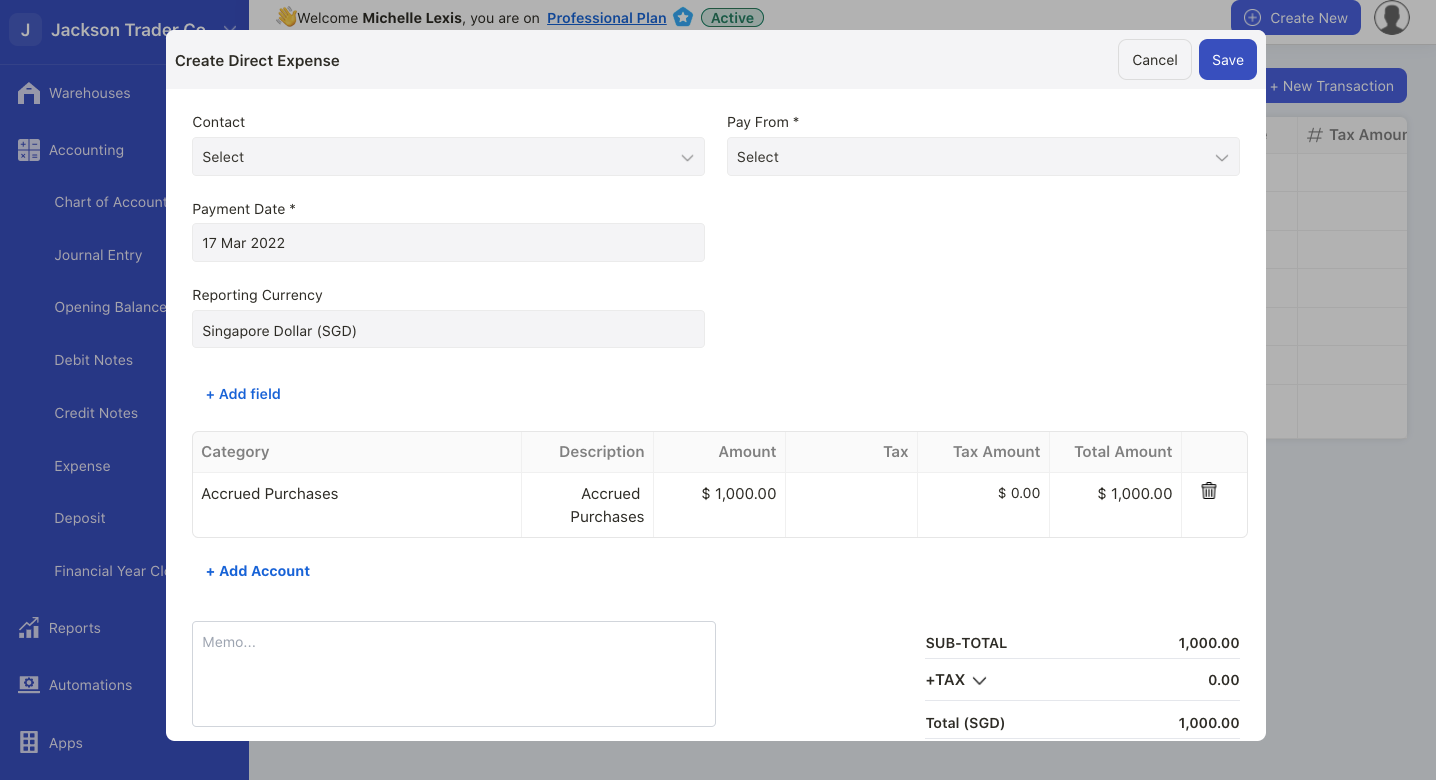
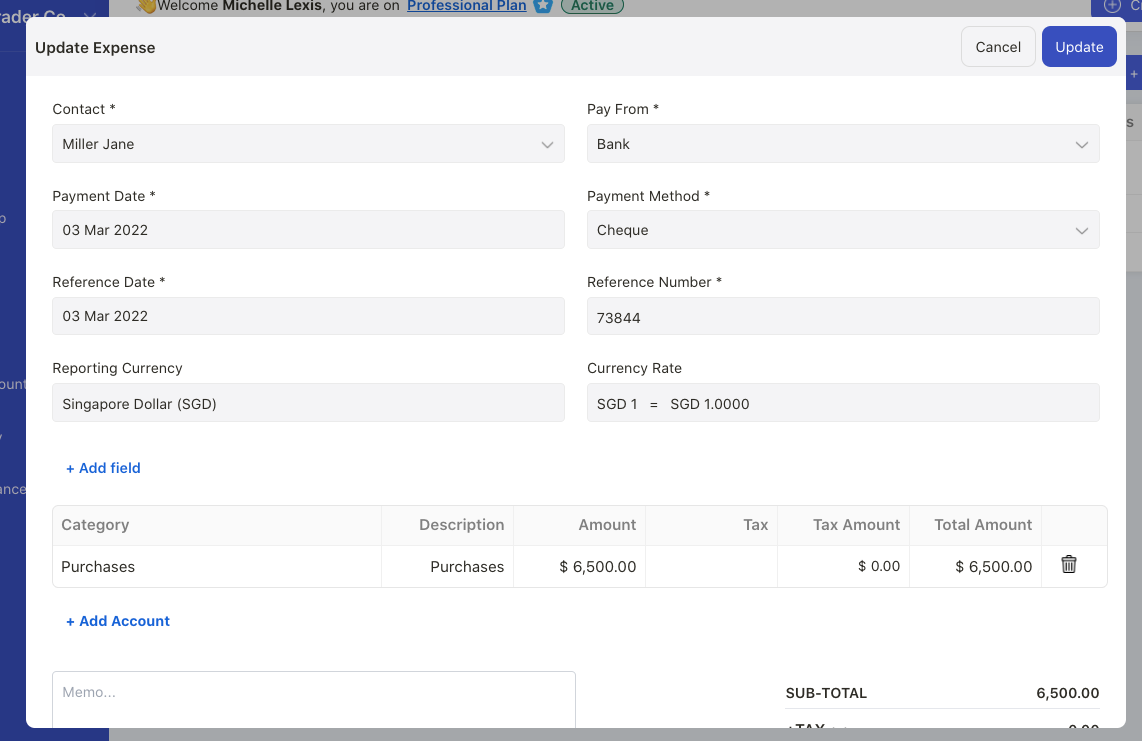
- contact - select the contact name to make payment to
- pay from - choose the account to make the payment
- payment date - enter the payment date
- payment method - choose the payment method. choose from cheque, bank or card payment
- reference date - enter the payment reference date
- reporting currency - enter the reporting currency
- currency rate - enter the exchange rate if foreign currency is applied
- add custom fields - add custom fields in the expense record
- add accounts - choose the account for the expense incurred
- memo - enter short description about the expense record
- attach file - upload attachment in pdf, image and document format no greater than 5MB
5. Click on the save button to save the direct expense and pre-payment record.
How can I edit the direct expense and prepayment record?
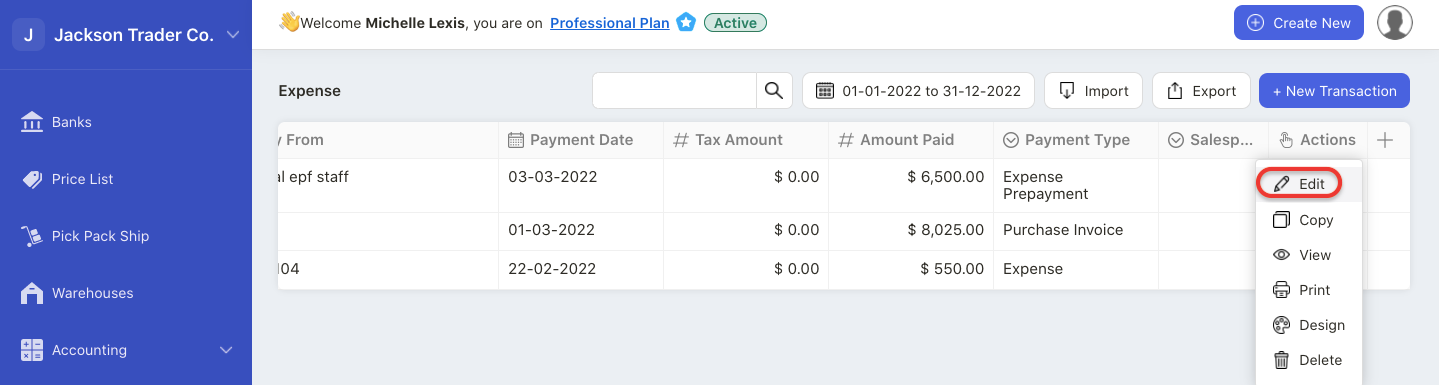
Click on the Edit icon under the Actions column.
A pop-up will appear.
Edit the information in the pop-up menu and click on the update button.
Note:
- You cannot edit the pre-payment record if you have applied the prepayment record in your Bill document
- You cannot view or edit expense records auto-populated by the system
How can I delete the direct expense and prepayment record?
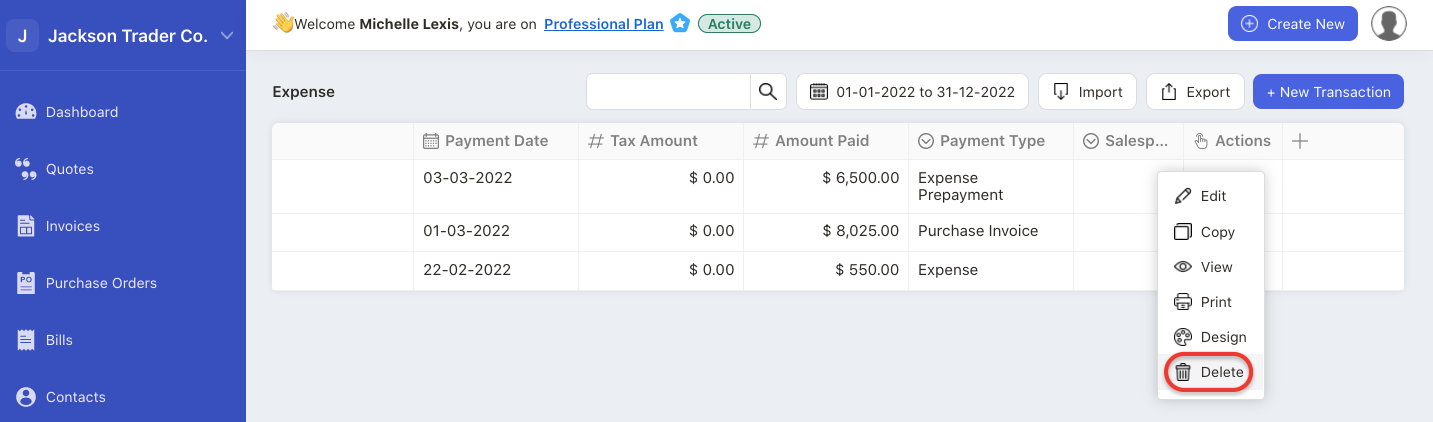
Click on the Delete icon under the Actions column.
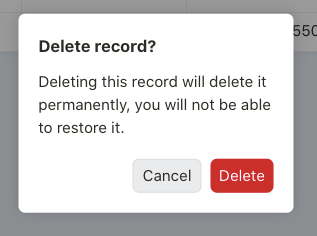
A pop-up message will appear after clicking on the delete button.
Click on the delete button.
Note:
- You cannot delete the prepayment record if you have applied the prepayment record in your Bill document
- Deleting the expense records auto-populated by the system will remove the payment record in the bill document tag against it
How can I apply the pre-payment record in my bill document?
Once you have created the prepayment record in the system, you can apply the pre-payment against your bill document to adjust the remaining amount.
Go to Bill document for the respective contact.
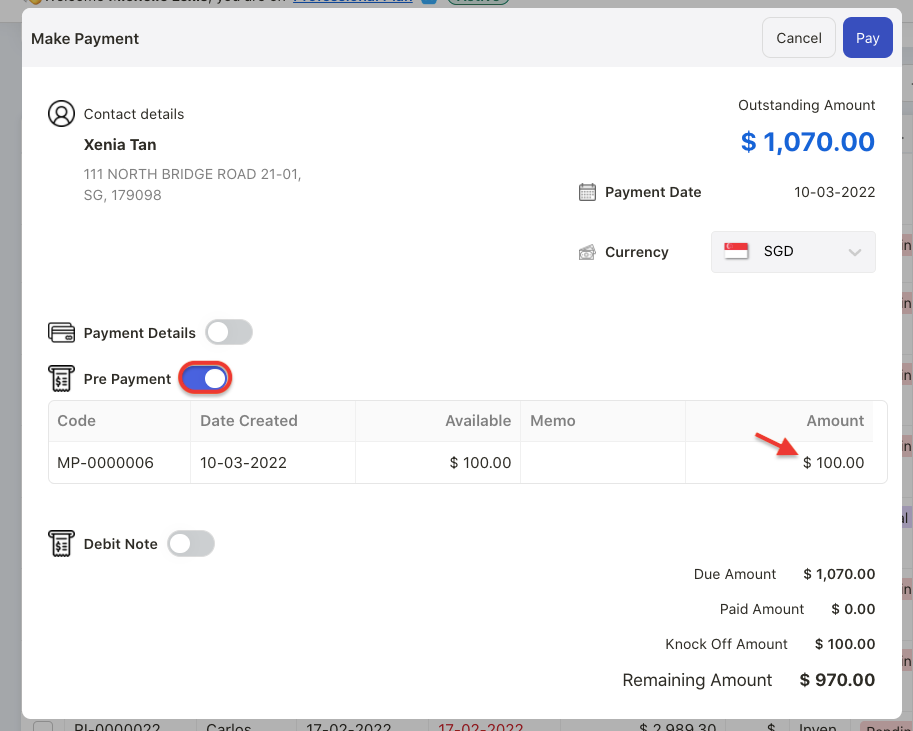
Click on the Pay button under the Actions column.
Once you have applied the prepayment record, it’s final and you cannot reverse this action anymore.
Note: You can create one prepayment record and apply this record in multiple bills.
How can I change the direct expense and prepayment template?
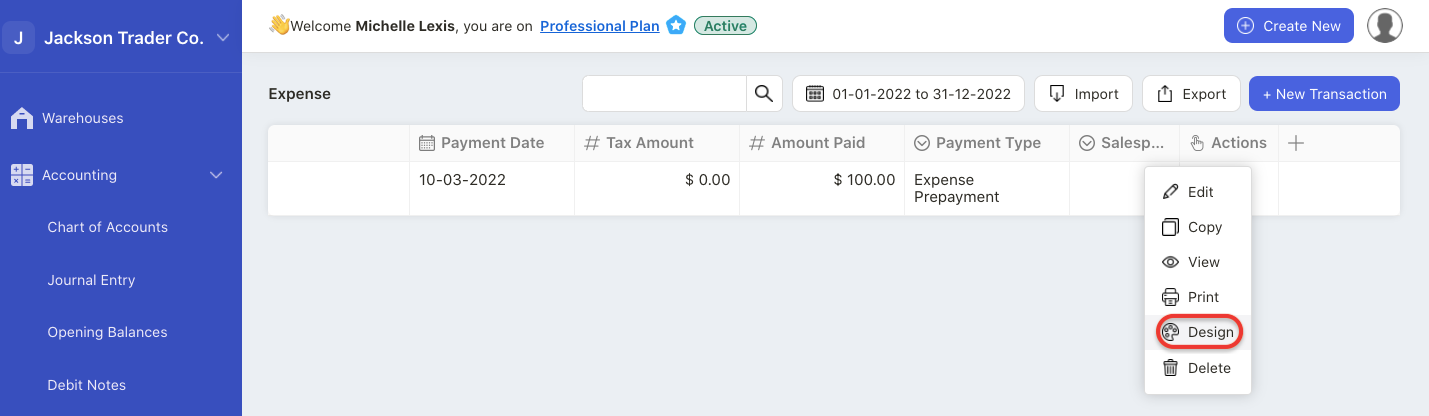
Click on the three dots and select design button.
The system will re-direct you to the document designer template.
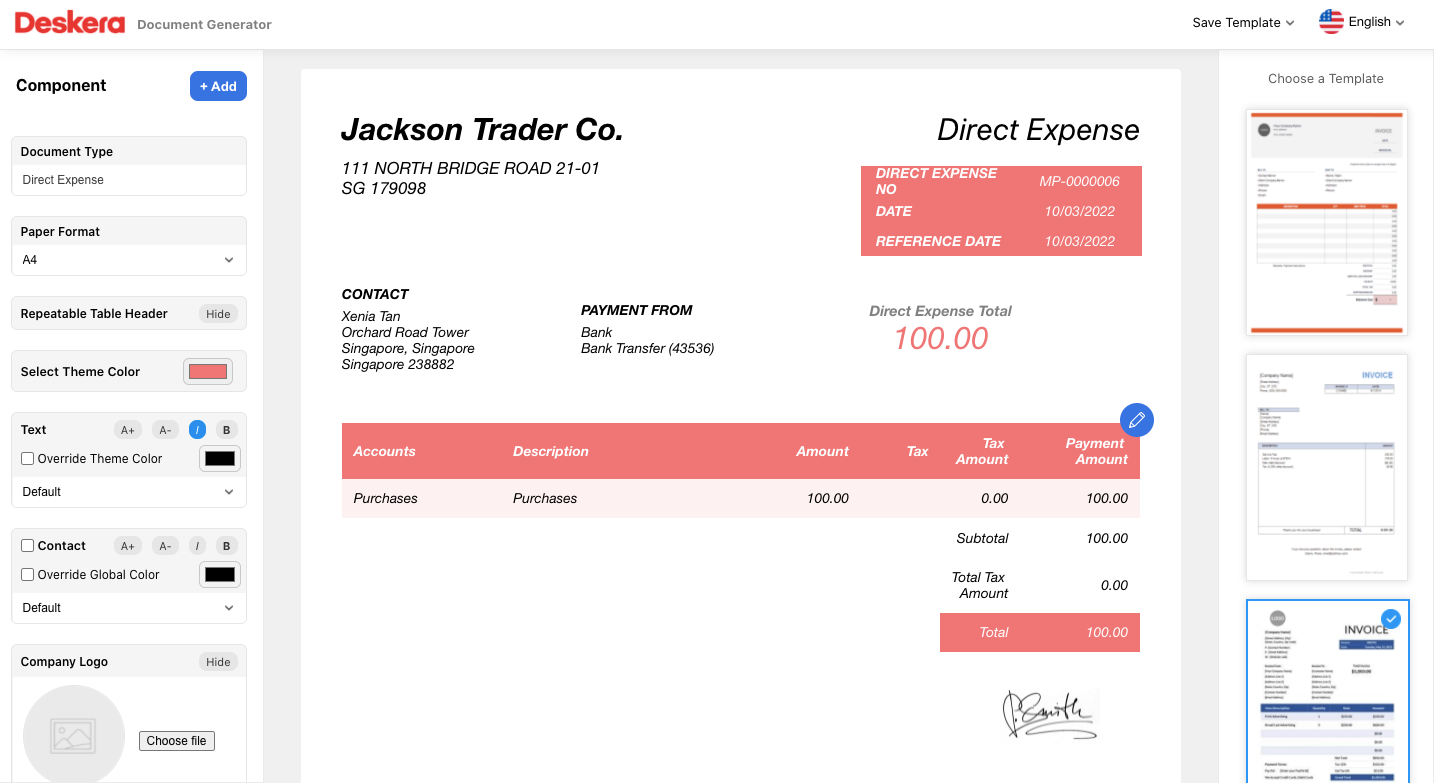
In the document designer page, select your preferred template on the right hand side page.
On your left-hand side panel, edit the component in the template by changing the theme color, hide or show your preferred components.
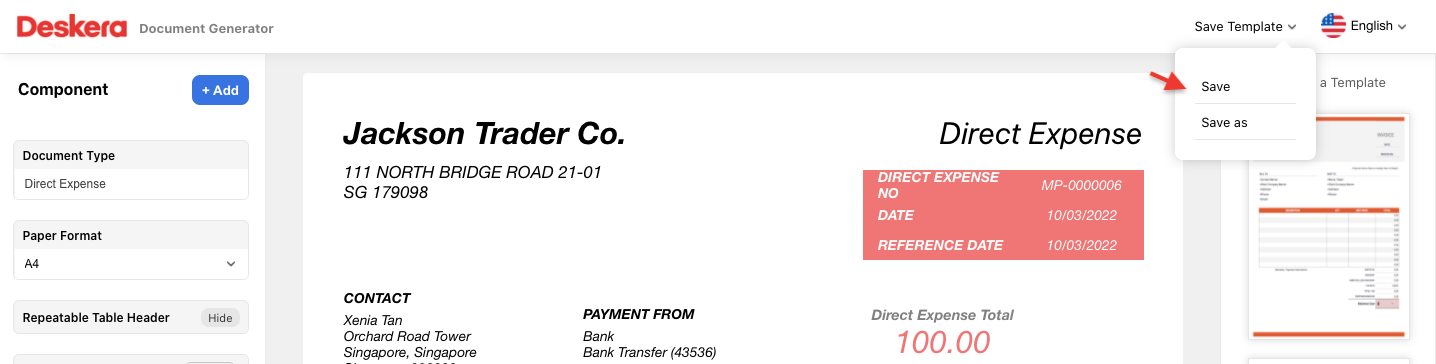
Click on the save button at the top right to save the template.
How can I print the prepayment and direct expense template?
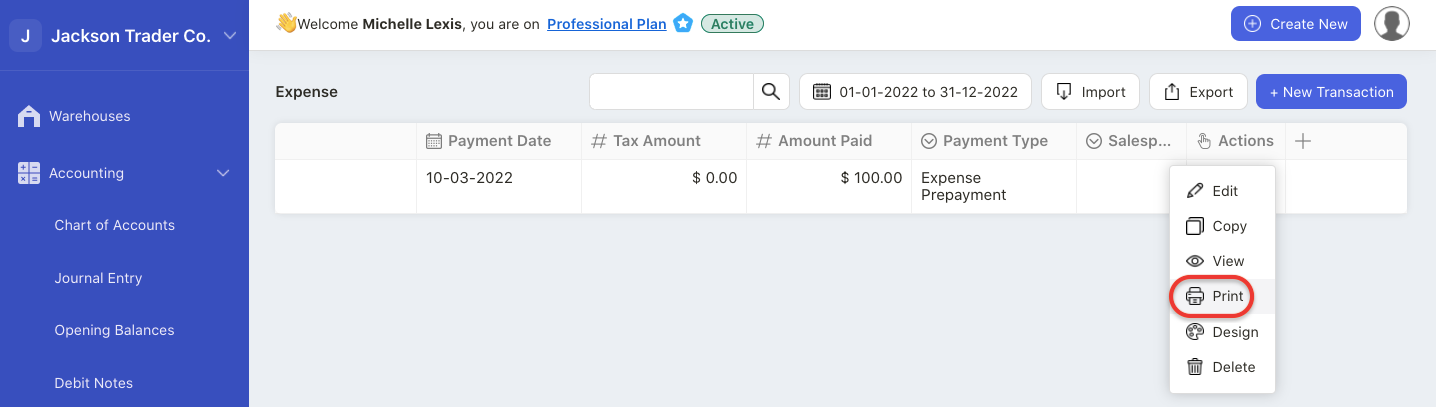
Click on the three dots and select print button.
A pop-up menu will appear.
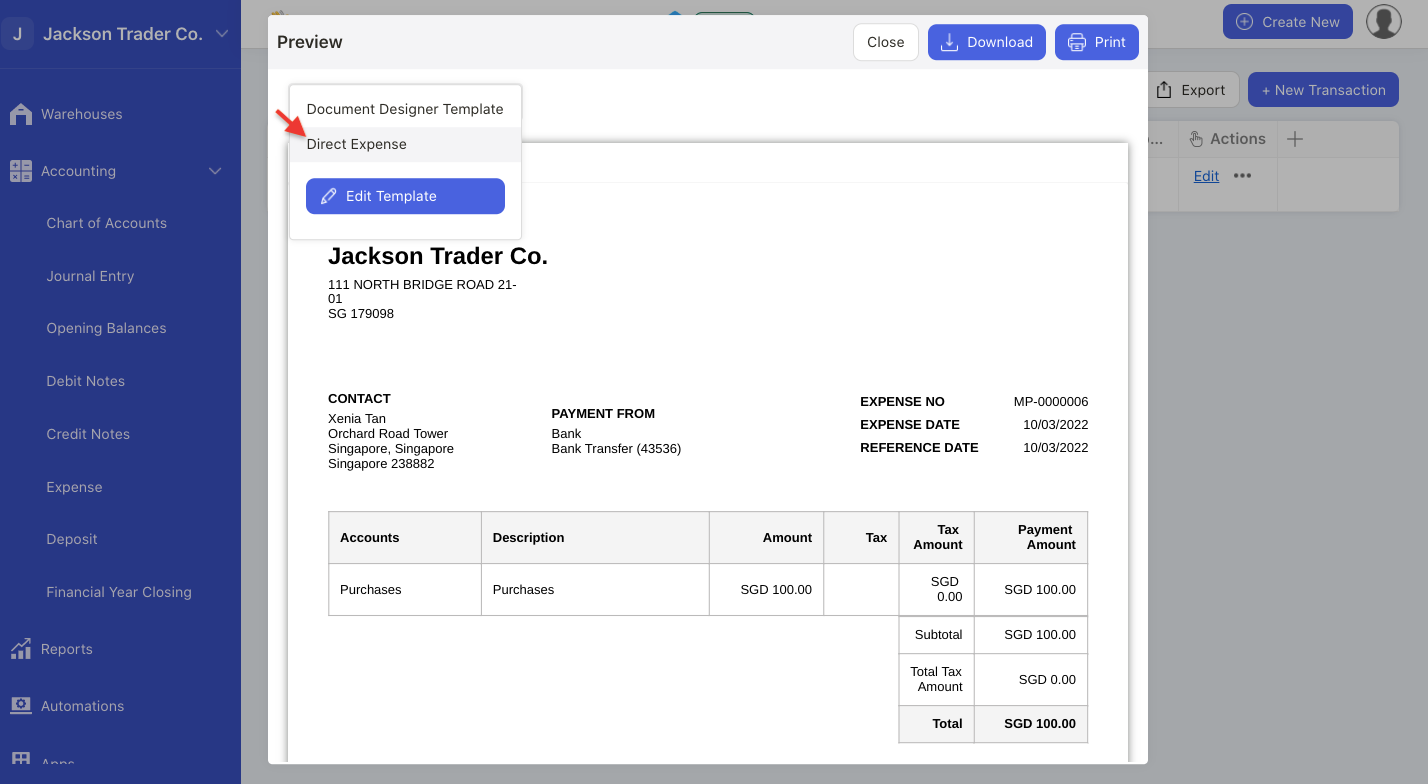
Select the template that you have saved earlier by clicking on the drop-down arrow.
Choose the template that you created.
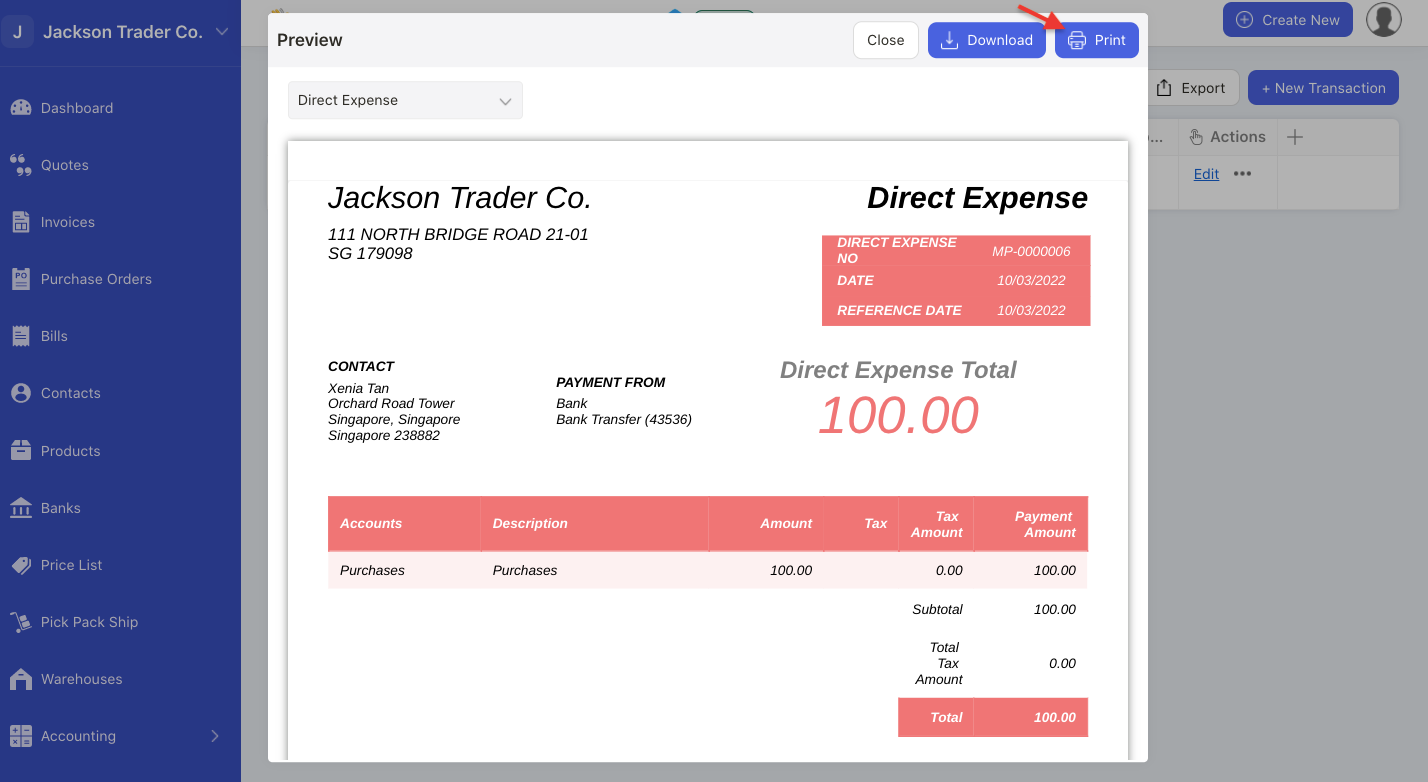
Click print.
You can download the template in pdf as well.
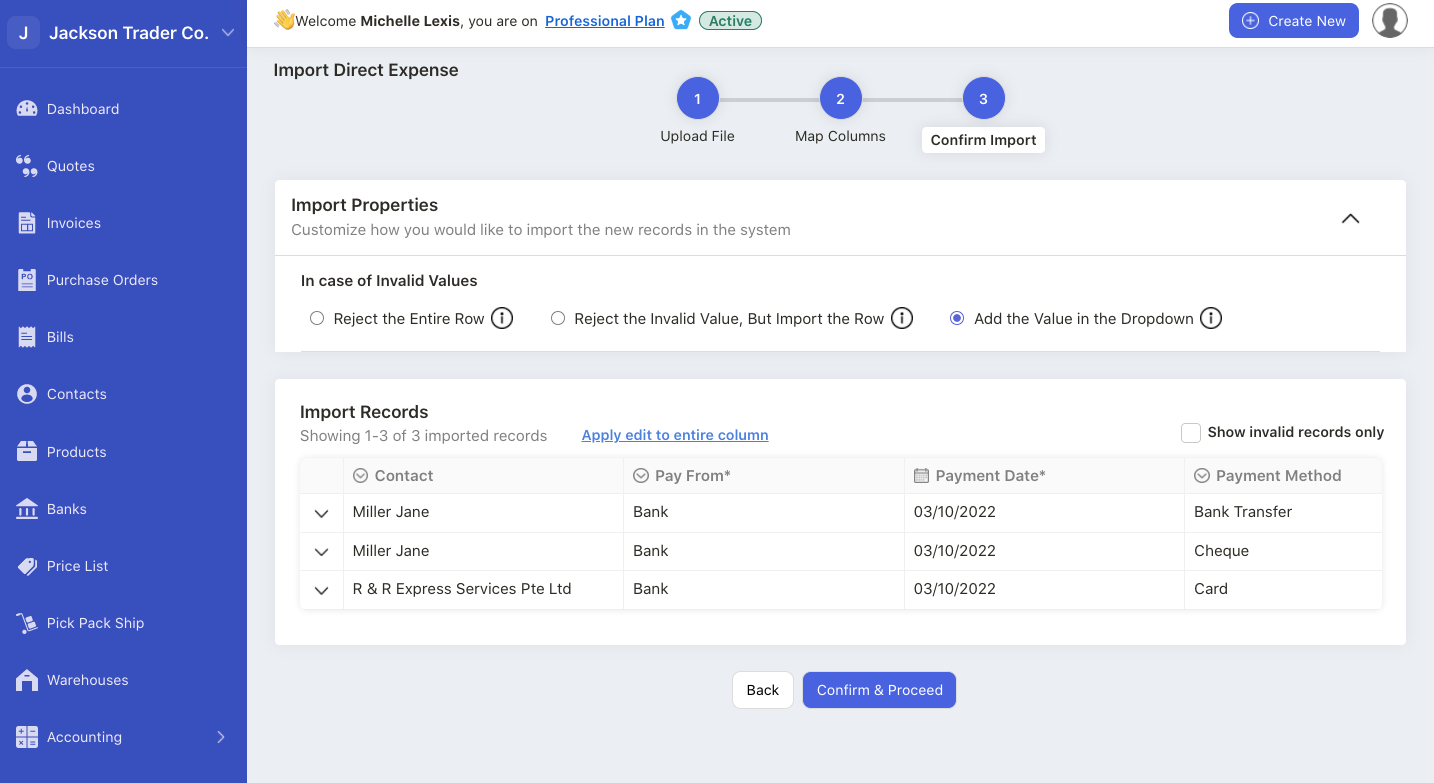
How can I bulk import the pre-payment and direct expense records?

Click on the Import button.
Choose the import direct expense or import prepayment expense button.
There are three stages that you will need to complete in order to import the direct expense and prepayment data to the system.
Follow the stages mentioned below.
Upload File Stage

- On the upload file stage, download the system file here.
- It’s mandatory to use the sample file from the system.
- Once you have downloaded the file, fill in the fields in the file.
- Save the file and upload the file to the system.
Map Columns
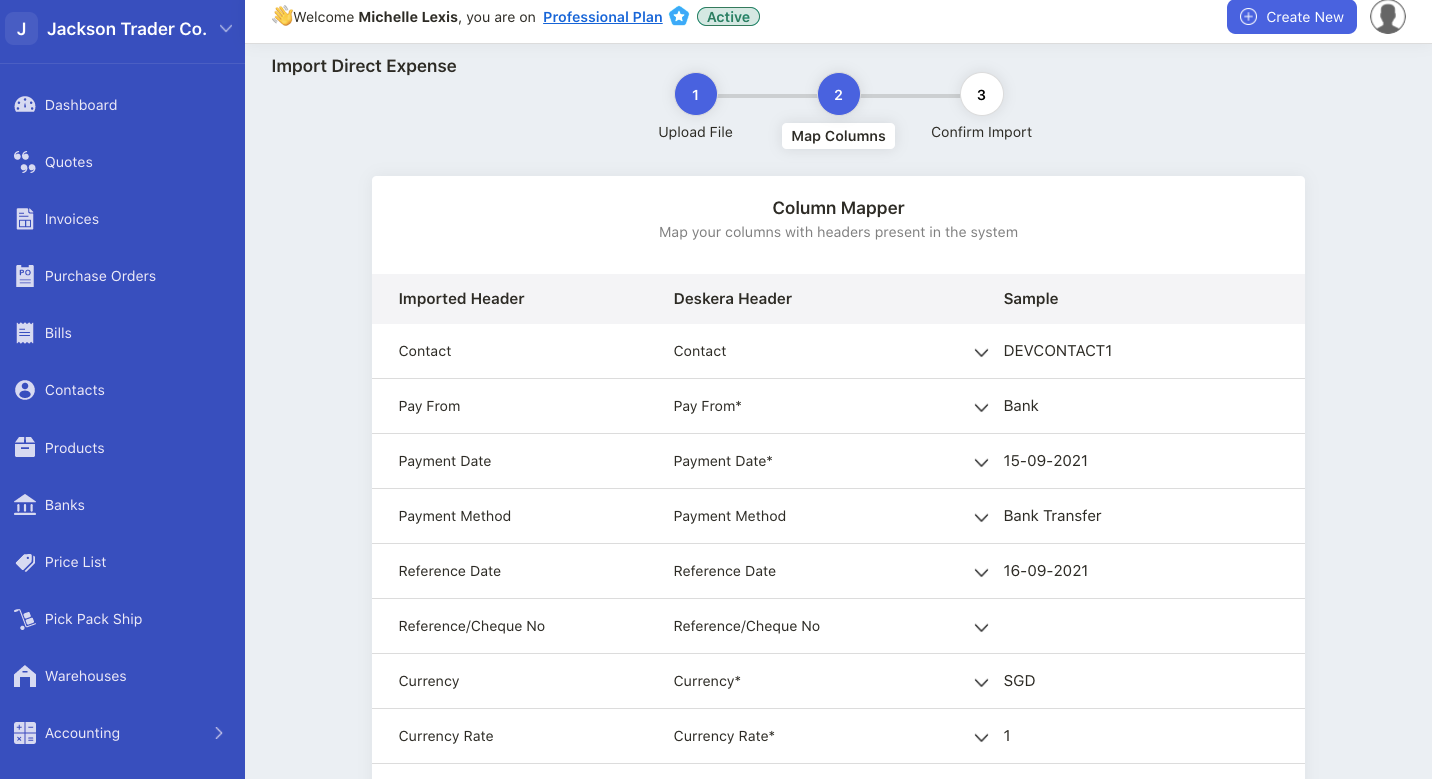
- On the second stage, you can view three headers - imported header, Deskera Header and Sample.
- You can change Deskera Header by clicking on the drop-down arrow. Make sure the header matches to the sample value.
- Enable the checkbox “skip columns that do not match” if you do not wish to map certain rows.
- Please choose your preferred date format as well.
- Click on the continue button.
Confirm Import
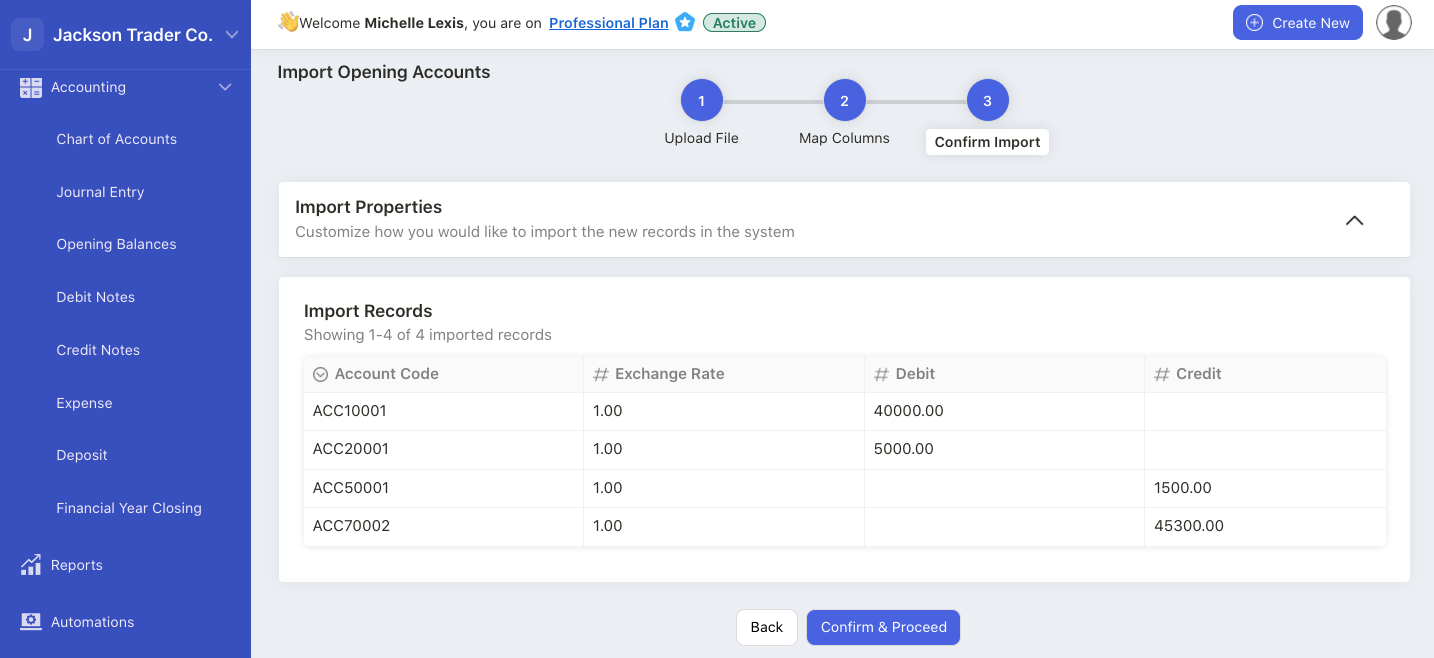
- During the final stage, you can view the data in table format.
- If your data is invalid, still will highlight the record in read.
- You can enable the checkbox to view only invalid records so it’s easier for your to identify which data need amendment.
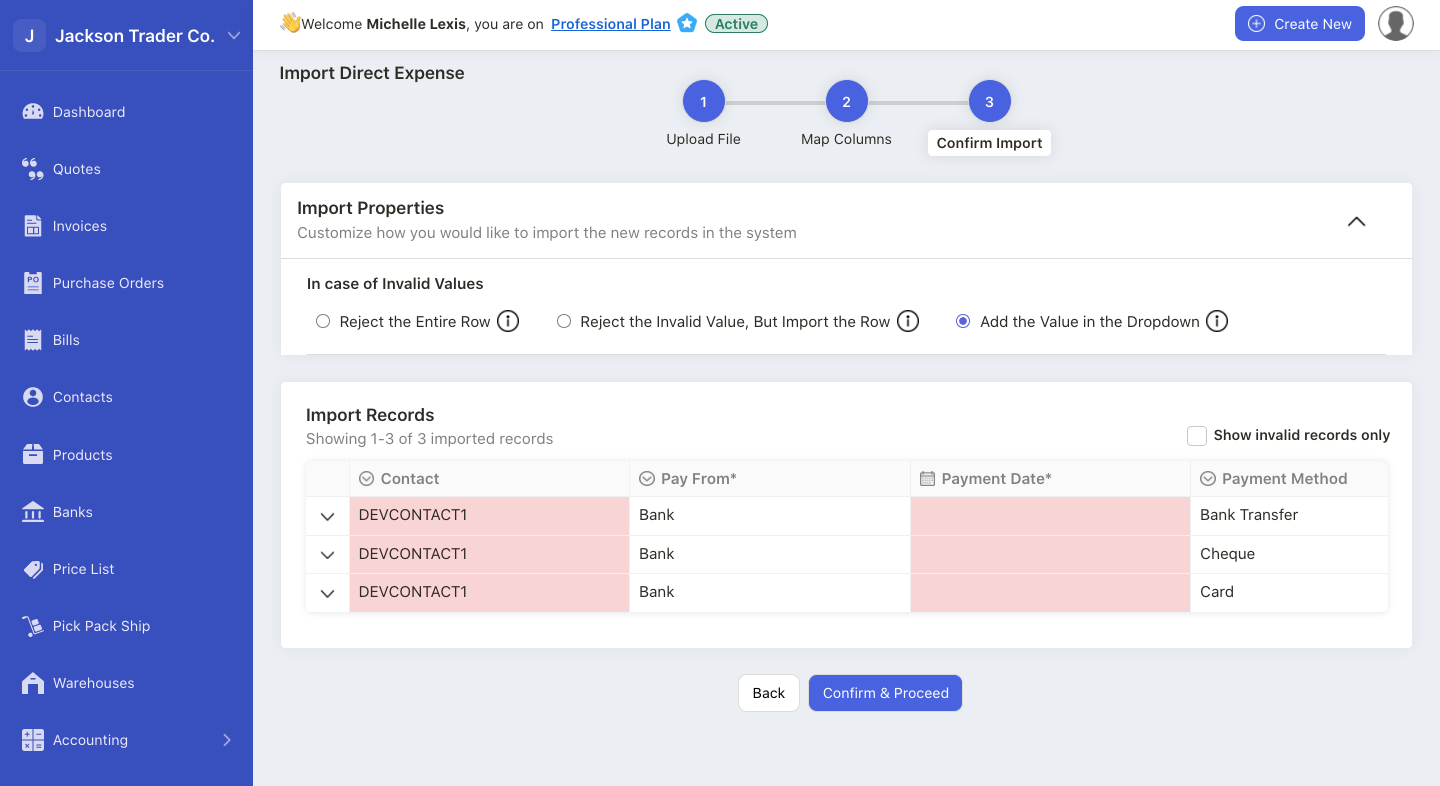
- You can manually edit the fields in red boxes.
- Once the data is valid, click on the confirm and proceed button.
- All your records in sample file will appear in the Expense page.
Note: You can only import 1500 records in one go.
How can I export the expense records?

Click on the export button to download all the expense records in XLS format.