

A bill document is a document that reflects your purchases from your vendors.
In a typical bill, you can view the bill date, your vendor company name, the due data, billing and shipping address, your name, line items, and the total amount due in the bill document.
To create a bill in Deskera Books+, follow the steps below:
- Login to your Books+ account.
- On Deskera Books+ Dashboard, click on Bill Module on the sidebar menu.
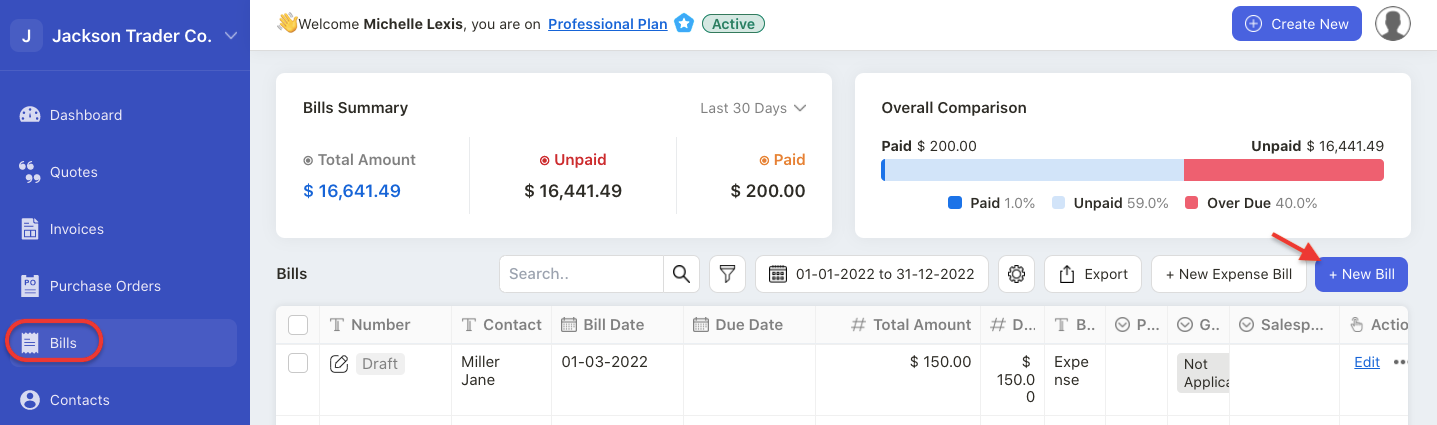
3. Click on the “+ Add New Bill” or “Create New >> Bill” button to create a new quote in the system.
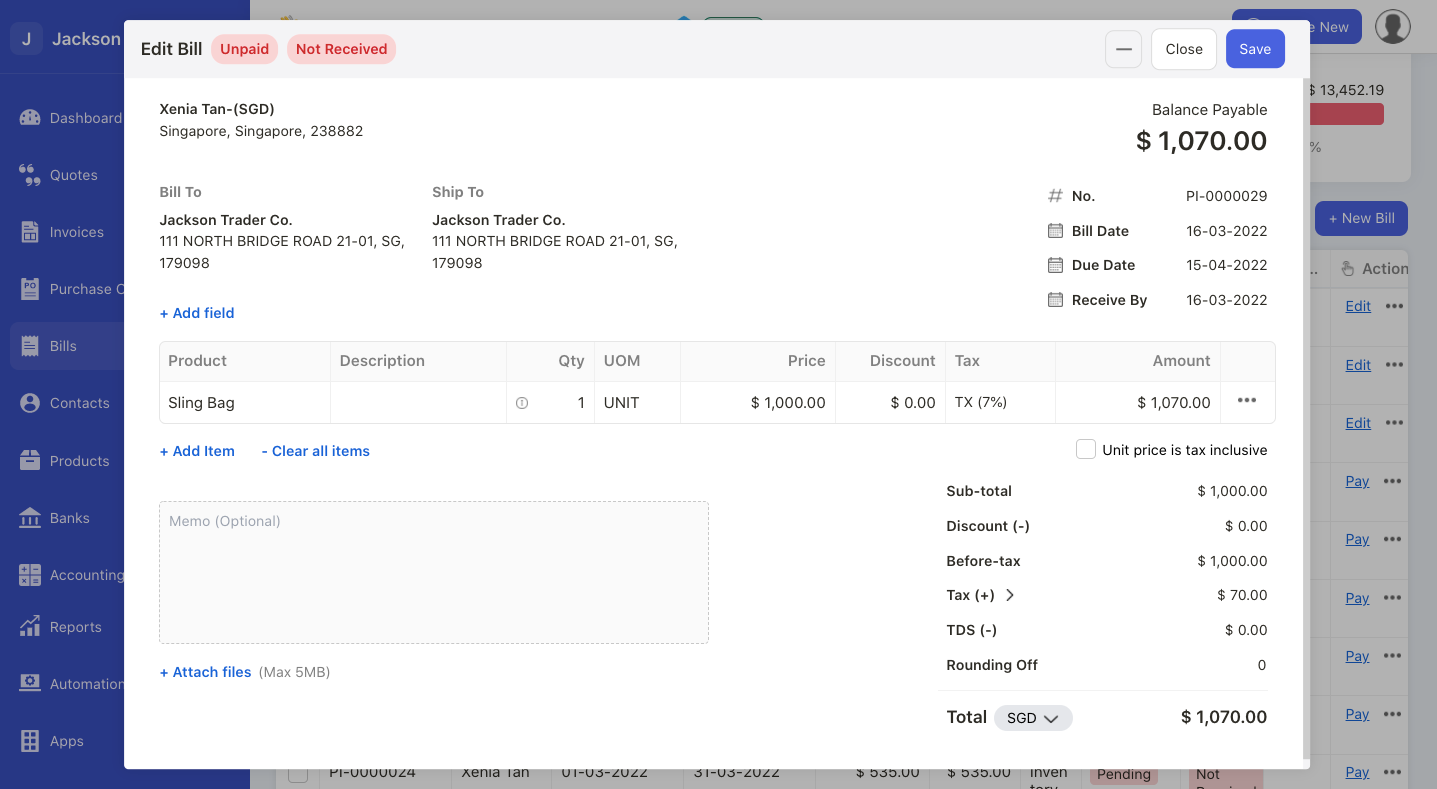
4. A pop-up will appear. Fill in the information in the bill pop-up menu:
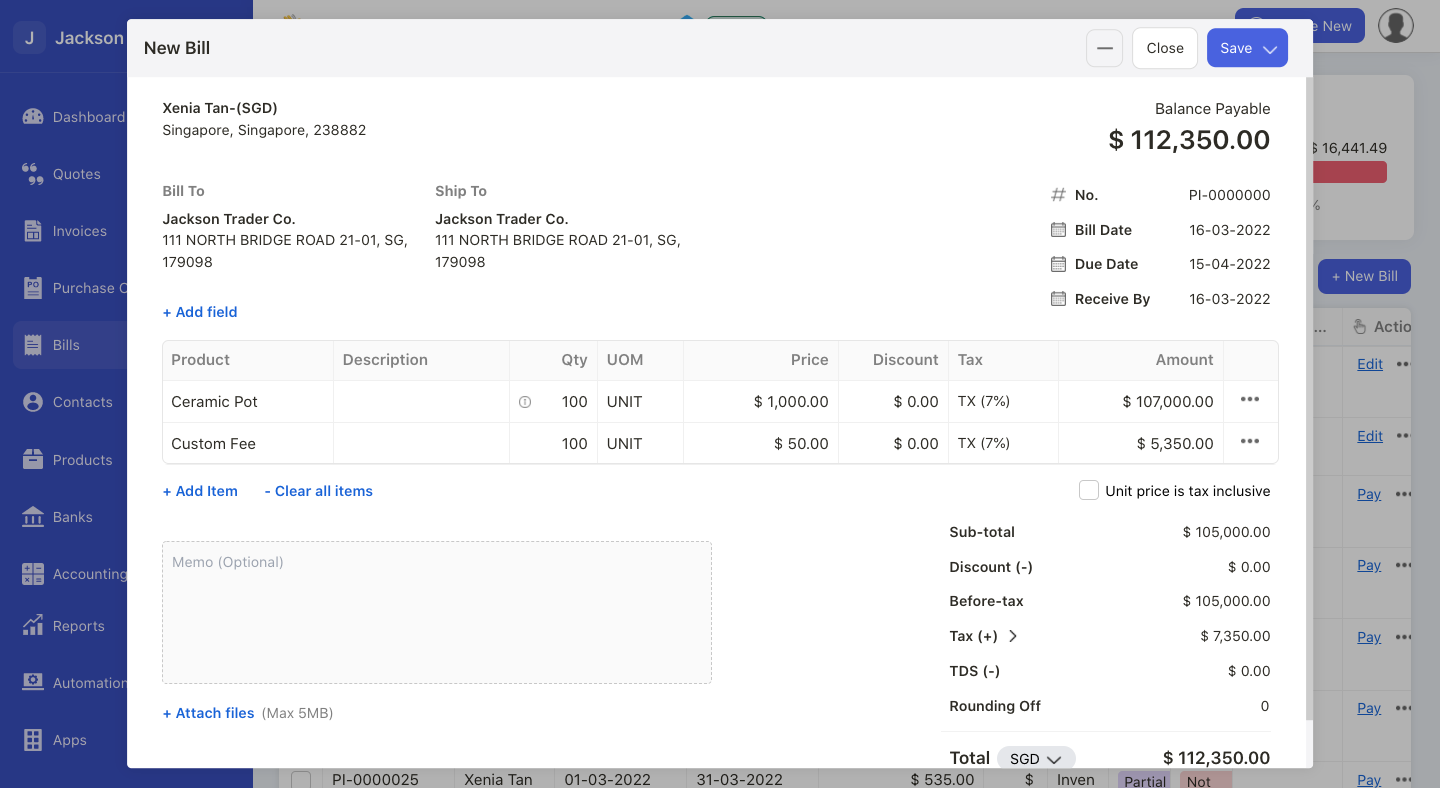
- Contact: Choose your vendor name from the drop-down menu
- Bill To: This information is auto-populated based on your company bill-to address
- Ship To: This information is auto-populated based on your company ship-to address
- No: You can configure the bill sequence number
- Bill date: This is the date you create your bill document
- Due date: The due date will be populated based on the vendor’s payment term. You can edit the due date on your end as well
- Receive by: Choose the date you’re expected to receive the goods or services
- Add Field: Add custom fields in the bill document
- Add Item: Add the products and services that you intend to purchase from your vendor. The description, UOM, price, tax-rate and amount will be auto-populated based on the product configuration in the Product Module. You can edit the quantity and discount for each line item as well. The total amount will adjusted accordingly.
- Unit price is tax inclusive: Tick this checkbox if the unit price is inclusive of tax
- Memo: enter bill memo if required
- Attachment: You can attach file in the bill document not exceeding 5MB
5. Verify the information in this Bill document and proceed to save the Bill.
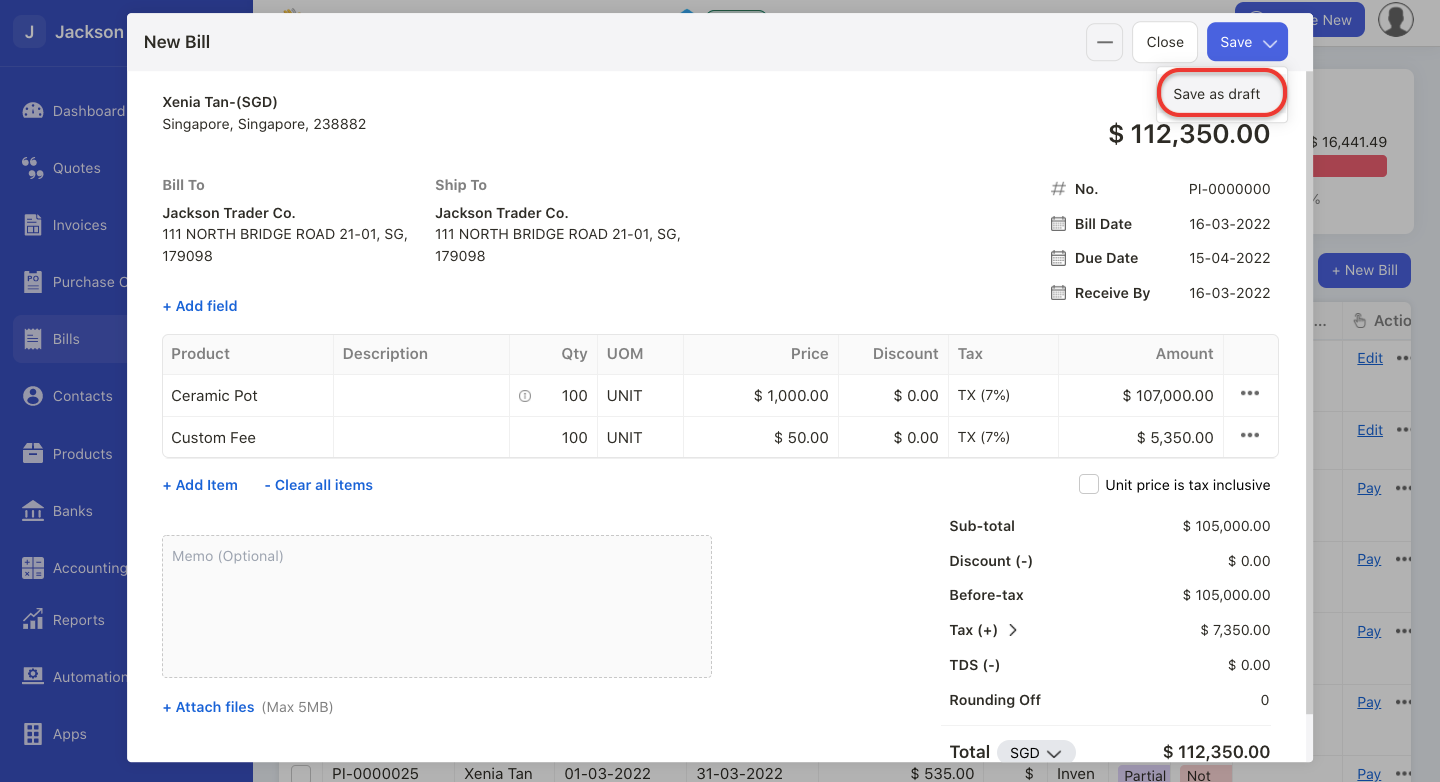
6. Click on the ‘save as draft’ option if you have not confirmed the information entered in the Bill.
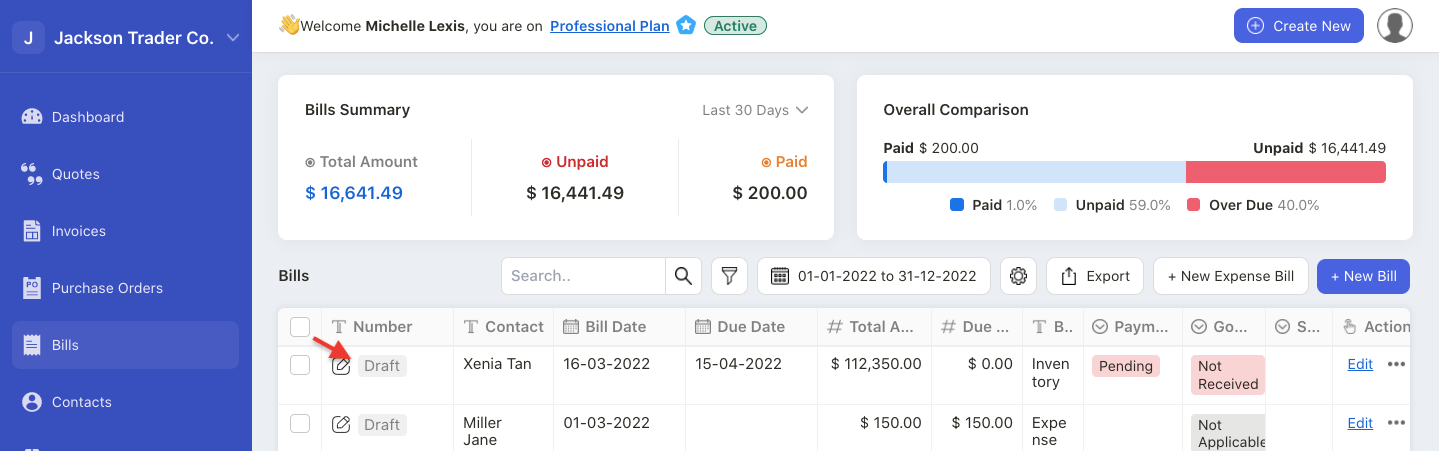
7. For Bill saved as a draft, you can only view the edit button under the Actions column. You cannot view the convert/received goods button as the document is in draft mode.
8. If you wish to view the convert/received goods button, you will have to click on the 'save' button in the Bill screen instead of the save as draft button.
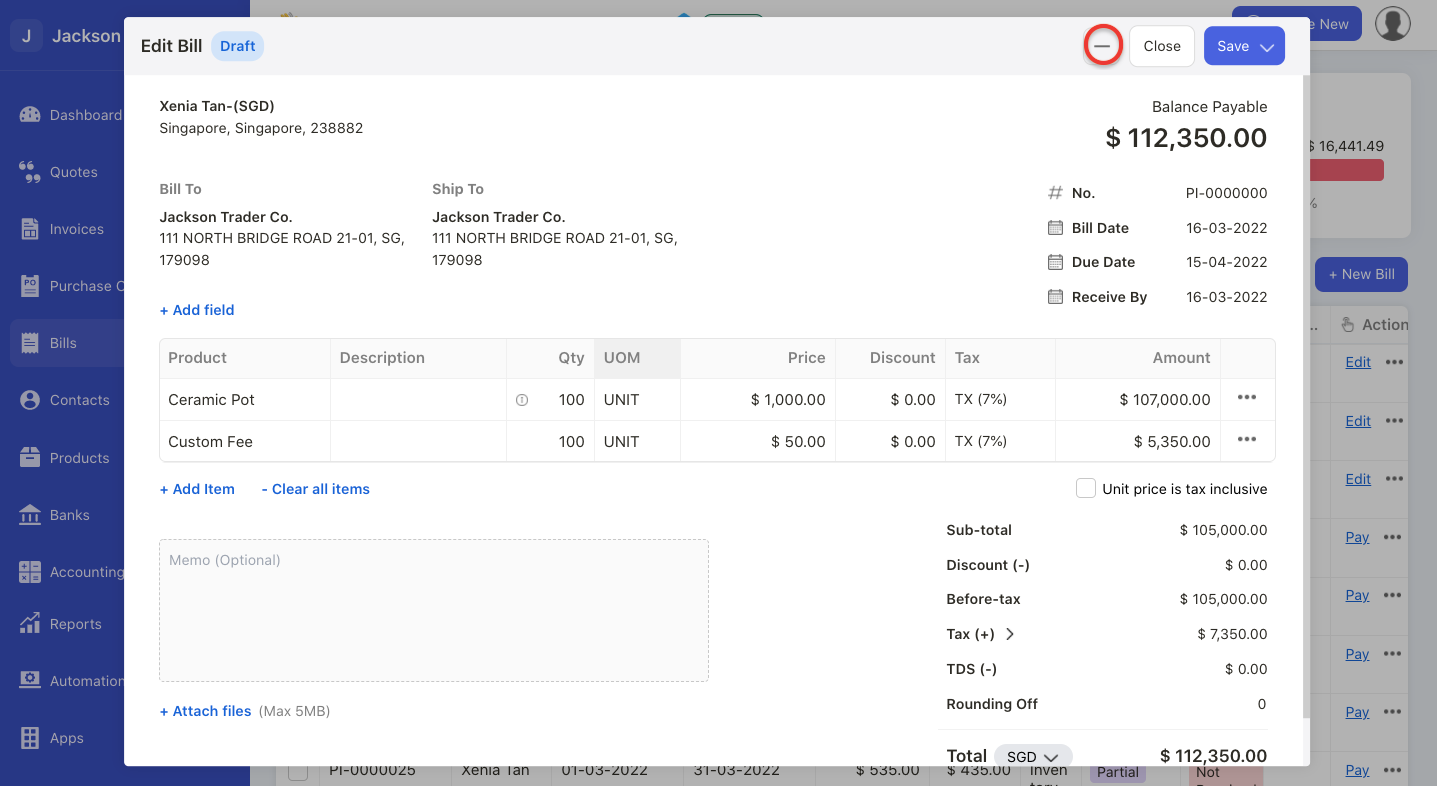
9. On the Bill canvas screen, you can also click on the minimize button next to the close button.
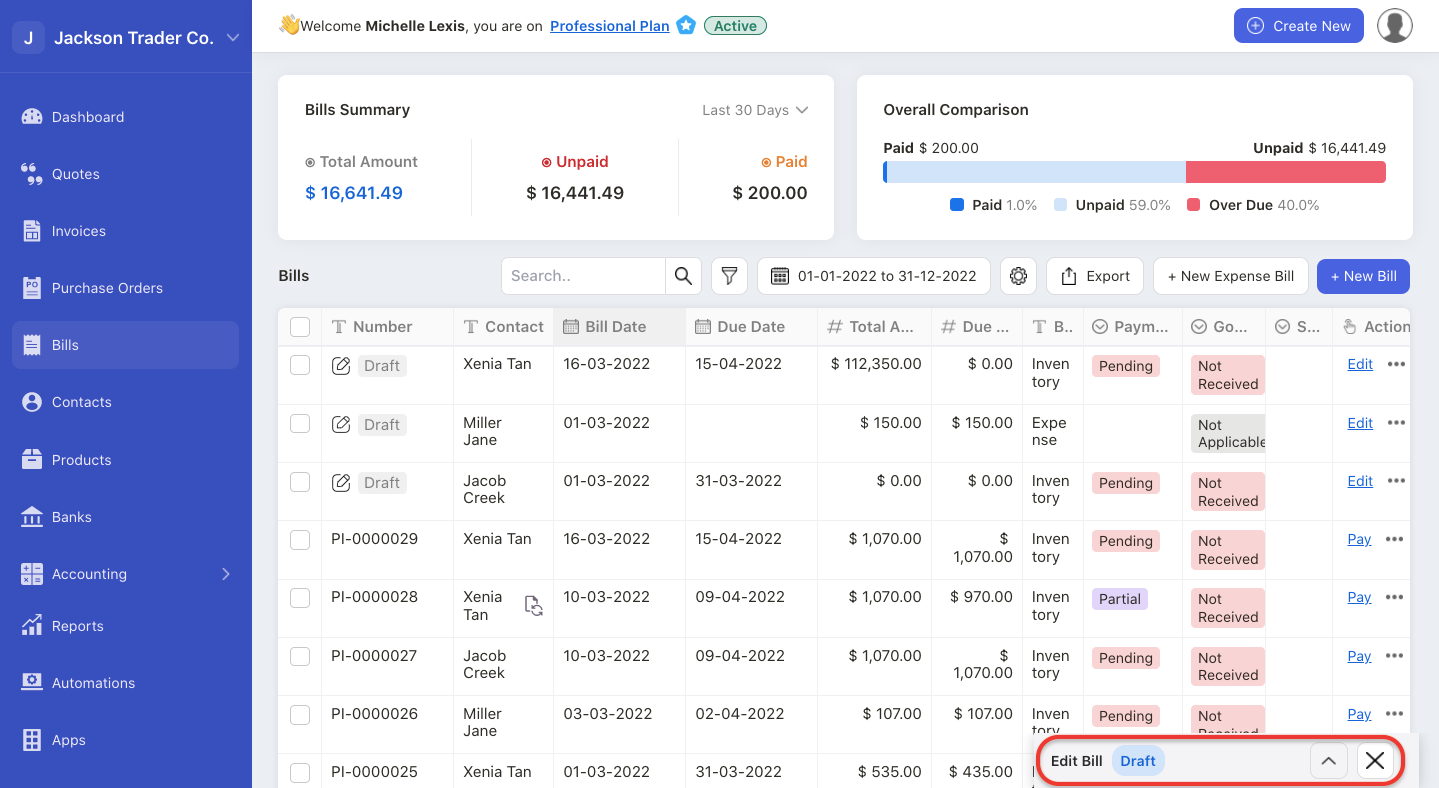
10. Click on the minimize button to help you shrink the Bill page. You can view this page saved as a taskbar at the bottom right of the Books+ application.
How can I edit or delete a bill?
You cannot edit your bill if you have already mark the bill as paid, or fulfilled (either partially or fully).
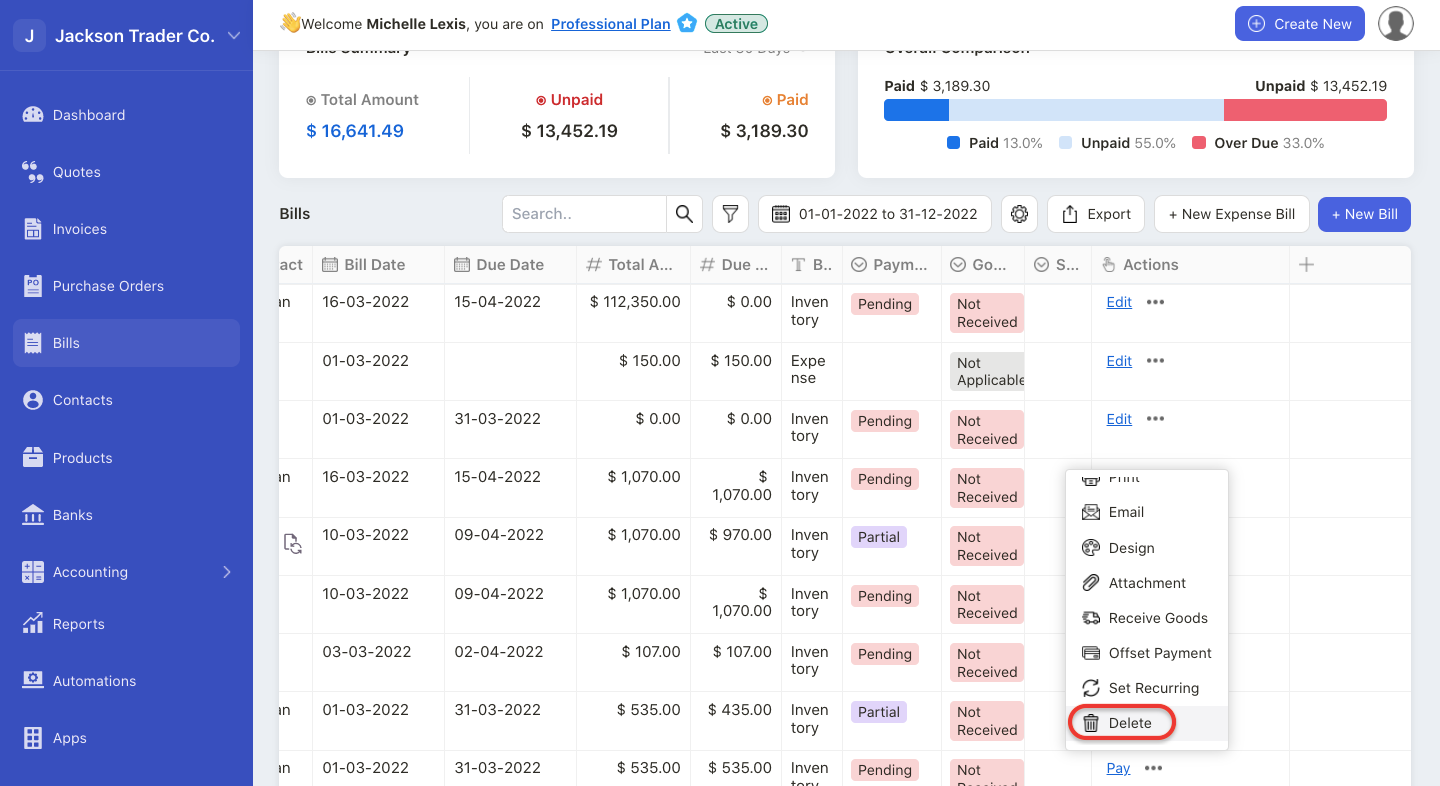
In order to edit or to delete a bill, you will need to delete the payment record and the goods received record.
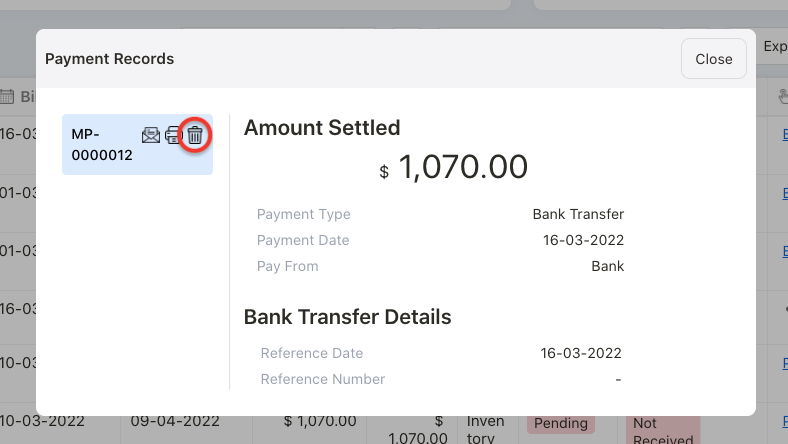
Click on the three dots under the action column:

- select the payment record. A pop-up will appear. Click on the delete icon to delete the payment record
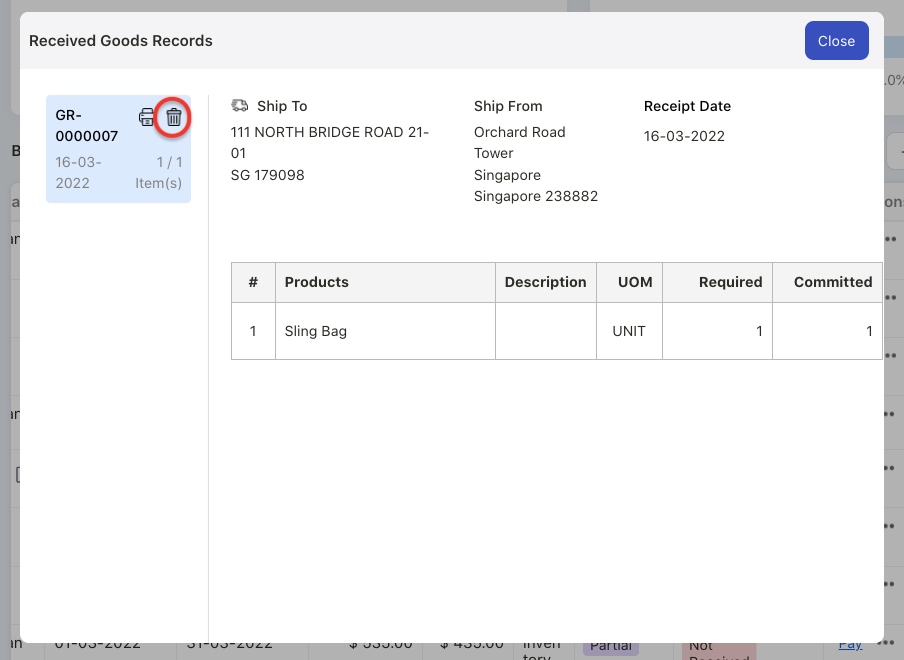
- select the goods received record. A pop-up will appear. Click on the delete icon to delete the good received record
After you have deleted both the records, you can re-edit the bill again by clicking on the open button.
Edit the information by clicking on the individual field to change the data. Save the bill and the latest changes will be reflected accordingly.
Once your bill is showing as unpaid and unfulfilled status, you can proceed to delete the bill.
How can I apply custom fields in a bill document?
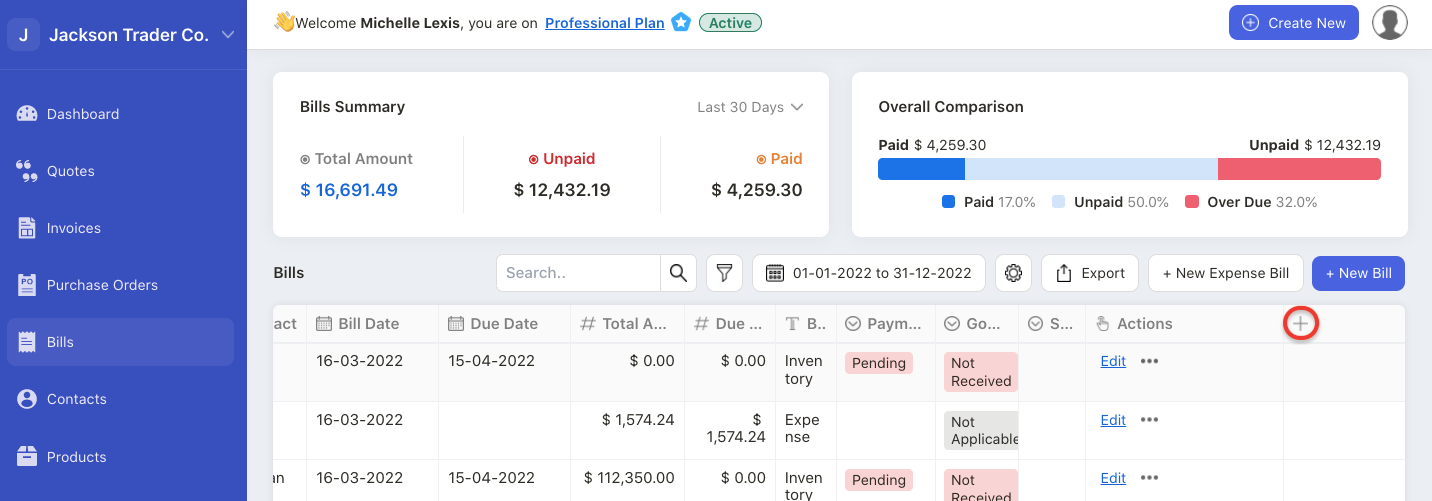
In the Bill Summary List, you can click on the "+" icon on the table.
A pop-up menu will appear.
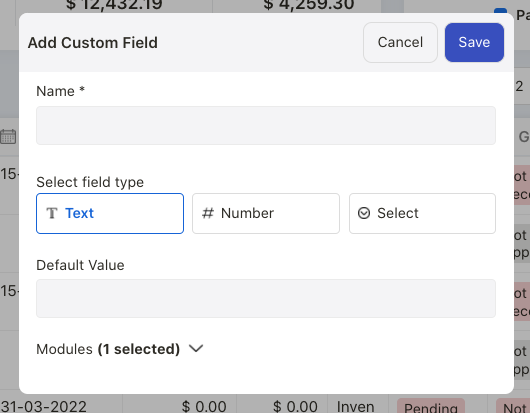
Fill in the custom field name, field type, default value and the modules.
Click on the Save button.
Finally, you should be able to view the new custom field on the table's header.
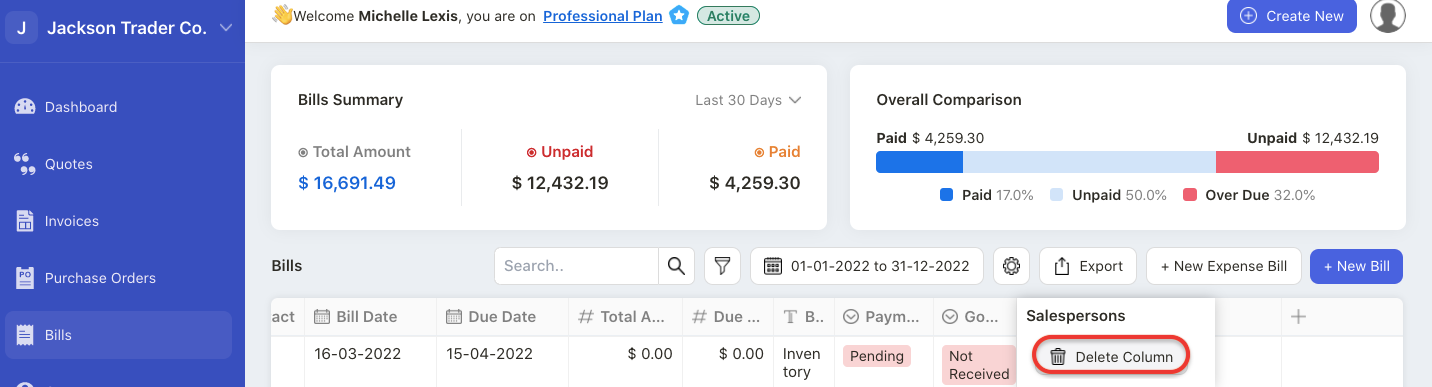
If you wish to delete the custom field, simply click on the custom field header and select delete column button. You can only delete custom field that is not in use.
How can I search for a bill document in the Bill Module?
You can use the search box to locate a specific document.
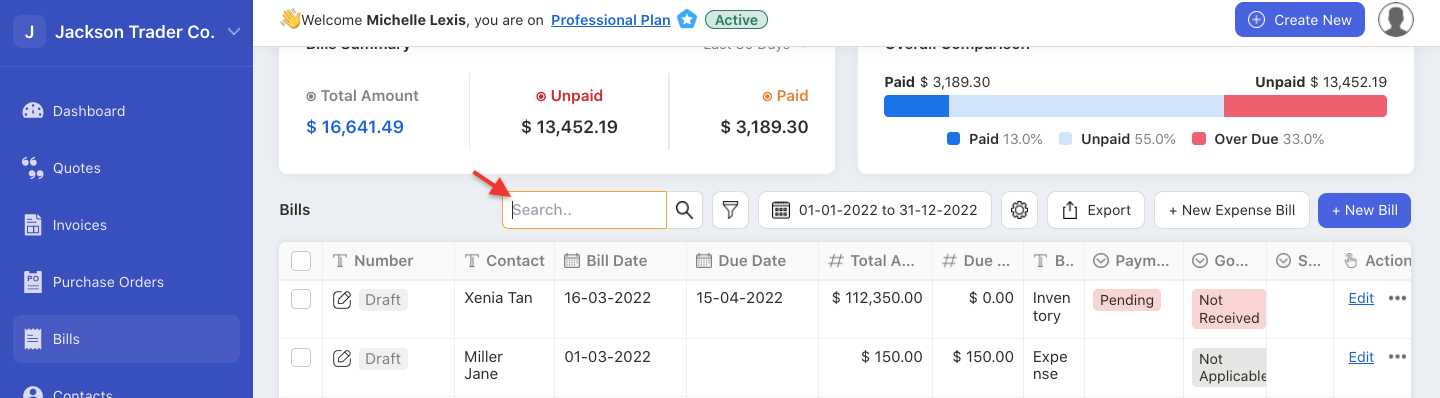
Enter the bill number and contact name in the search box and the system will automatically populate the respective document.
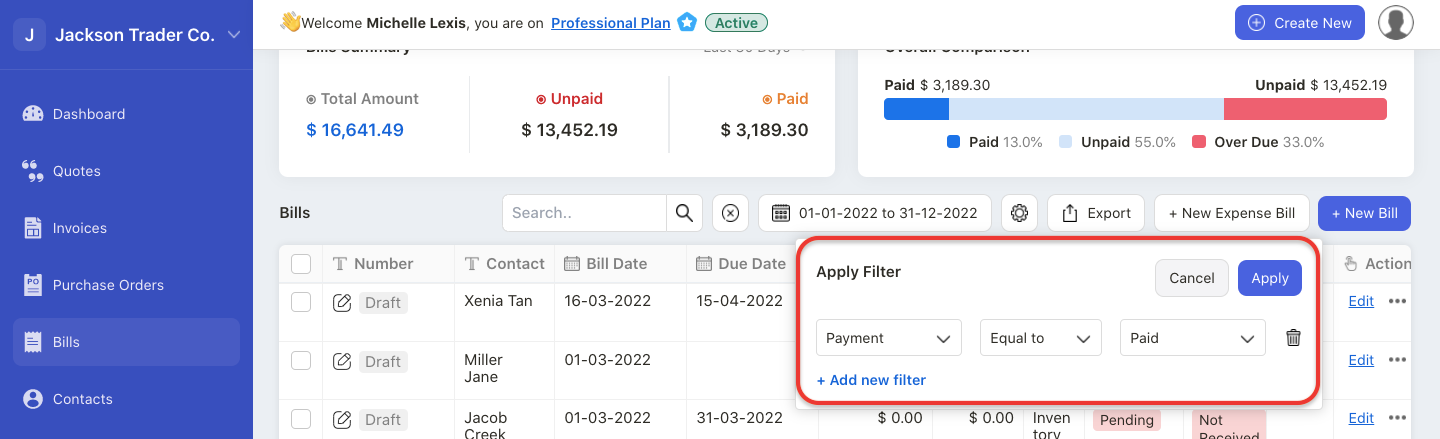
Also, you can use the filter option to filter your document based on good received status, payment status, and your custom fields.
The bill document will be populated based on the conditions set on your filter configuration.
How can I export my bill documents?
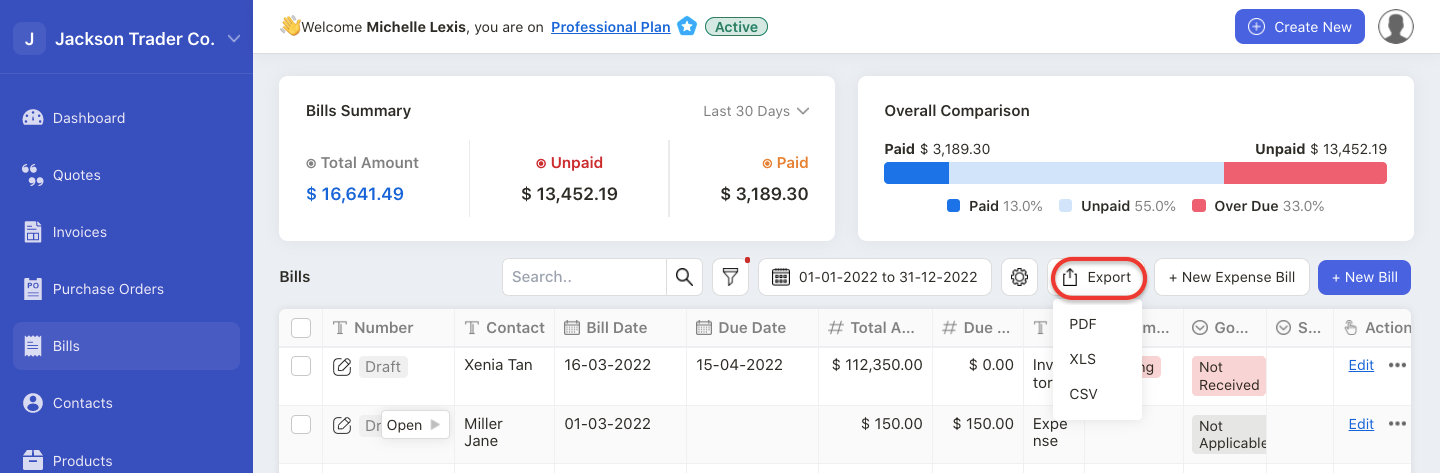
In the Bill Summary List, click on the export icon to download the bill documents in CSV, PDF and XLS format.