

Journal entries are used to record business transactions. It always involves at least one Debit and one Credit entry into the system.
If you are creating sales invoices, fulfillment, payment, bill, and goods received records; the journal entry will be auto-populated by the system.
In case you need to create a manual journal entry, follow the steps mentioned below:
- Login to your Books+ account.
- Click on Accounting Module on the sidebar menu.
- Select Journal Entry.
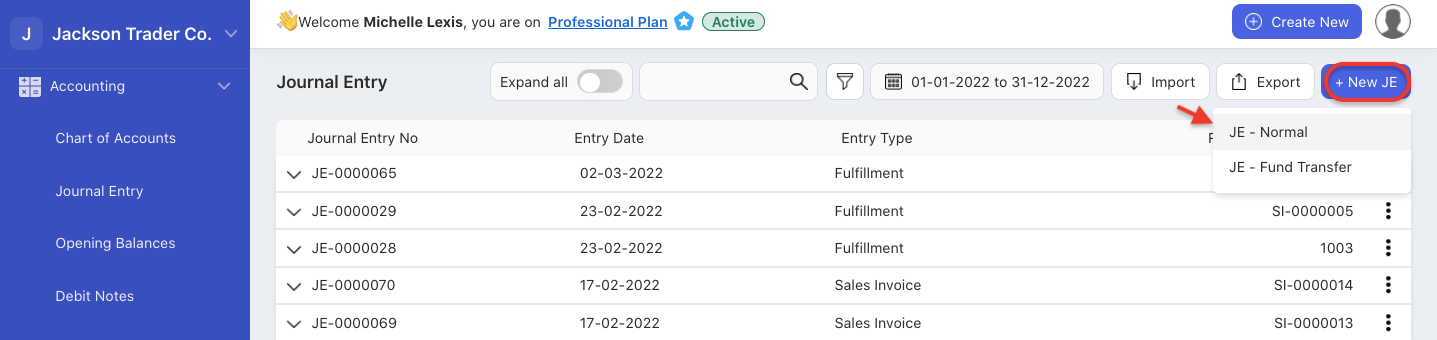
4. In the journal entry page, click on create JE-normal.
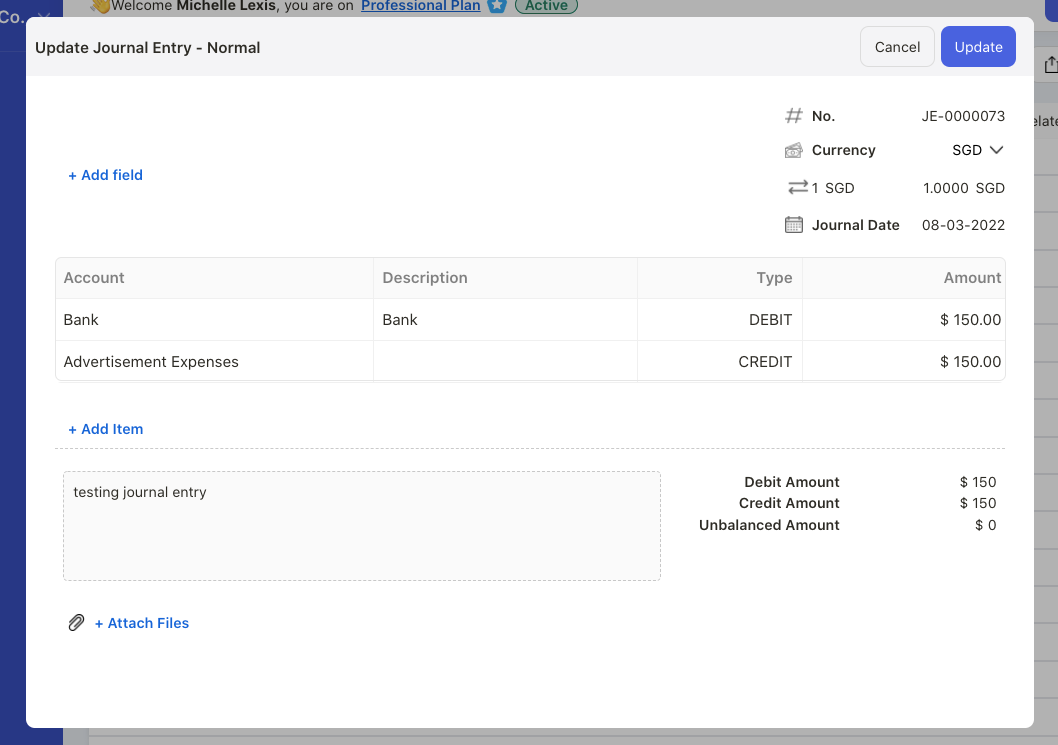
5. A pop-up will appear. Fill in the fields in the pop-up box:
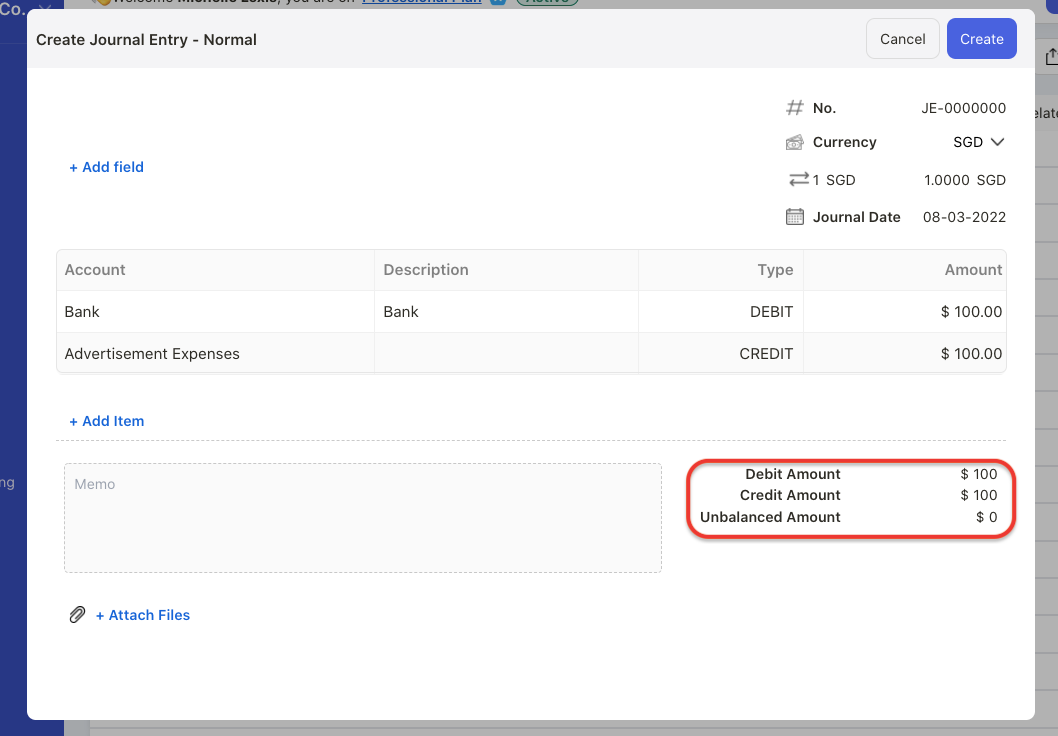
- enter the account on debit side
- enter the account on credit side
- add custom fields
- enter memo
- attach file in this journal entry
6. Make sure that the debit balance is equal to the credit balance.
7. Click on the “create” button.
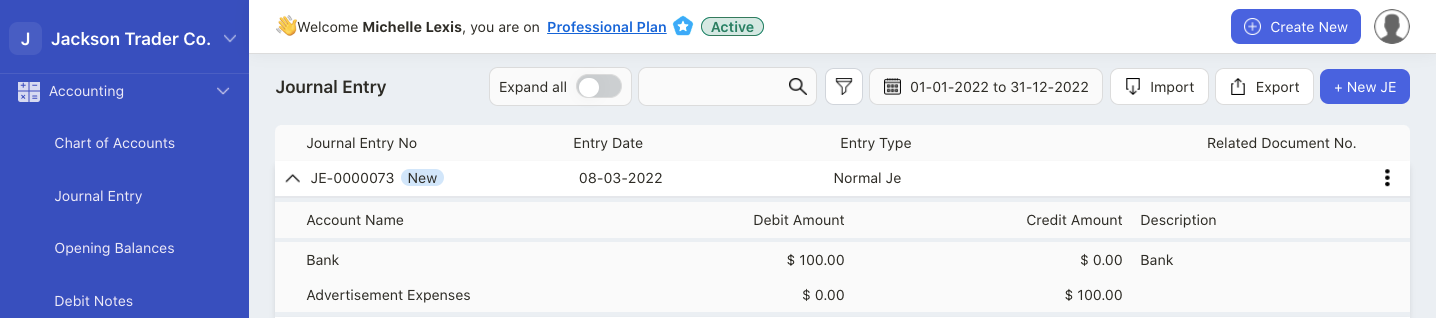
8. You should be able to view the manual journal entry created in the Journal Entry List.
How can I edit the journal entry?
Click on the three dots at the end of the JE row.
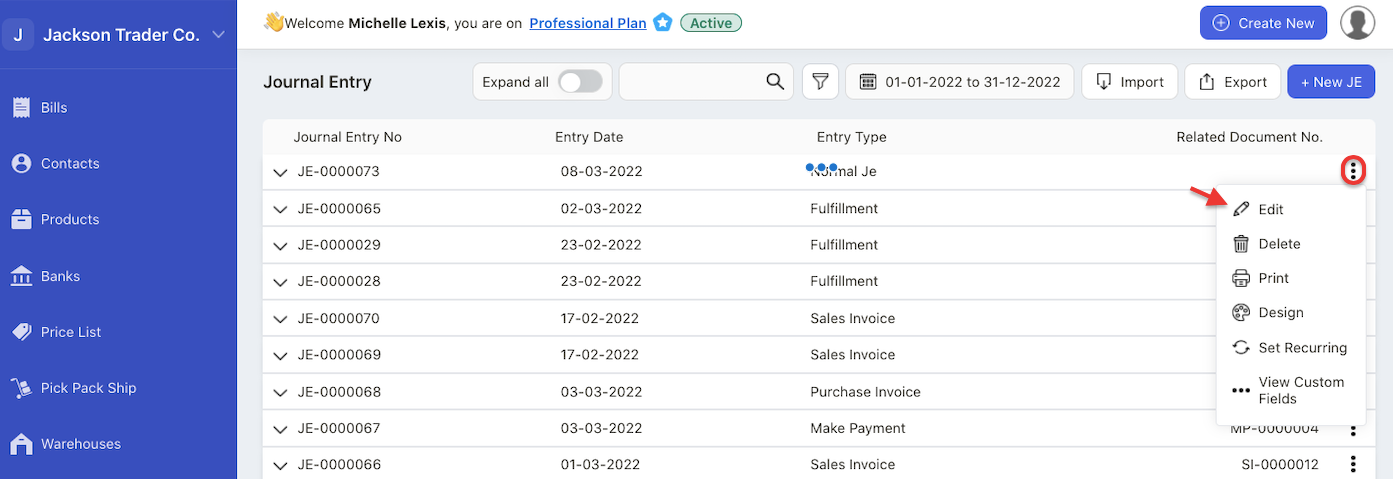
Select edit button.
A pop-up will appear. Edit the information in this pop-up box.
Click on the Update button.
Note: You can only edit journal entry that is manually created in the system. You cannot edit journal entry records auto-populated by the system.
How can I delete the journal entry?
Click on the three dots.
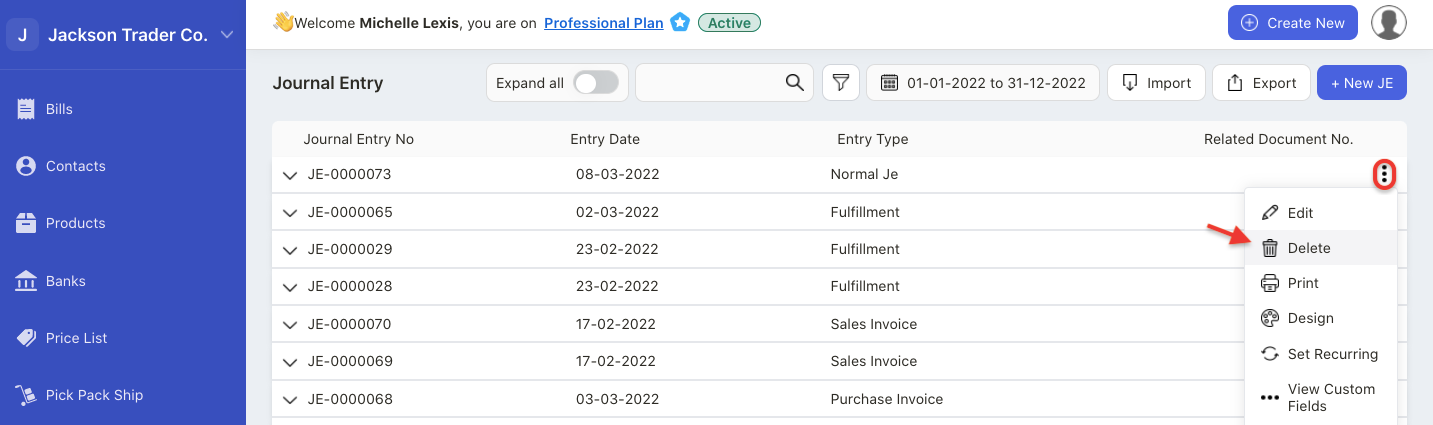
Select delete button.
Note: You can only delete journal entry that is manually created in the system. You cannot edit the JE auto-populated by the system on the Journal Entry page.
How can I set recurring journal entry?
- Click on the three dots at the end of the JE row.
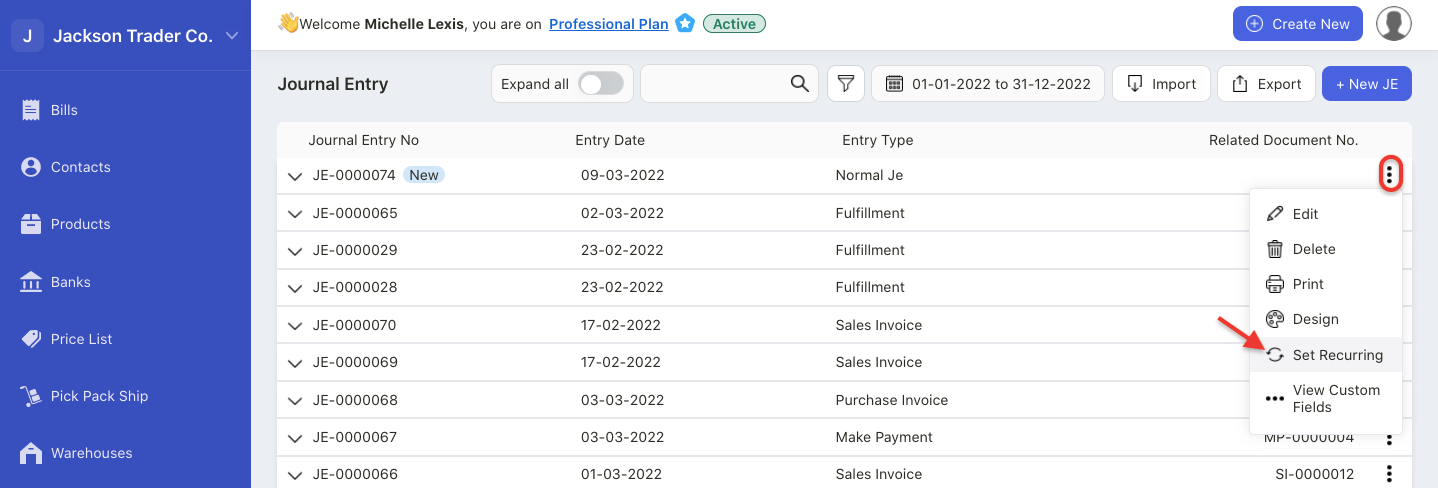
2. Select set recurring button.
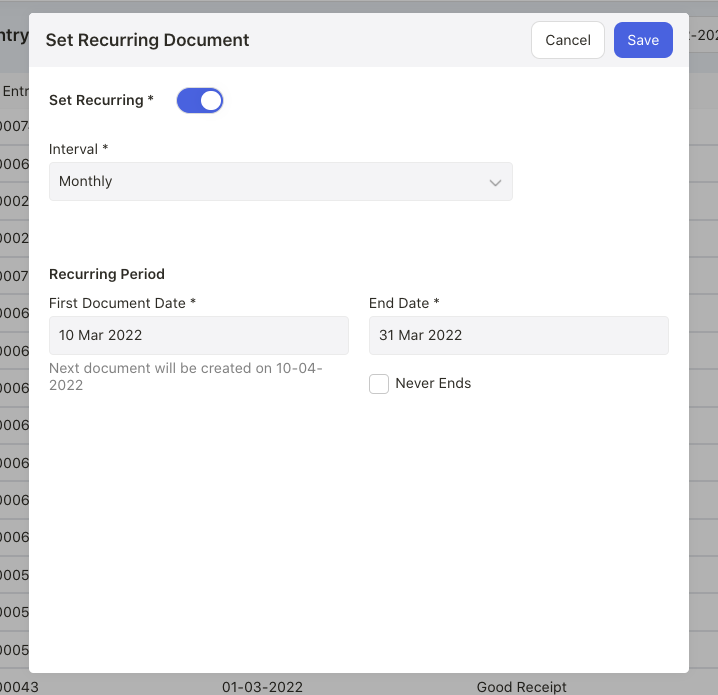
3. Enable the set recurring toggle
4. Choose the interval; monthly, yearly, weekly, or customize the interval on daily basis
5. Enter the first document date and the last document date
6. Enable the “never end” checkbox if you wish to set the recurring forever.
7. Click on the save button
8. The JE will show the recurring icon.
9. To disable the recurring JE, simple turn off the recurring toggle.
How can I print my journal entry?
Click on the three dots at the end of the JE row.
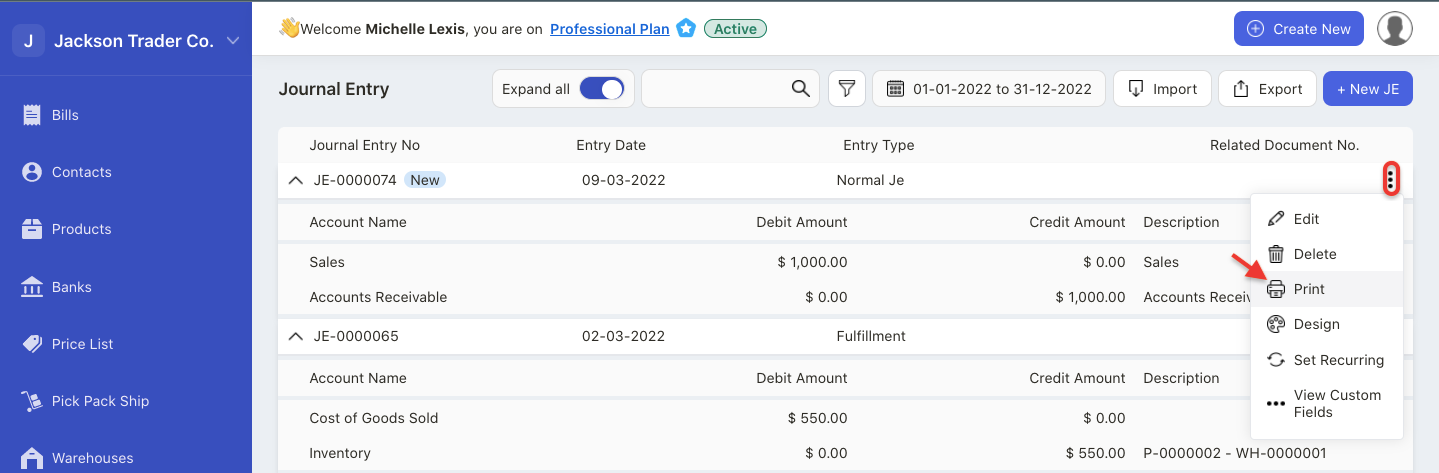
Click on the Print button.
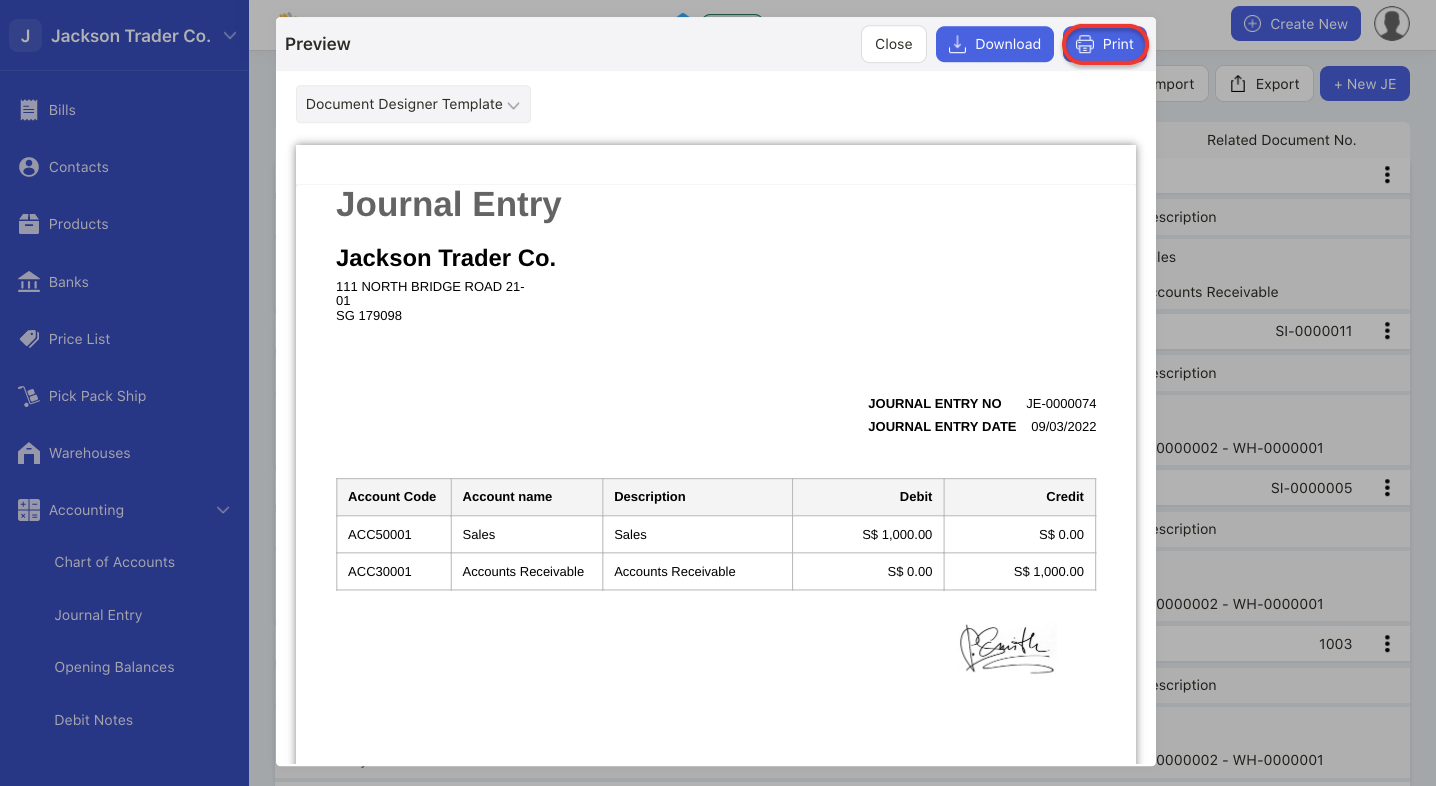
A pop-up will appear and click on the Print button at the top right.
You can also click on the download button to download the journal entry in pdf format.
How can I choose a different Journal Entry template?
Click on the three dots.
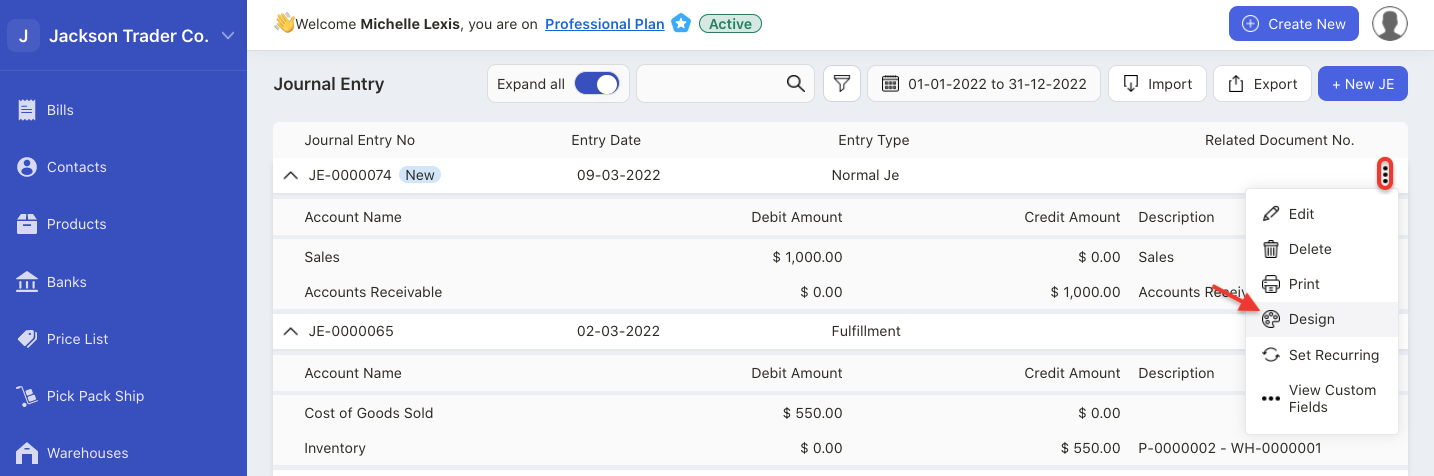
Select design. The system will re-direct you to designer template page.
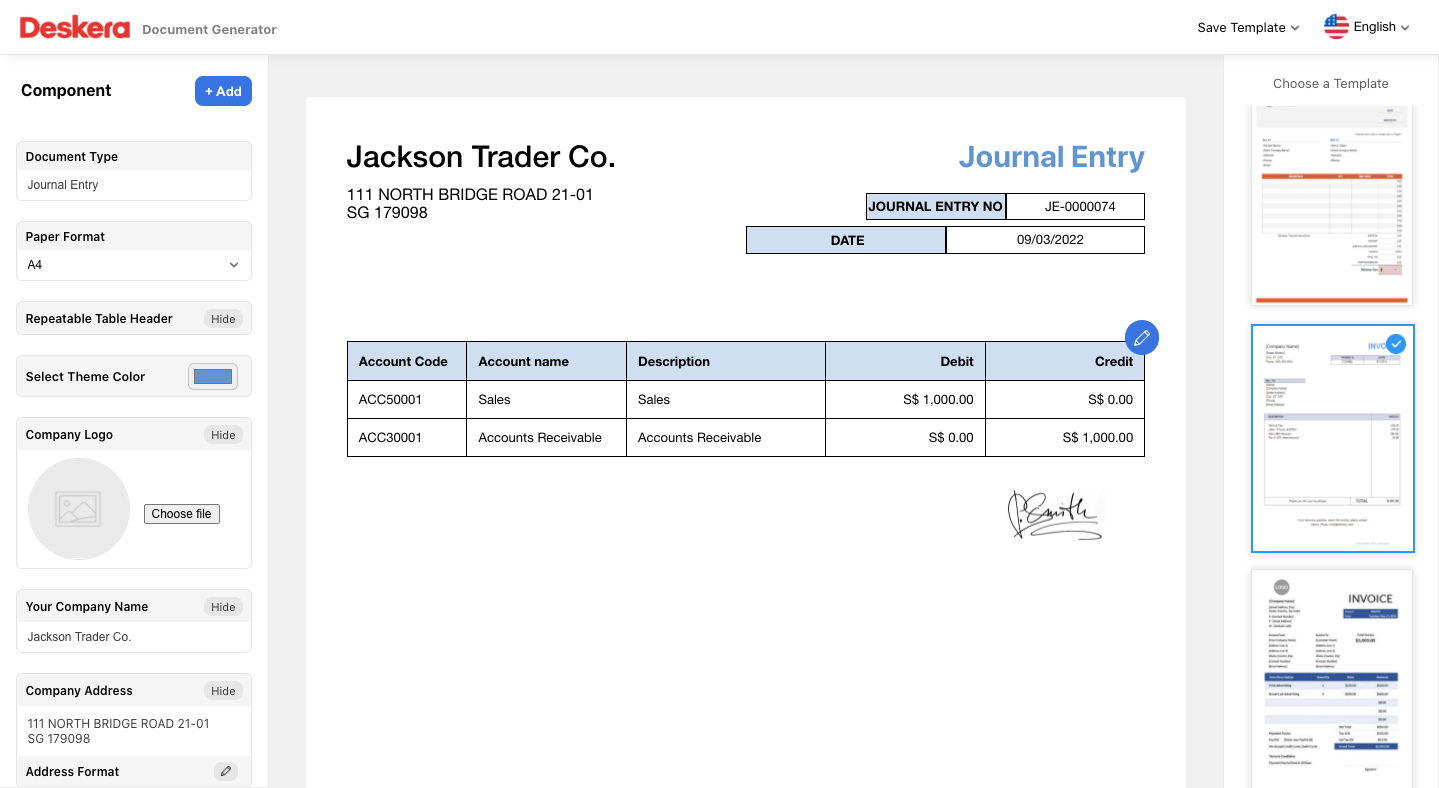
Choose your preferred template on the right-hand side screen.

Click on the save template.
How can I export the journal entry?
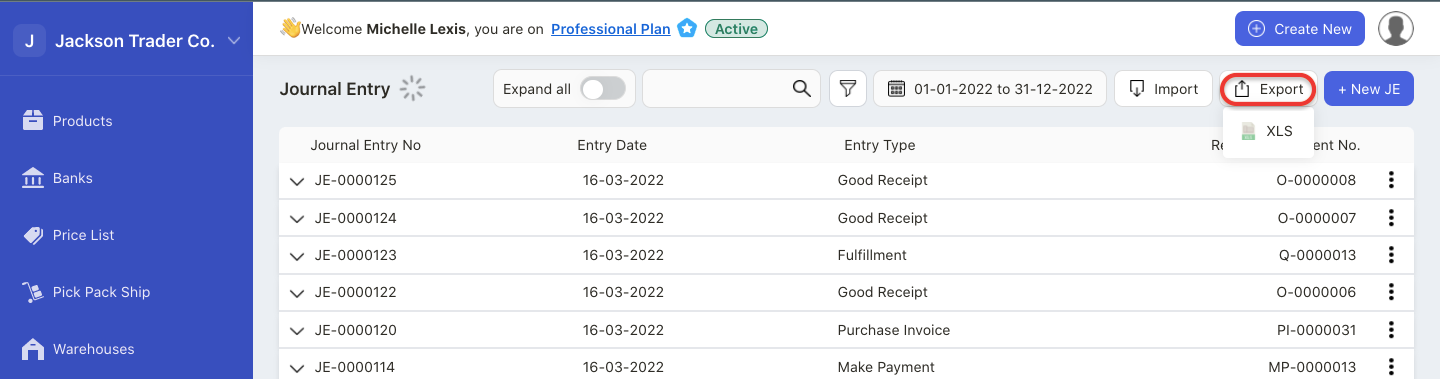
Click on the export button to download the journal entry in xls format.
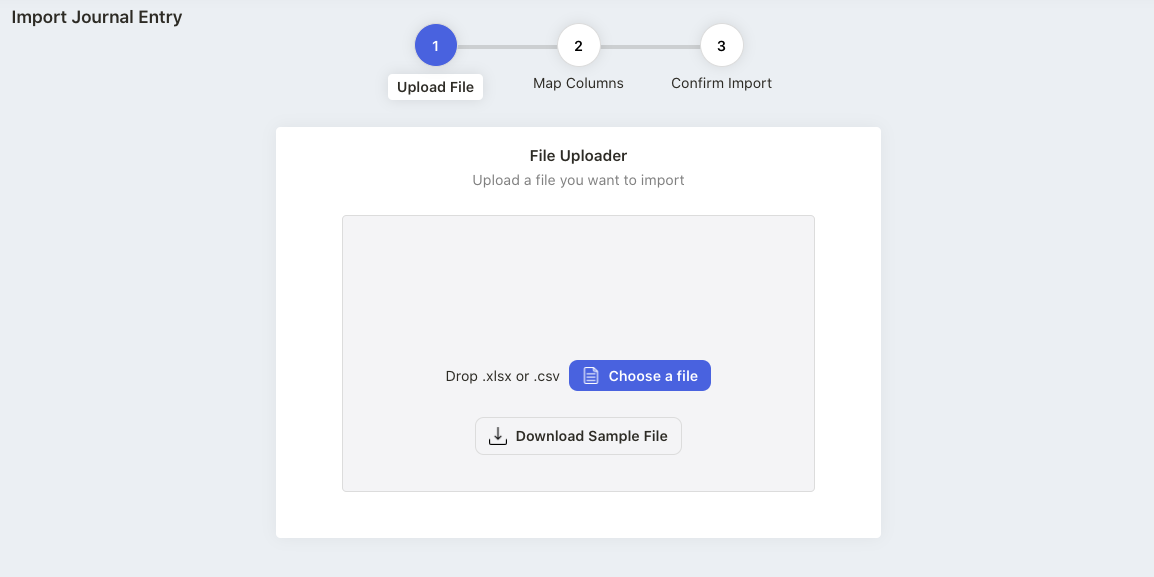
How can I bulk import my journal entry?
You can bulk import journal entry using the sample file from the system.
- Click on the import button > Select Import Journals.
2. In the sample file, fill in the following fields:
- number
- journal entry date
- include in tax report
- memo
- currency
- currency rate
- account name
- description
- type
- amount
3. Save the file and upload the file to the system.
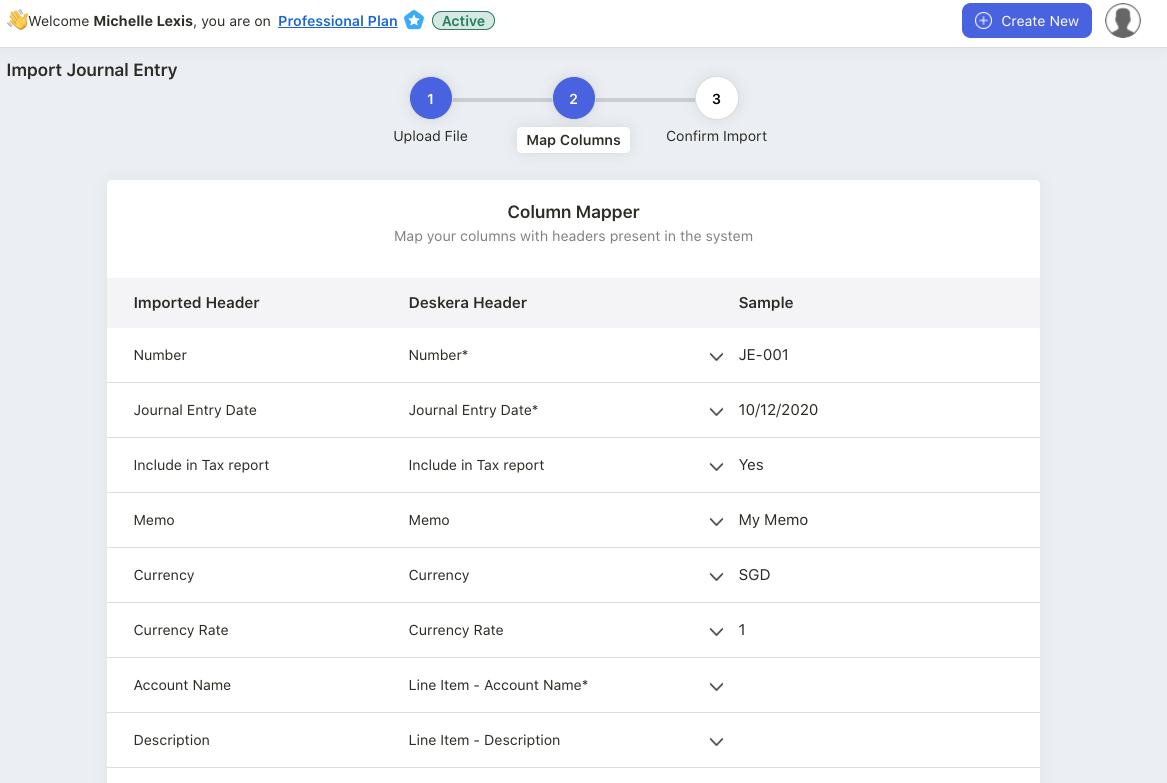
4. Next, make sure to match Deskera Header to the sample values.
5. Select your preferred date format.
6. Click on the continue button.
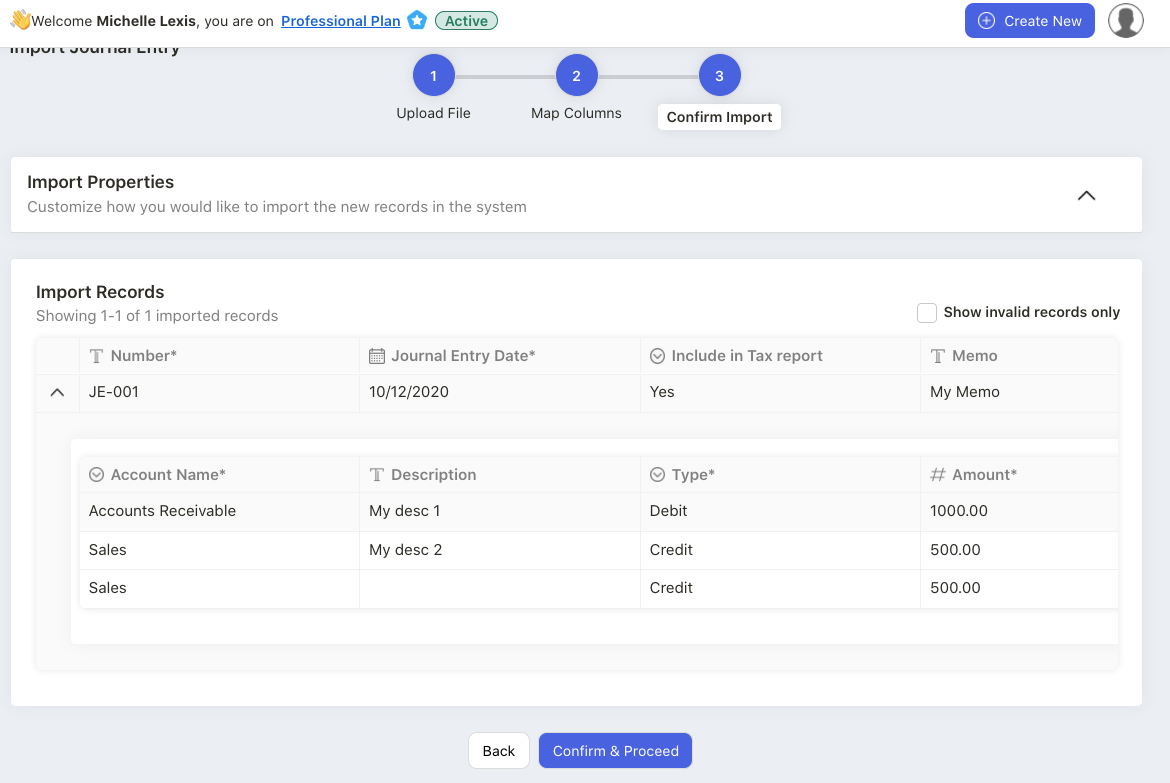
7. During the confirmation stage, make sure that the information are valid.
8. Once you have verified the data, confirm and proceed to the next stage.
9. All your journal entry records in the sample file will be uploaded to the system successfully.