

Your landing page is the bridge between you and your potential customers.
But the question is, how do you connect to your lead via your landing page?
One of the ways is by creating a form section at the end of the landing page.
Having a form on your landing page is the gateway that connects you to them.
When visiting your website, your leads will fill in their details through the form section if they wish to connect with you.
You can quickly connect with your potential customers using the information provided.
How can create a form?
To start, you need to create a form in Deskera CRM.
Follow the steps mentioned:
- Login to Deskera account and switch to Deskera CRM.
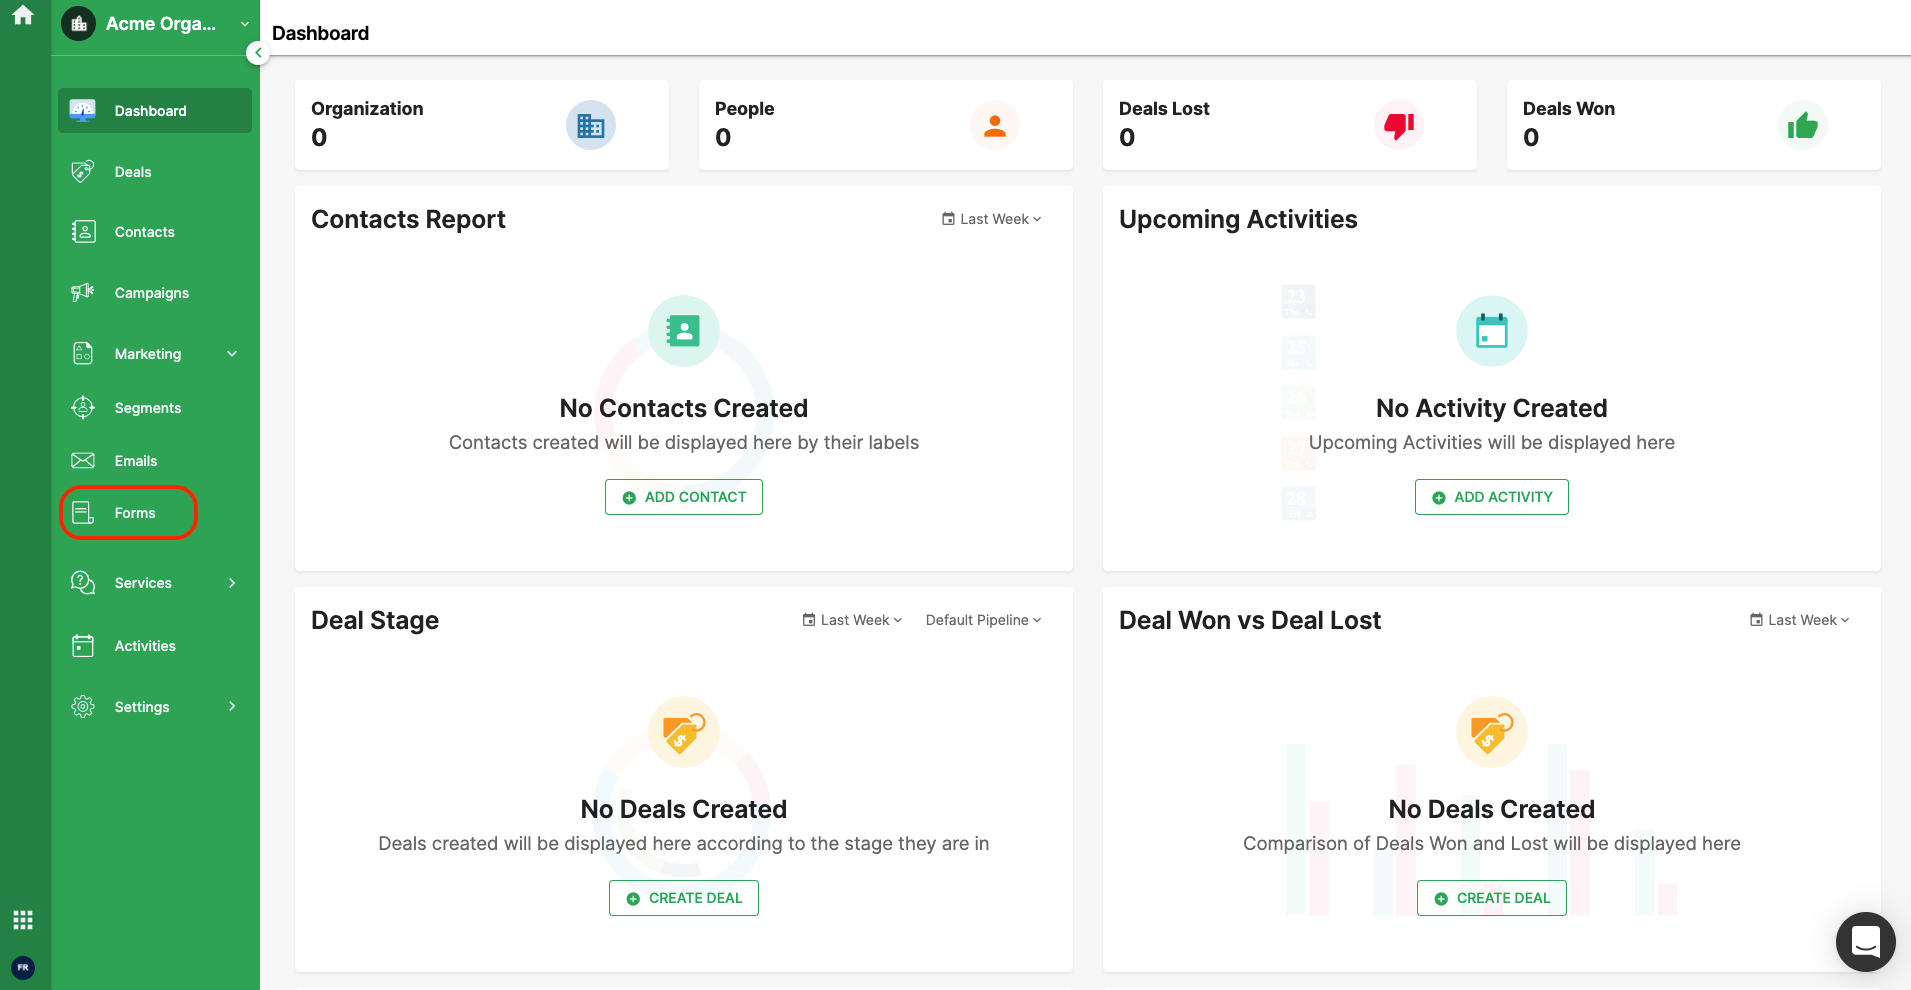
- In Deskera CRM, click on the Marketing tab on the sidebar menu. Select Form.
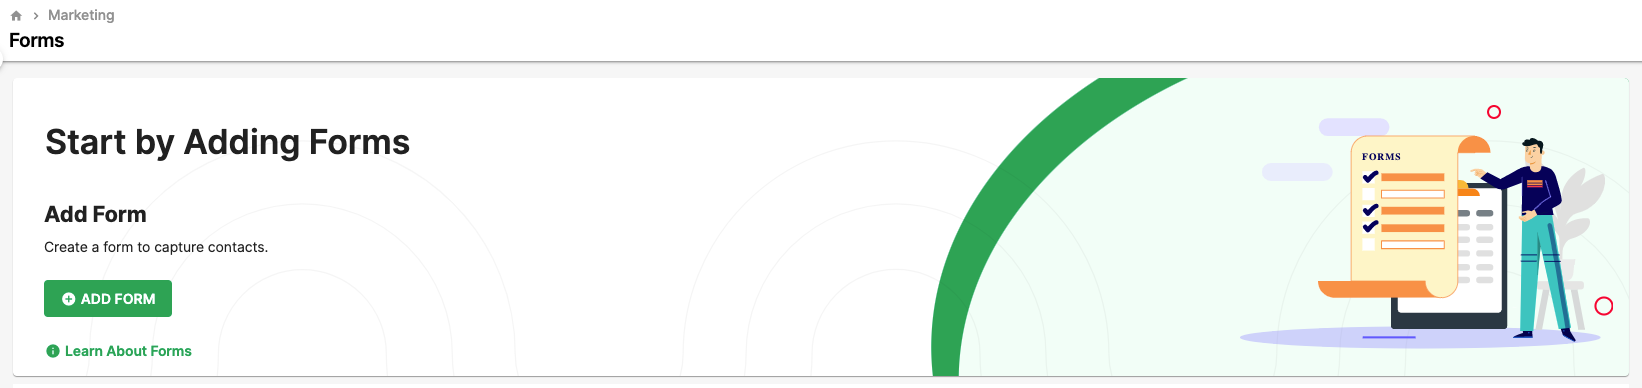
3. Next, click on the "Add Form" button.
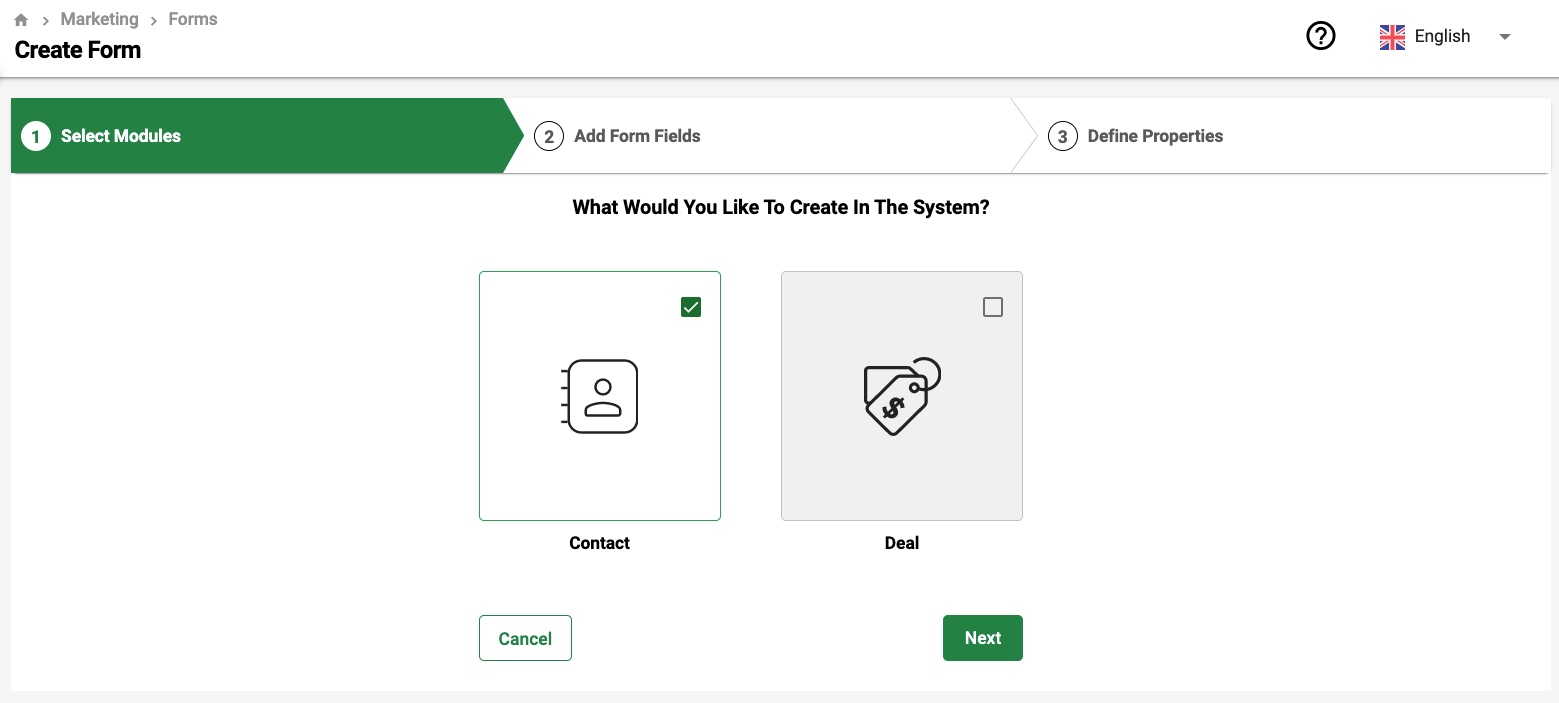
4. Select the modules that you'd like the contact information from the form to automatically map to (in Deskera CRM). It can be a contact form or a deal form.
5. Click on the Next button.
6. Enter the form's name Also, you can add more fields to the contact or deal form using the drag and drop functionality.
7. Here are the default fields available in the system for contact form:
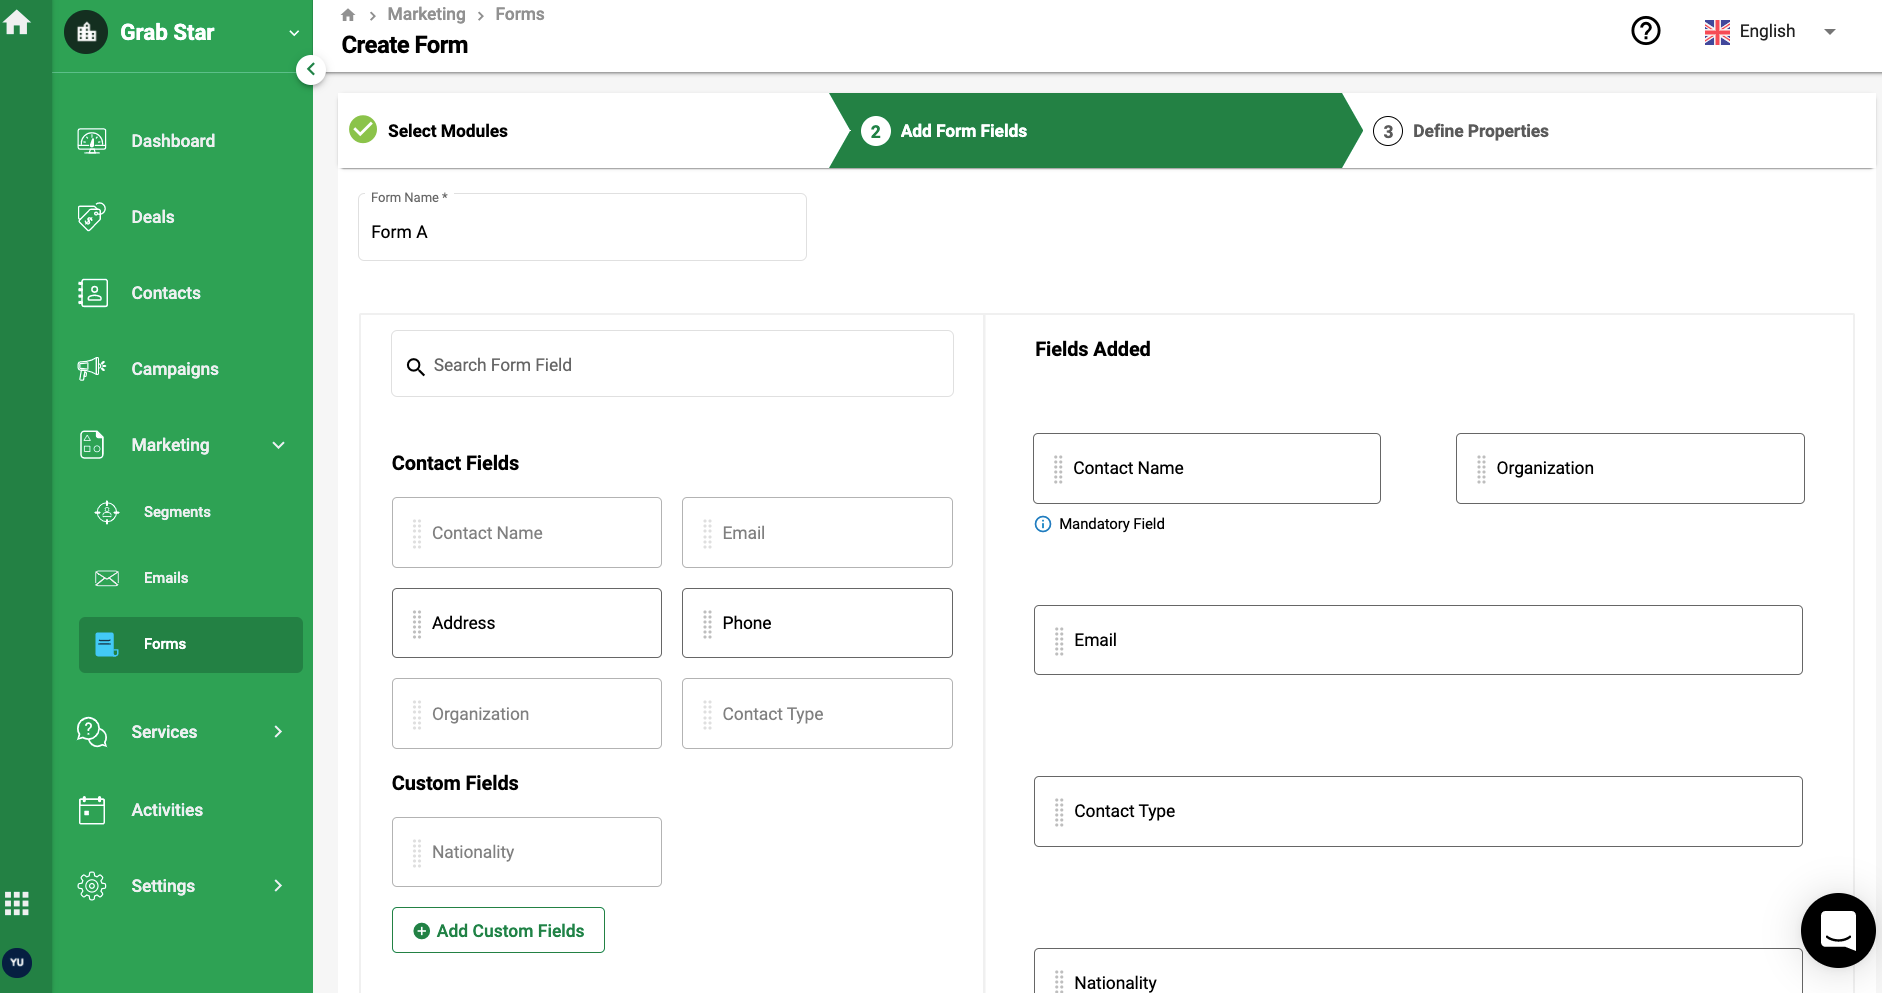
- Contact name (this is the only default mandatory field)
- Address
- Phone
- Contact Type
- Organization
8. Here are the default fields available in the system for deal form:
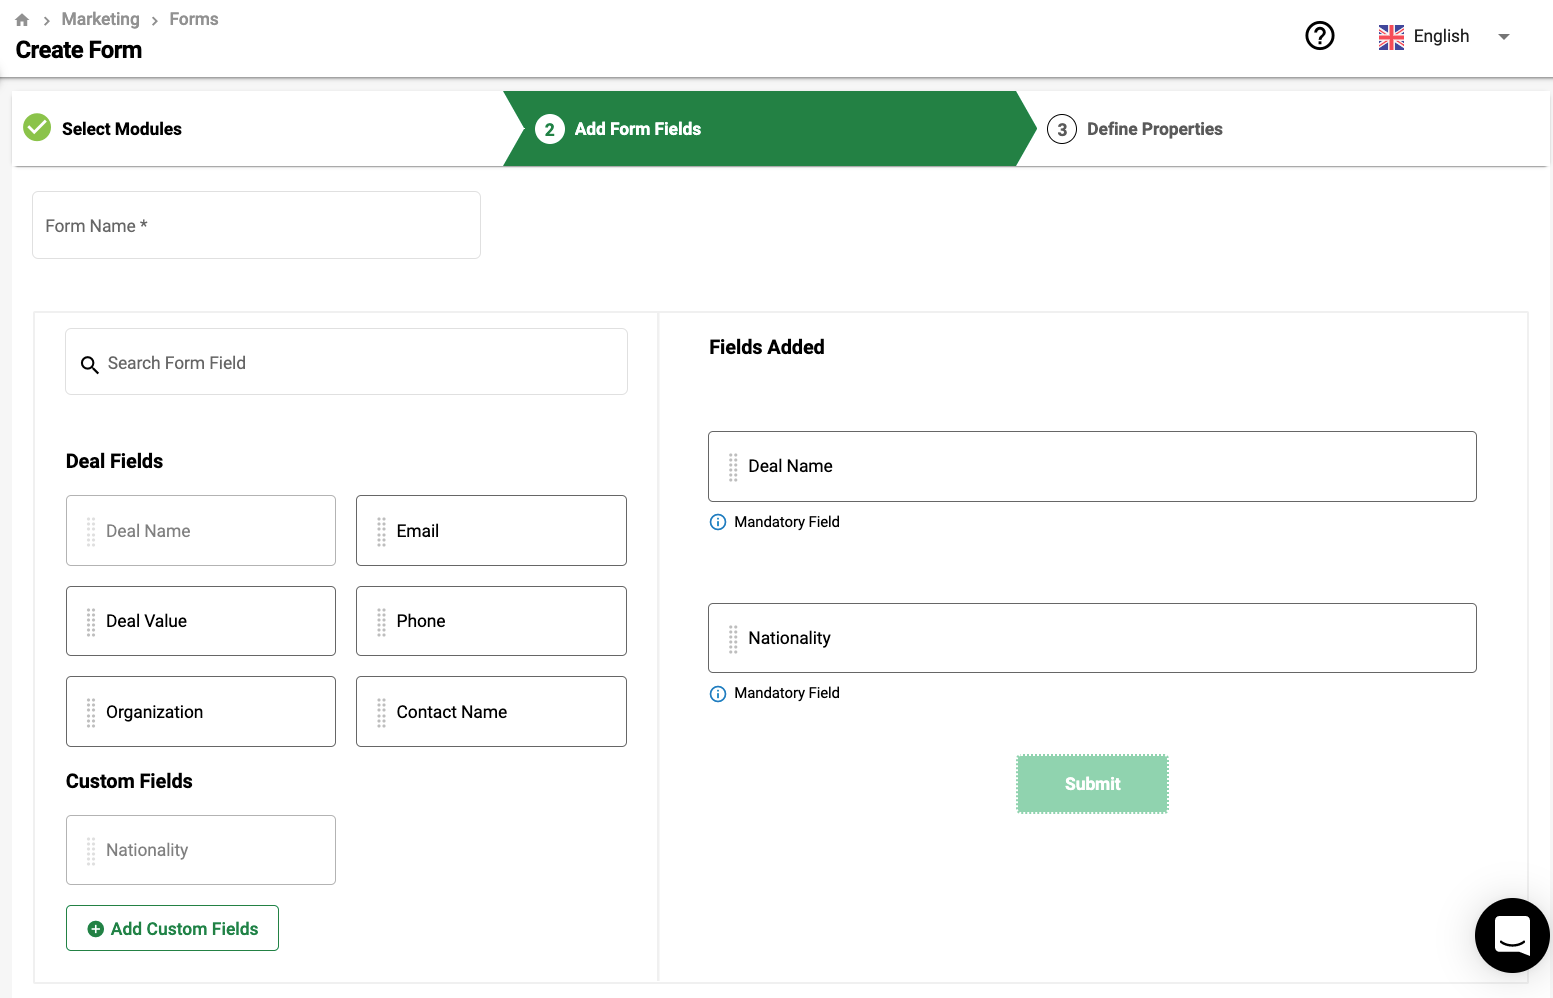
- Deal Name
- Deal Value
- Phone
- Organization
- Contact Name
9. Alternatively, you can also create additional fields for your form. Click on the "Add custom fields" button.
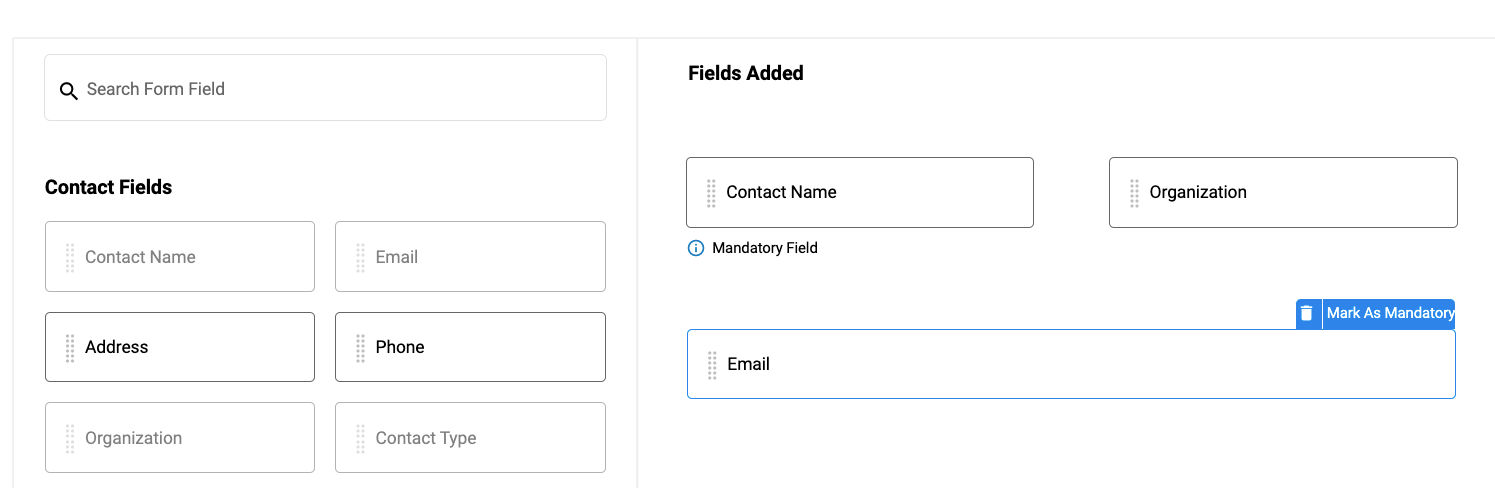
10. If you need to delete or mark the field as mandatory, click on the respective field on the field added section to open the action buttons.
11. Once all the required fields are stated in the deal or contact form, click on the Next button.
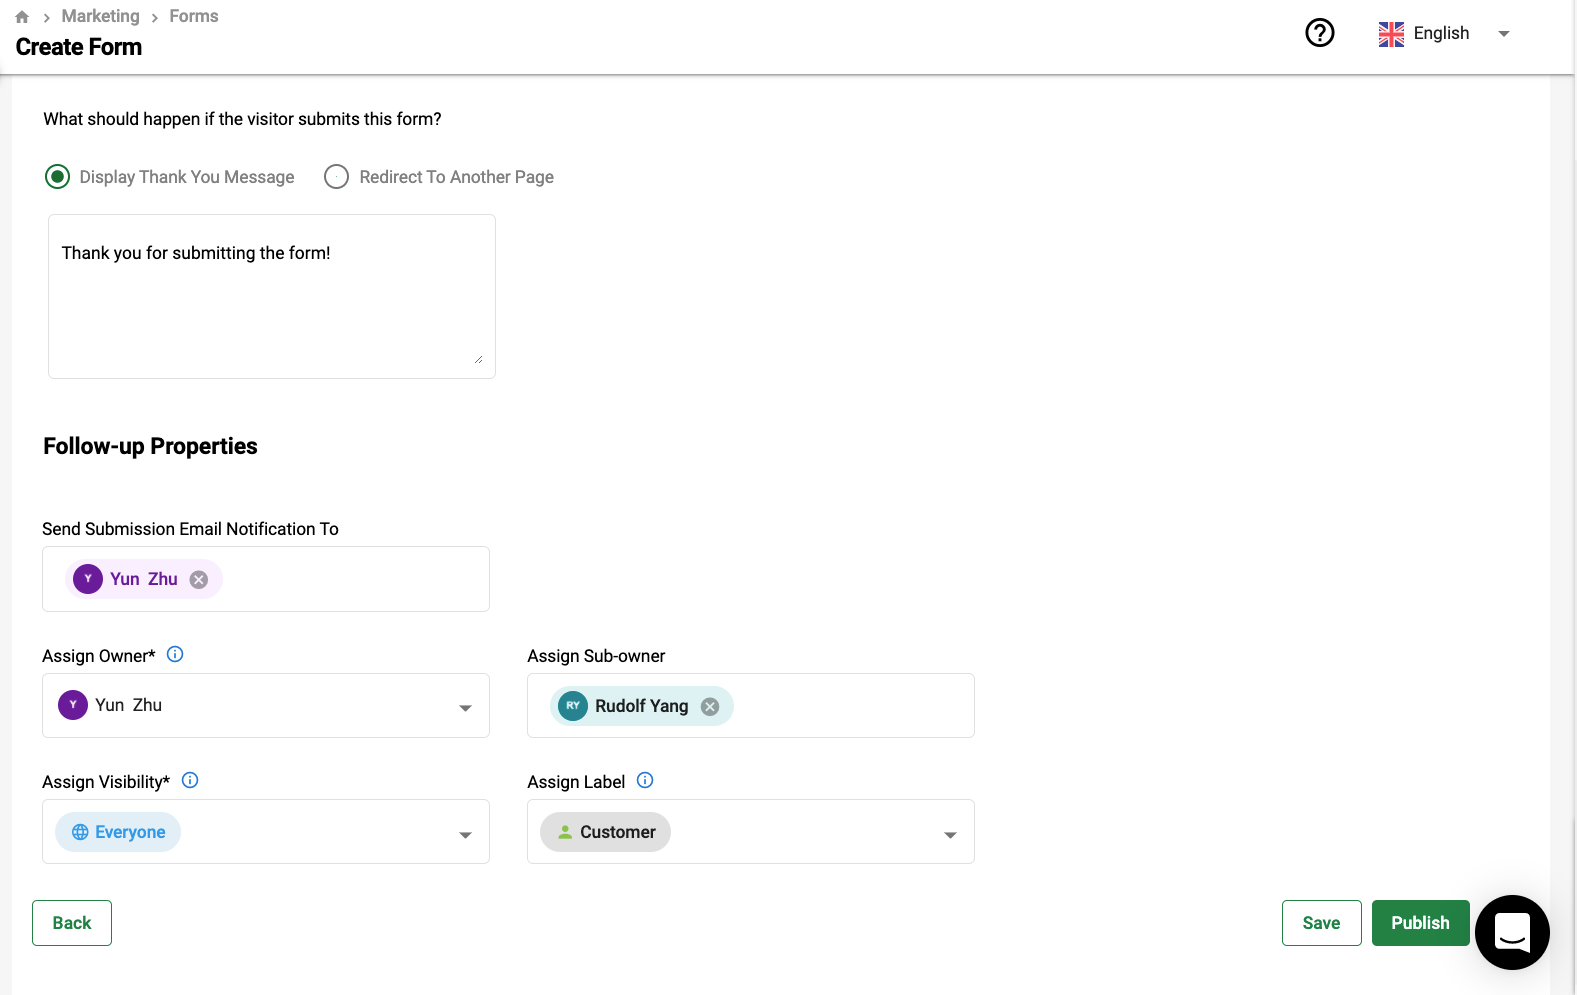
12. In the following stage, you will need to define the contact or deal form properties:
- The trigger when the leads submit the form. You can either choose to display thank you note message or redirect them to another page. (end-user view)
- Follow-up properties: Indicate the email notification, the owner, sub-owner, the visibility and the lead's label. (internal user view)
13. Click on the Publish button once you have configure the form properties.
14. Hit on the Publish button.
How can I link the respective form to my website?
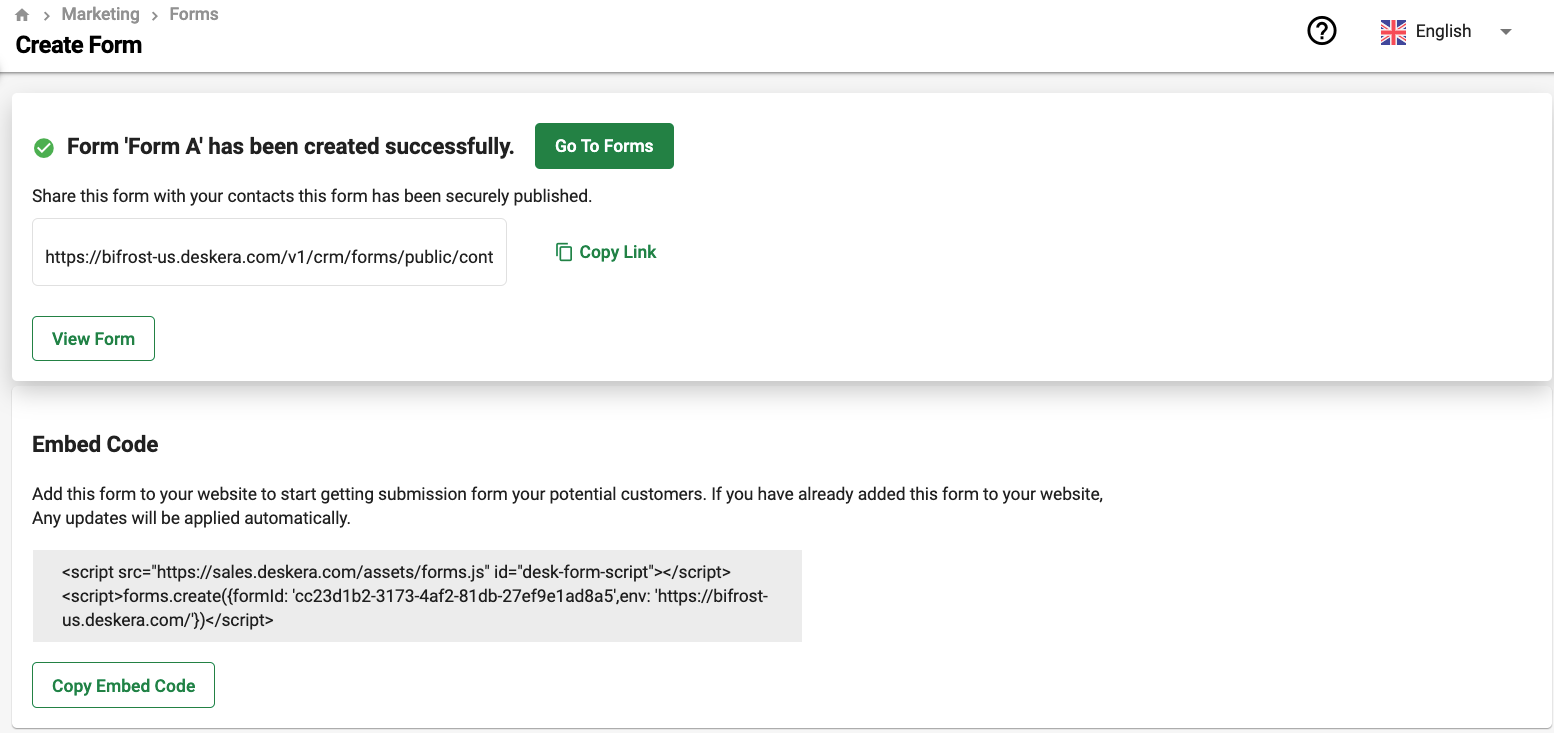
Once you have published the contact or deal form, the system will notify you that the form has been created successfully.
You will need to copy and embed the code as shown in your website in order for the fields to appear on your landing page.
Can I edit the form after publishing it?
- Certainly. You can edit the form after publishing it.
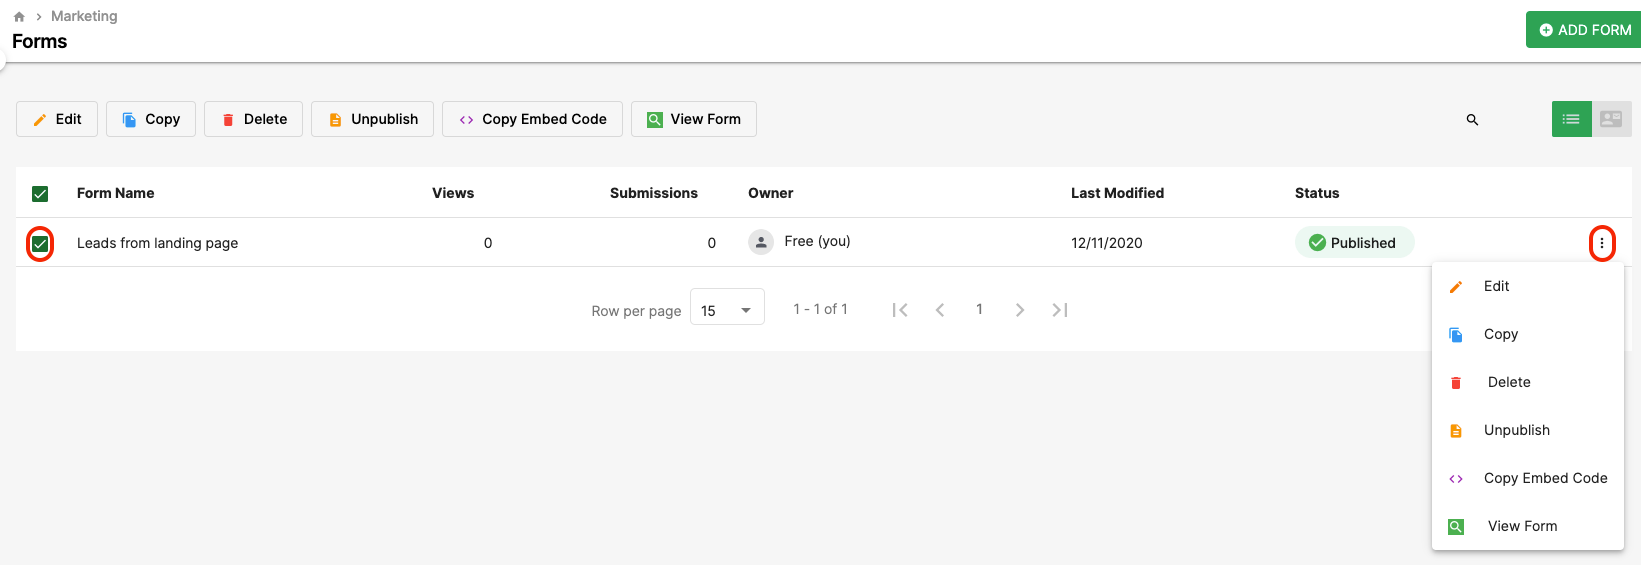
- Go to the Form Summary page.
- Follow the steps to perform the actions stated:
- Edit: You can edit the form such as adding new fields, remove existing fields, and mark/unmark fields as mandatory
- Copy: Create a duplicate form
- Delete: Remove the form from the system
- Unpublish: Your leads won't be able to view this form if you unpublish it
- Copy the embed code: You can always copy the code whenever you need it
- View the form: View the structure of the form in the end-user's eye
Also, you can view the number of viewers and form submission in this page.