

Having a CRM system that allows you to create, save, monitor, and track your daily work tasks is crucial for your sales team. With Deskera CRM Plus, you can plan your schedule and ensure that you complete your tasks before the deadline given by your manager.
If you wish to improve your productivity and increase sales performance, you need to plan and manage your time effectively. You can use the Activity Module in Deskera CRM Plus to help you achieve this.
Find out more below.
How can I create an activity?
Follow the steps below to create an activity in Deskera CRM Plus:
- Login to your Deskera CRM Plus account using this link.
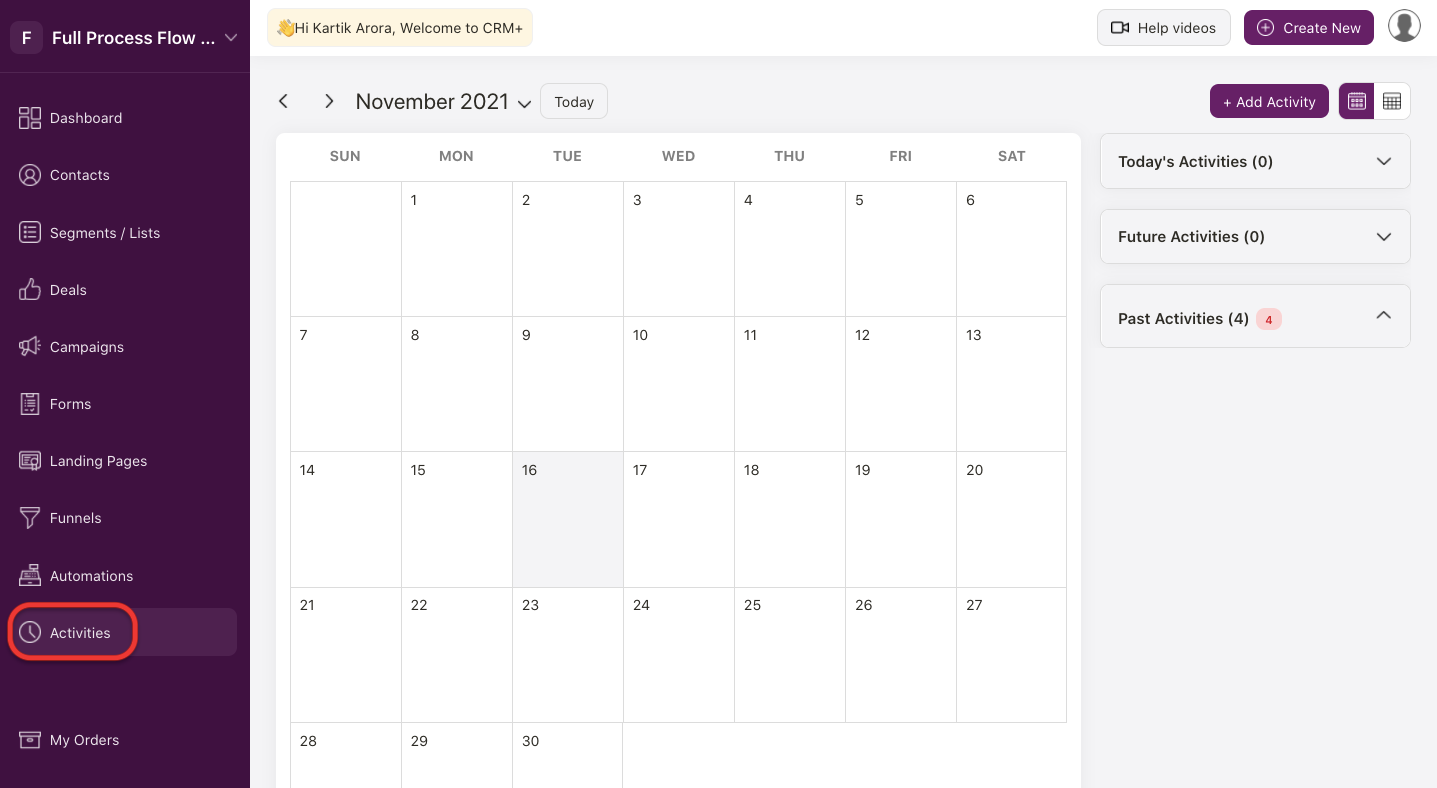
2. Click on the Activities Module on the sidebar menu once you are logged-in. On the Activity Module page, you can view your calendar.
3. Start adding your work tasks by click on the "+ Add Activity" button.
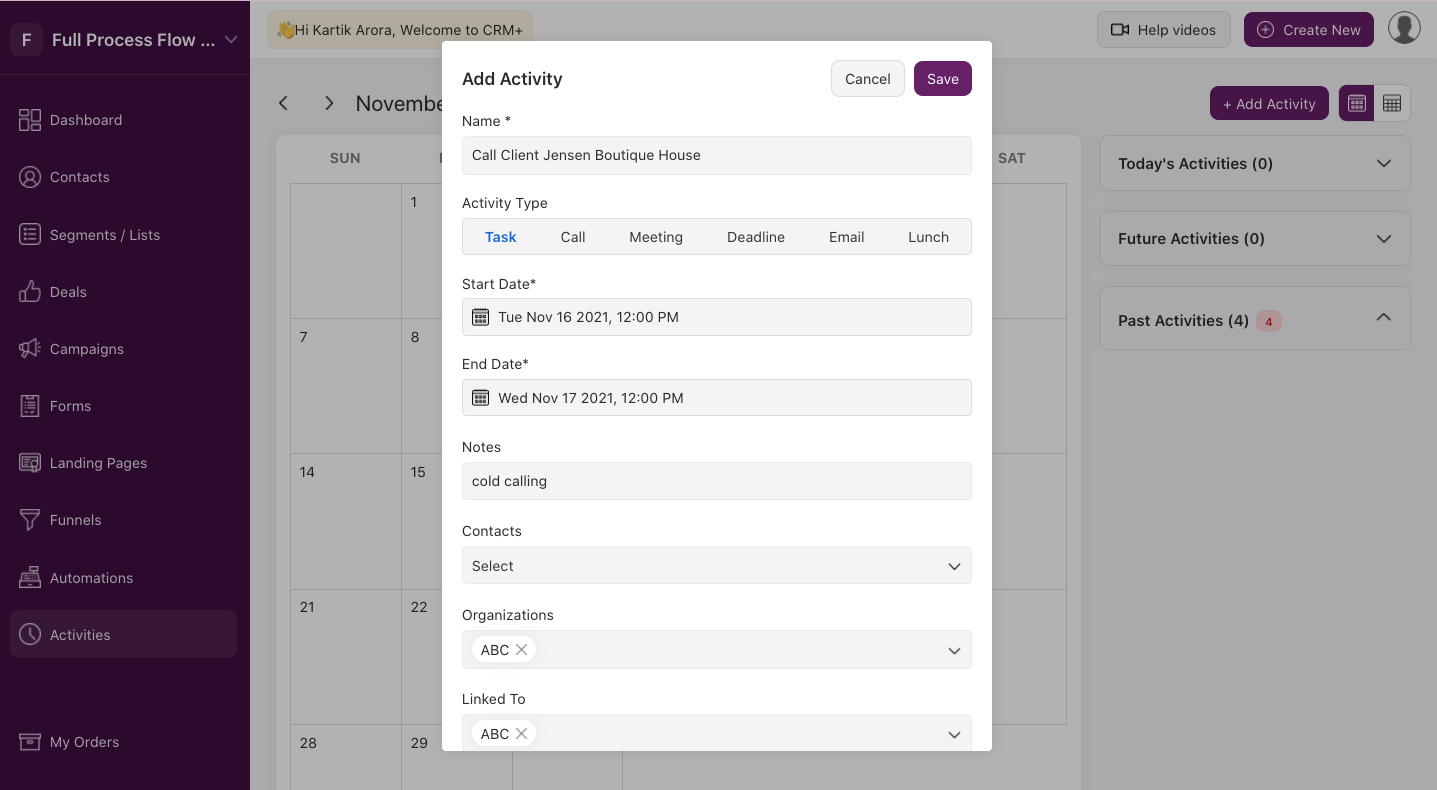
4. A pop-up will appear and you will have to enter the following details:
- Name - Name the activity
- Activity Type - Select the activity type. You can choose from task, call, meeting, deadline, email or lunch
- Start Date - Enter the start date of this activity
- End Date - Enter the deadline to complete this activity
- Note - Enter short description for this activity
- Contacts - Select the contacts. The drop-down menu will populate the data saved in your Contact Module
- Organization - The organization your contact represents
- Linked To - Enter the deal linked to this respective contact. Choose the deals from the drop-down menu
- Status - Choose whether the task is completed or pending
5. Once you have entered the required information, click on the Save button.
How can I edit the activity?
Once you have created the activity in the system, you can always edit the activity, in case you need to correct the information saved earlier.
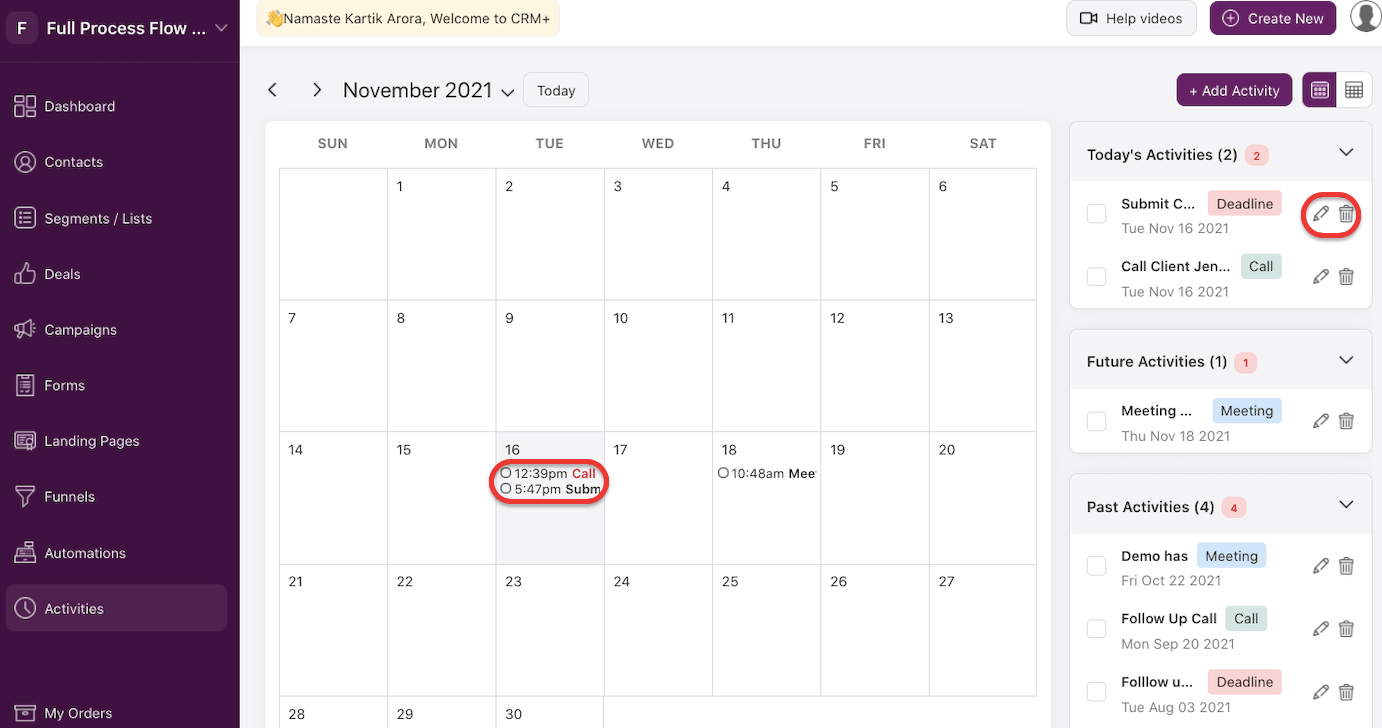
On the calendar, you can click on the respective tasks created to edit or delete the information. Alternatively, you can also click on the edit and delete icon for the respective task on the right-hand side menu.
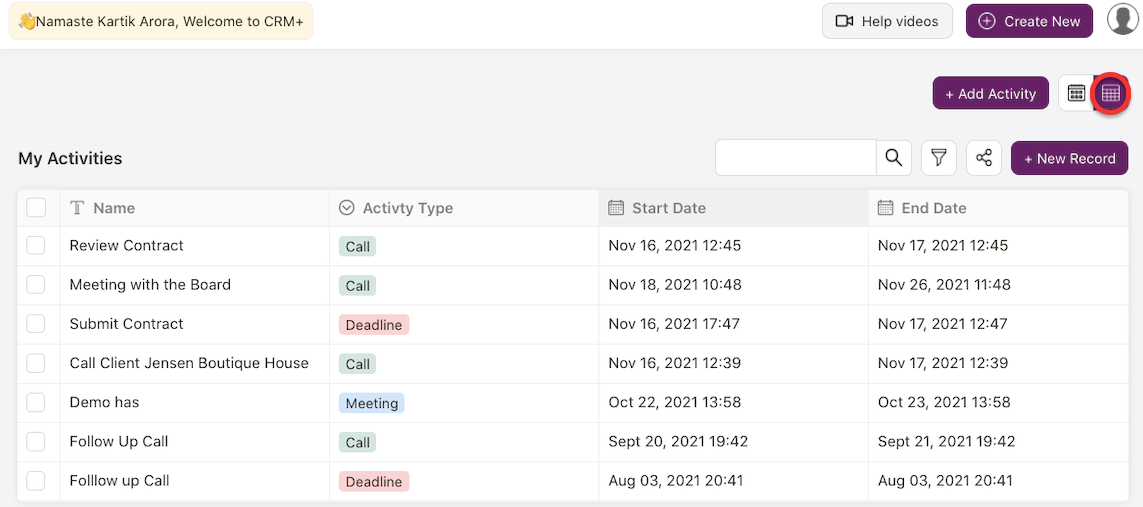
If you wish the view the activities in table format, click on the table icon at the top right page. The activities will reflect in table format as per your selection.
With the table format, you can bulk update the activities at one go.
Enable the checkboxes for the respective activities. This will trigger the action menu. Choose the respective fields available to bulk update or delete.
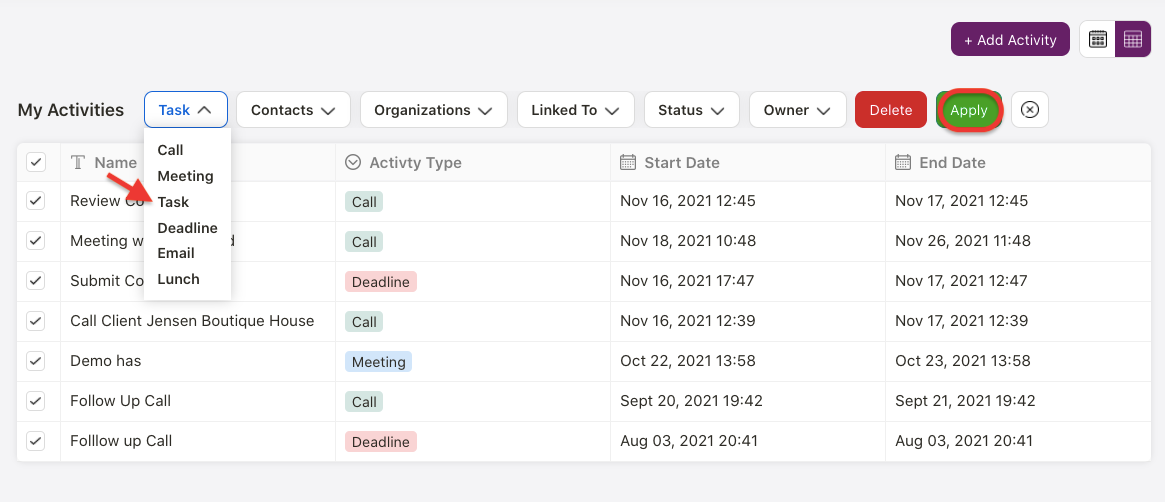
For instance, if you wish to bulk update the chosen activities to task, then choose the activity type as "task" and apply.
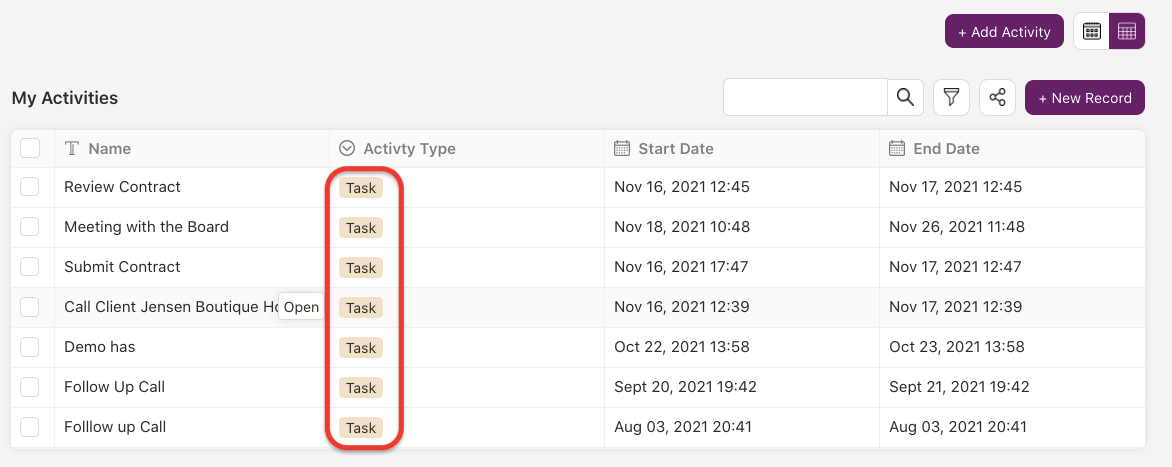
All the activities will be updated to Task under Activity Type column in the table. The same applies if you wish to bulk delete the activities.
How can I mark the activity as completed?
Click on the respective activity on the calendar.
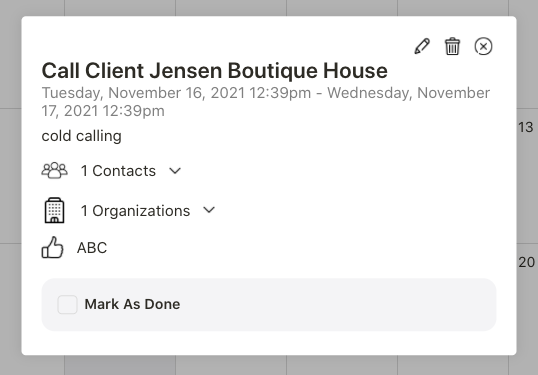
A pop-up will appear. Then, mark the activity as done.
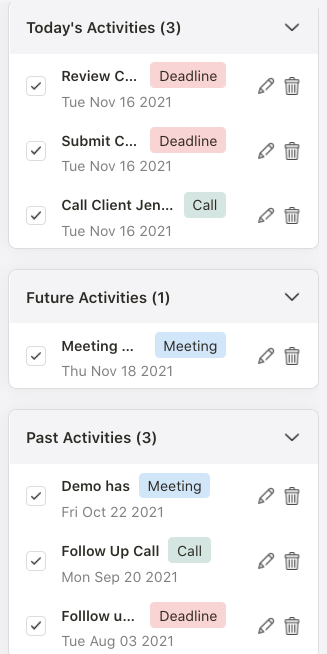
Alternatively, you can also tick the checkbox on the right-hand side menu to mark the activity as completed, and vice versa.
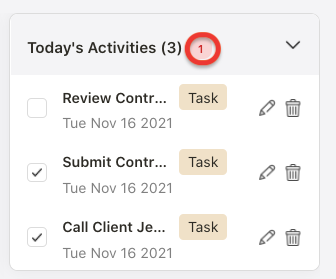
Once you have marked the activity as completed, the total number of pending tasks will reduced.
How can I add custom fields in the activity module?
If you would like to add more fields to the existing fields available, you can simply do so by scrolling the activities in table format to the right.
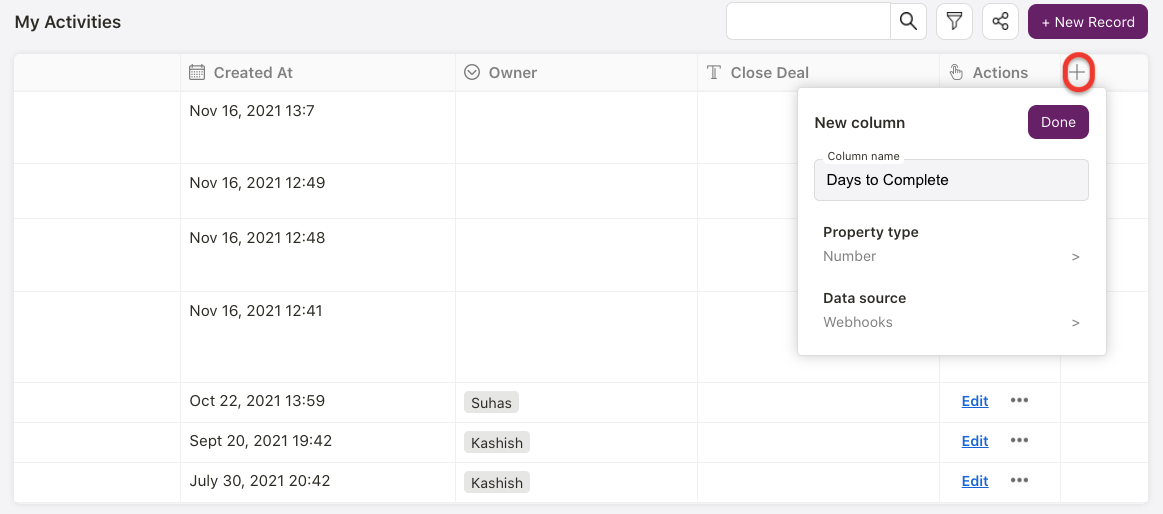
At the end of the table, click on the "+" icon and a pop-up will appear.
Enter the column name, property type, and data source. Click Done.

You can view the additional field added to the Activity Module.
Note: You cannot delete the default fields in the system. You can only delete the additional fields that you have created in the system.