

Expense group in Deskera People Plus allows you to add members to the same department conveniently. And, the team manager can view and approve claims submitted by their teammates from their account.
Follow the steps below create an expense group:
- Login to Deskera People Plus account.
- Click on Expense Module via the sidebar menu.
- Select Admin Settings.
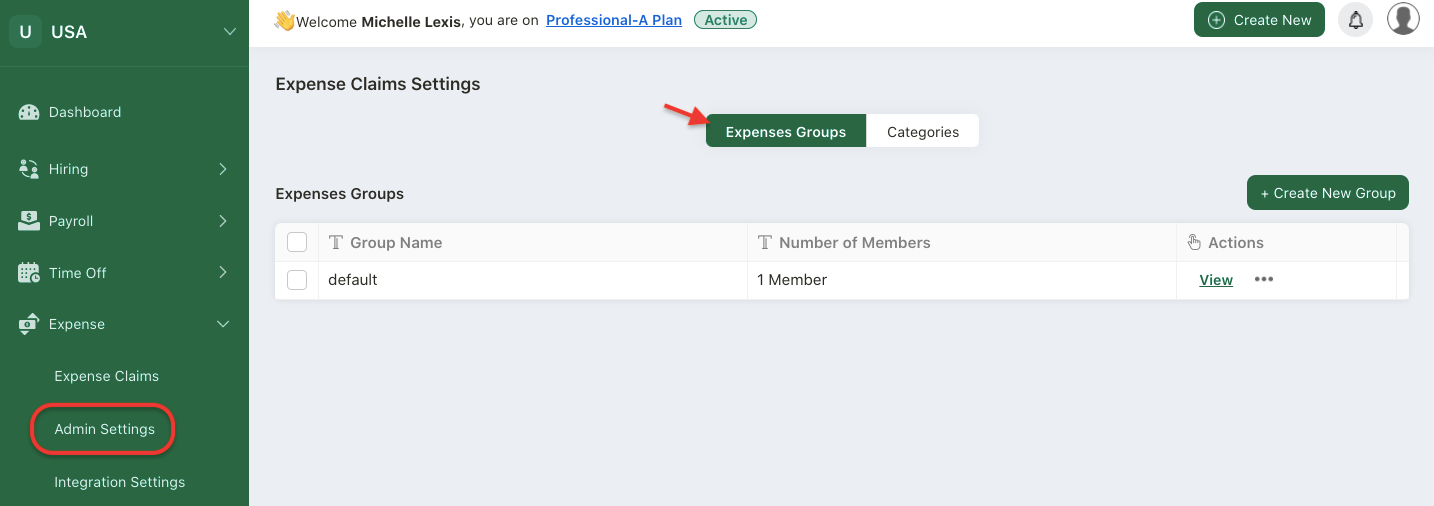
4. On this page, click on expense groups tab. You can view default group here. The account owner will appear in the default group.
5. If you wish to create a new group, click on the "+ Create New Group".
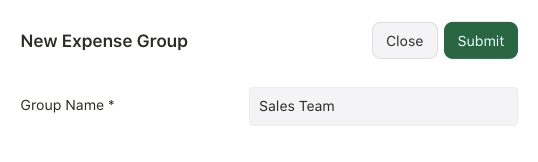
6. A pop-up box will appear. Enter the group name and submit.
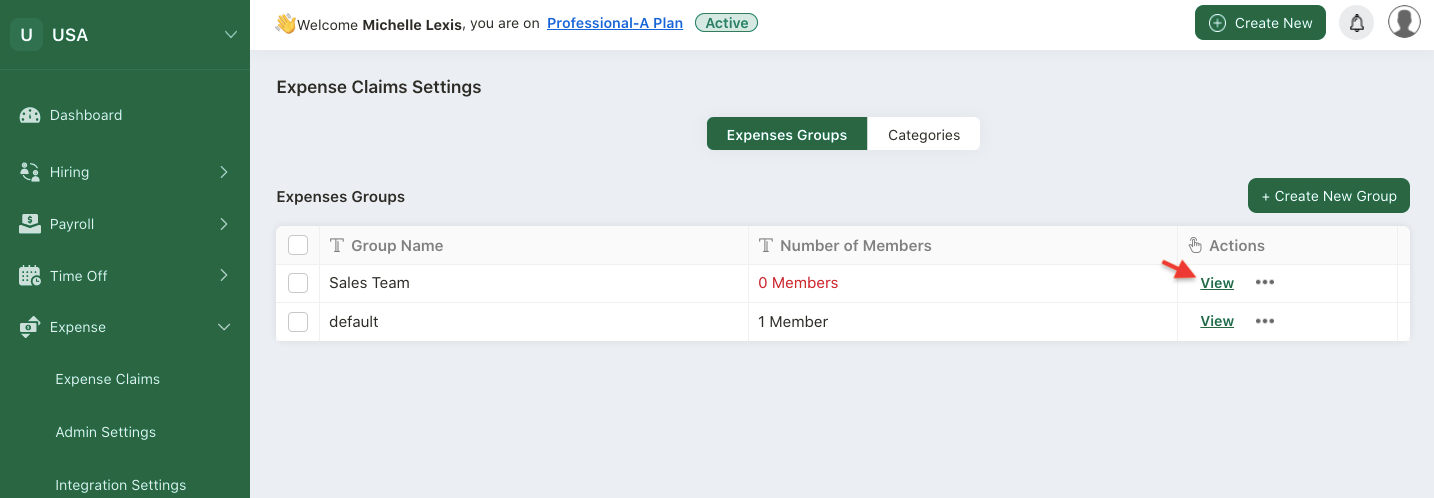
7. Click on the view button.

8. On this page, you can add members to this group.
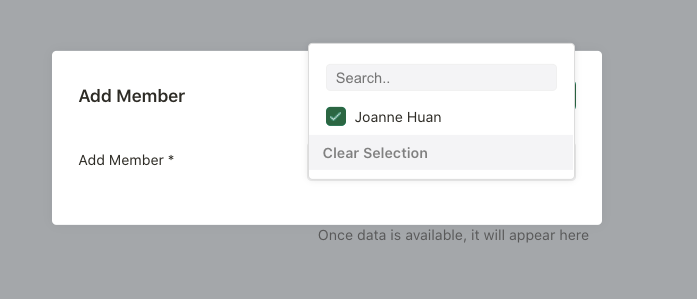
9. Select the members from the drop-down menu. The members are the organization users with People Module access.
10. Click on the Submit button.
How can I assign the user as a manager?
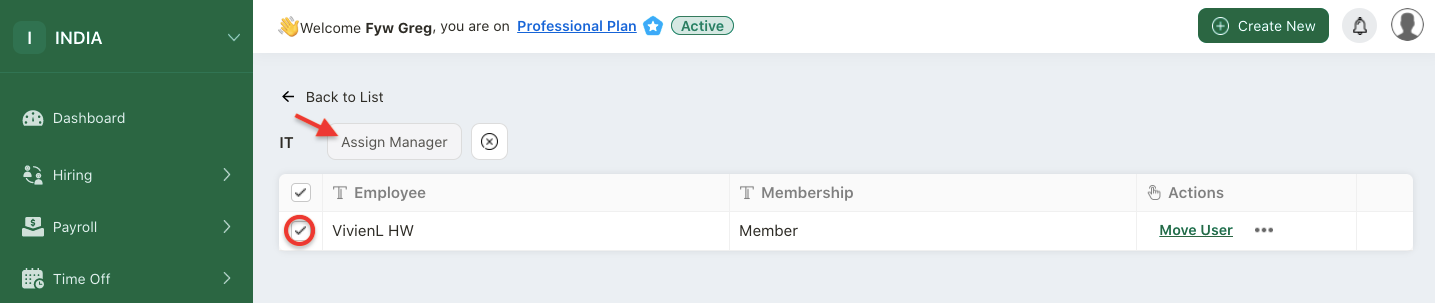
In the respective group, select the checkbox for the respective user and select assign manager button. This user will be updated as the group manager in the system.
Note: Only managers and admin can approve or reject the expense claim submission.
How I can move the user to another group?
You can also move the user to another group by clicking on the move user button.
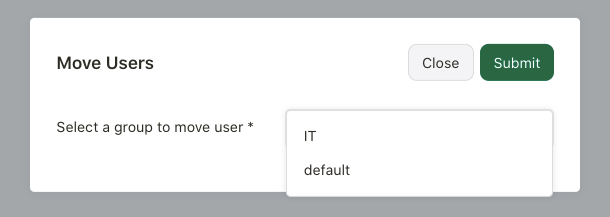
A pop-up menu will appear. You can this user to another expense group. Click Submit.
How to delete member from a group?
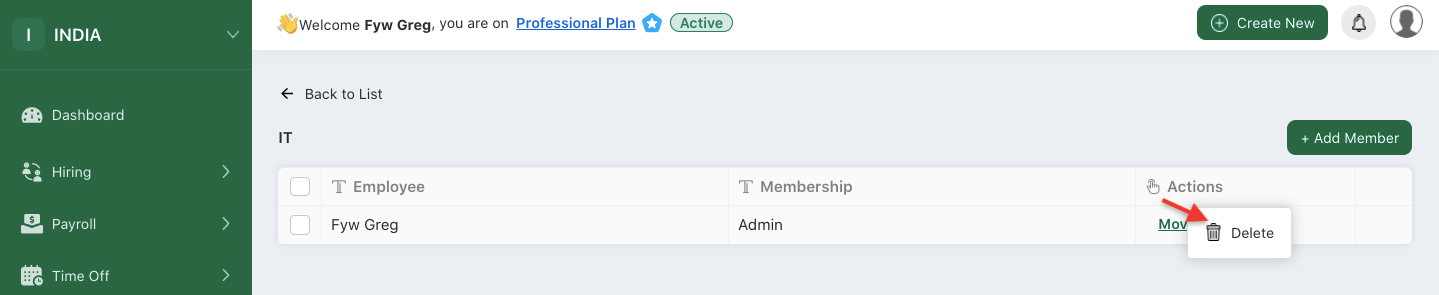
In the expense group, click on the three dots.
Select delete button to remove the member from the group.
How to delete expense group?
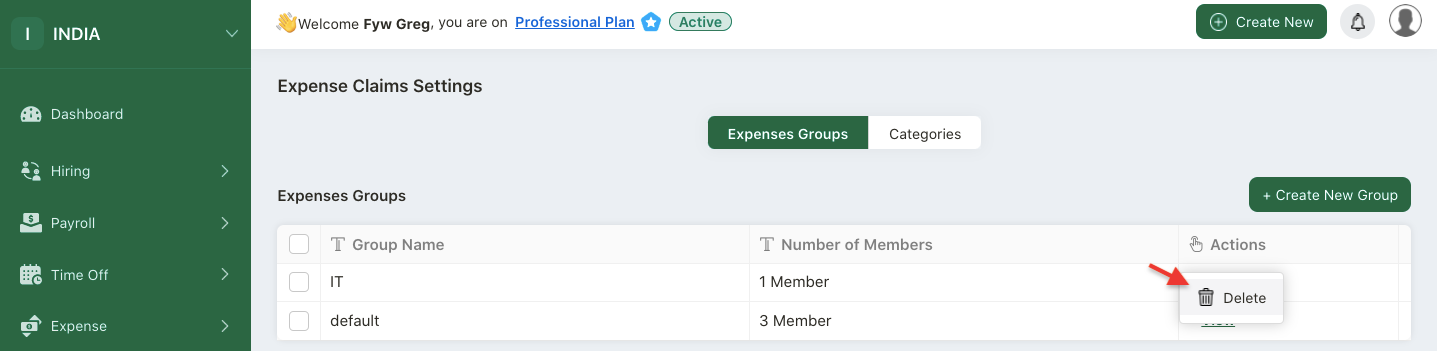
Go to the expense group tab.
Click on the three dots and select delete button.
Please note that you cannot delete expense group with members in it. You will need to delete all the members from the group first. Then only you can delete the expense group.