

Pick, Pack, and Ship is one of the fulfillment methods to fulfill goods to your customers.
After receiving orders from your customers, you will have to pick the items, pack these items to the correct boxes or wrappings, and finally ship the goods to its final destination - your customer's address.
Follow the steps below to generate Pick Pack Ship in Books+:
- Login to your Books+ account.
- Go to the Pick, Pack and Ship module on the sidebar menu.
- On the Pick, Pack and Ship Module, under the Pending Tab, you can view all the quotes and invoices created in your Quote and Invoice Module.
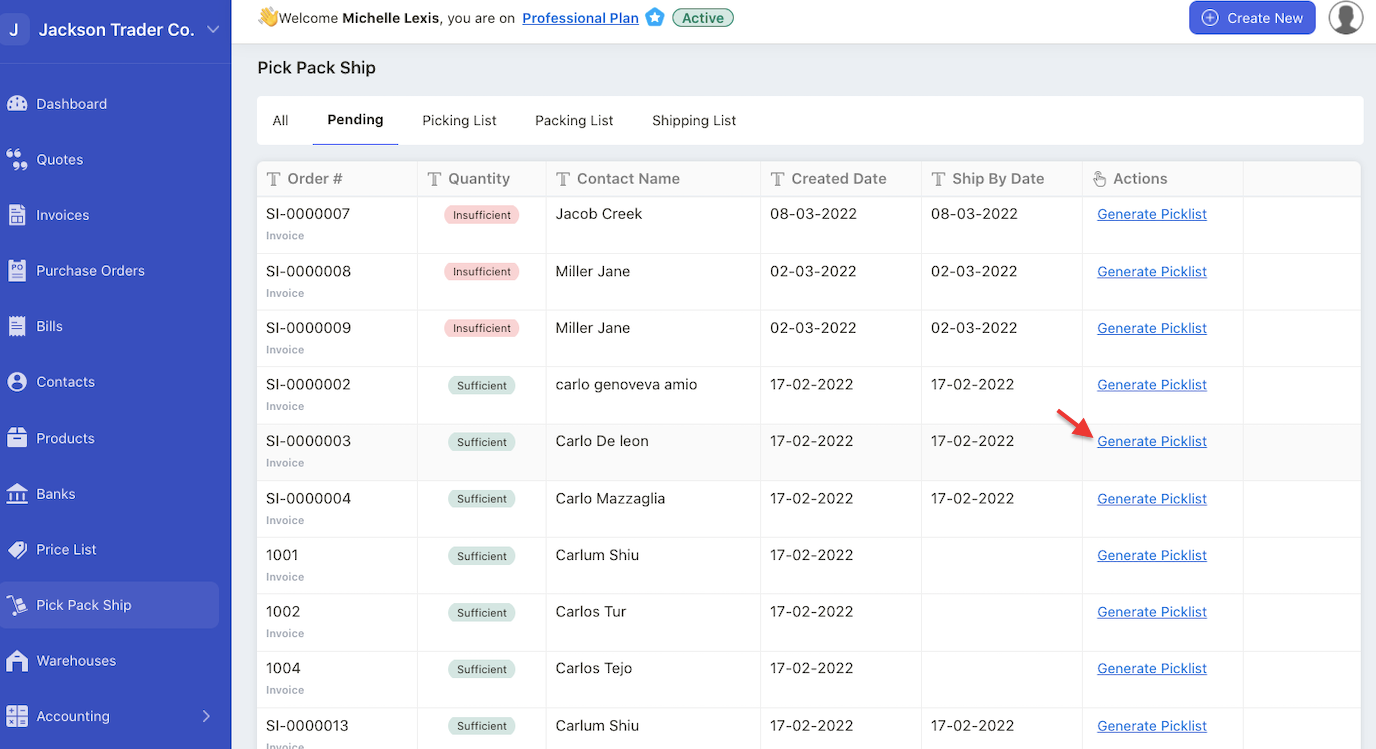
4. Click on the “generate picklist” button under the Actions Column to initiate the picking process.
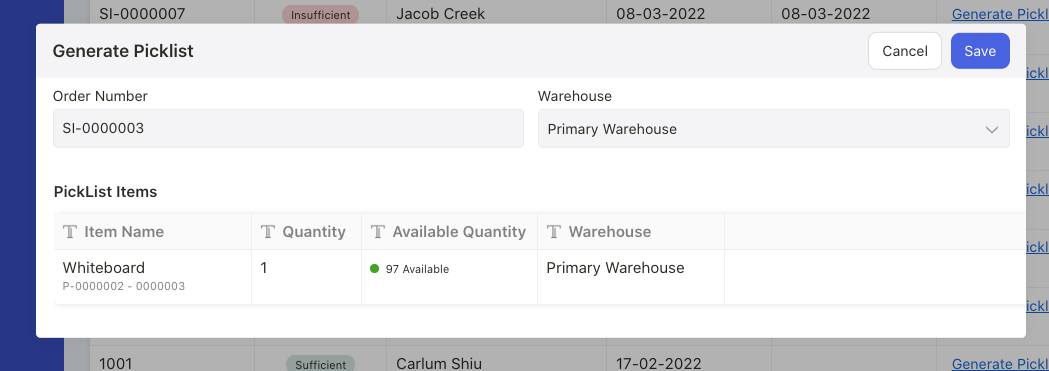
5. A pop-up will appear. Choose the warehouse to pick the goods from. If the warehouse has insufficient quantity, this will be highlighted under the Available Quantity Column. Click Save.
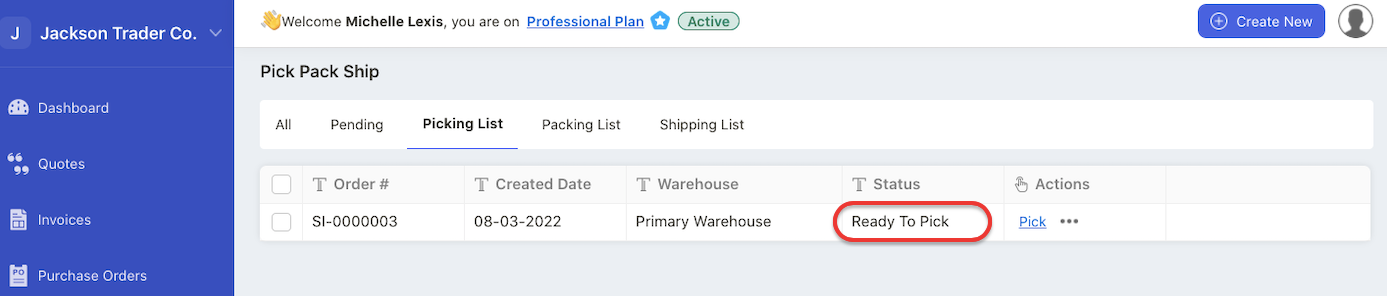
6. This document number will reflect in the Pick Tab. Go to the Pick Tab to view this document number, with the status ‘ready to pick’.
7. Click on the Pick button under the Actions Column.
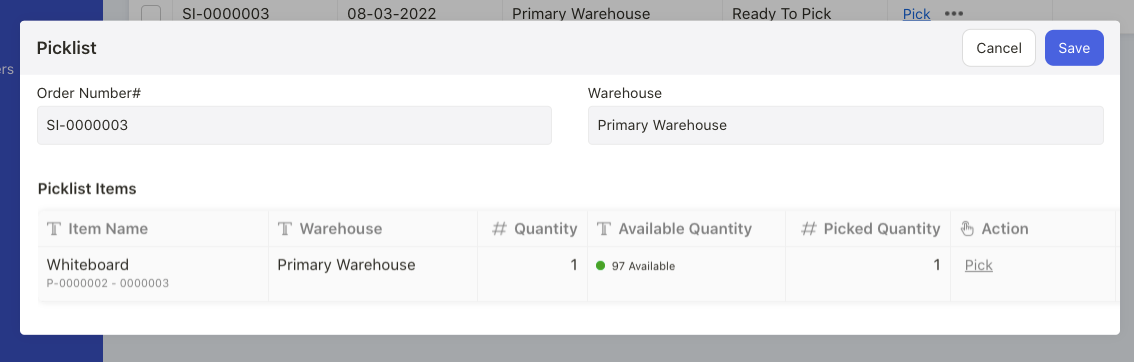
8. A pop-up will appear. Enter the Picked Quantity and save it.

9. The status of this document number will be reflected as Picked under the Status Column.
10. Next, go to Packing List Tab and click on the Pack button under the Actions Column.
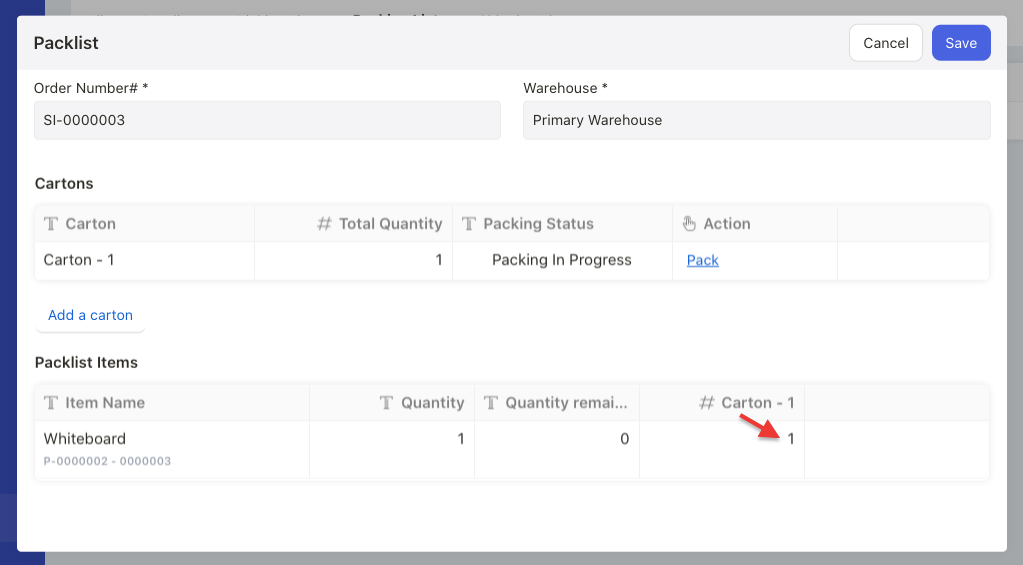
11. Enter the quantity in carton-1 under the packlist items section.
12. The quantity saved under carton-1 will be be auto-populated under total quantity column under the cartons section.
13. Click on the “Add a carton” to add additional cartons in the packing list. Click on the Pack button under the Action Column. Save it.
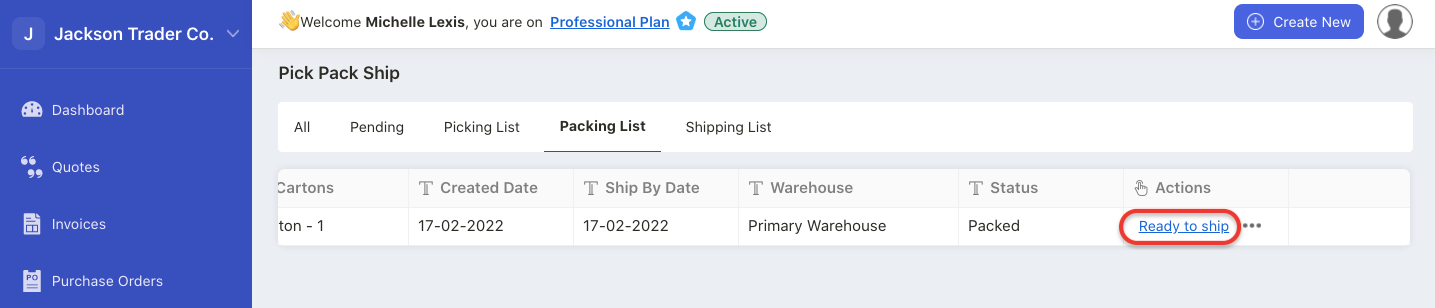
14. In the Packing List, this document number will be reflected as packed and you can click on the ‘ready to ship’ button to proceed to the shipping stage.
15. In the Shipping List, click on the Ship button. A pop-up will appear. Fill in the fields in the pop-up:
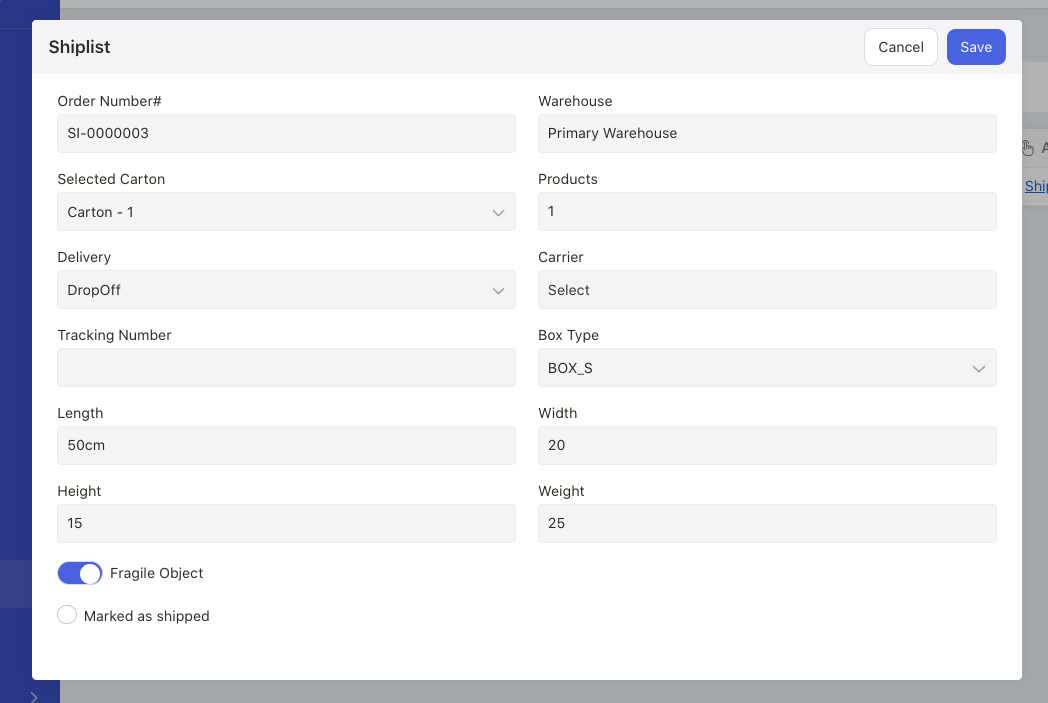
- order number: auto-populated by the system
- warehouse: auto-populated by the system
- products: auto-populated by the system
- carton: choose the carton to ship the goods
- delivery: choose courier, pick-up, or drop-off
- carrier: if you choose courier as your delivery, you can select DHL, USPS, UPS, Fedex, or others in this field
- tracking number: enter the tracking number
- box type: enter the size of the box. You can choose from S, M, or L
- length: enter the box length
- width: enter the box width
- height: enter the box height
- weight: enter the box weight
- enable the toggle “fragile object” if the item is easily broken
- enable the checkbox “marked as shipped”, if you have already shipped the goods
16. Click on the Save button.
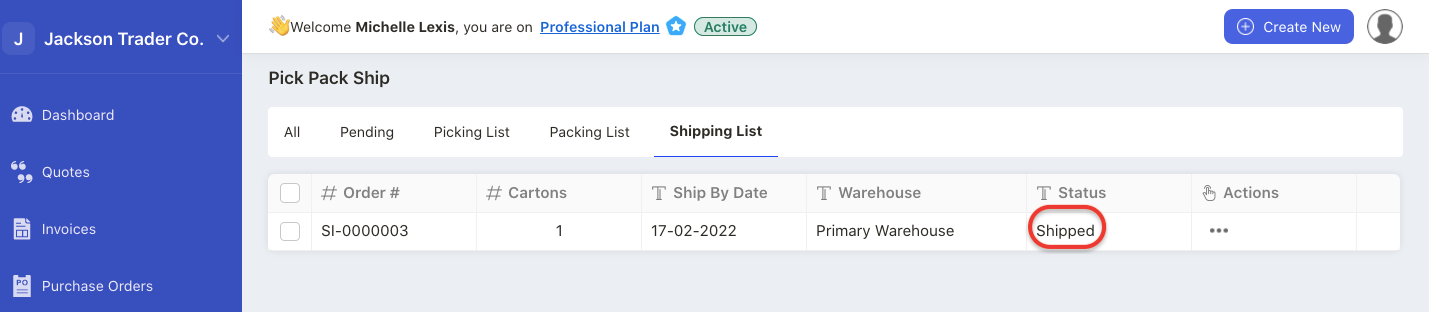
17. The order will be reflected as Shipped in the “Shipping List”, meaning the goods are out for delivery.
How can I print my picking, packing and shipping list?
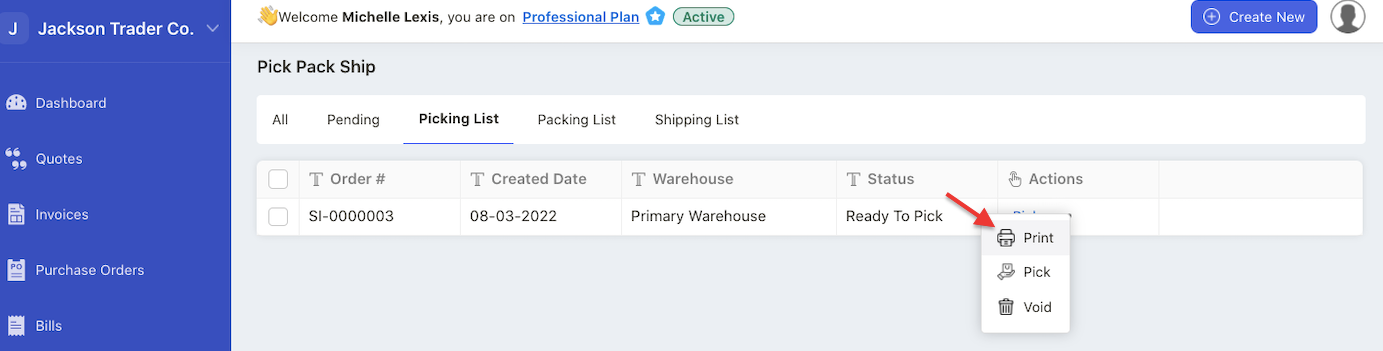
Go to Actions Column, and select the Print option.
Note: You will need to ensure that the status of the document number is shown as; ready to pick, ready to pack, and ready to ship in order to view the print button.
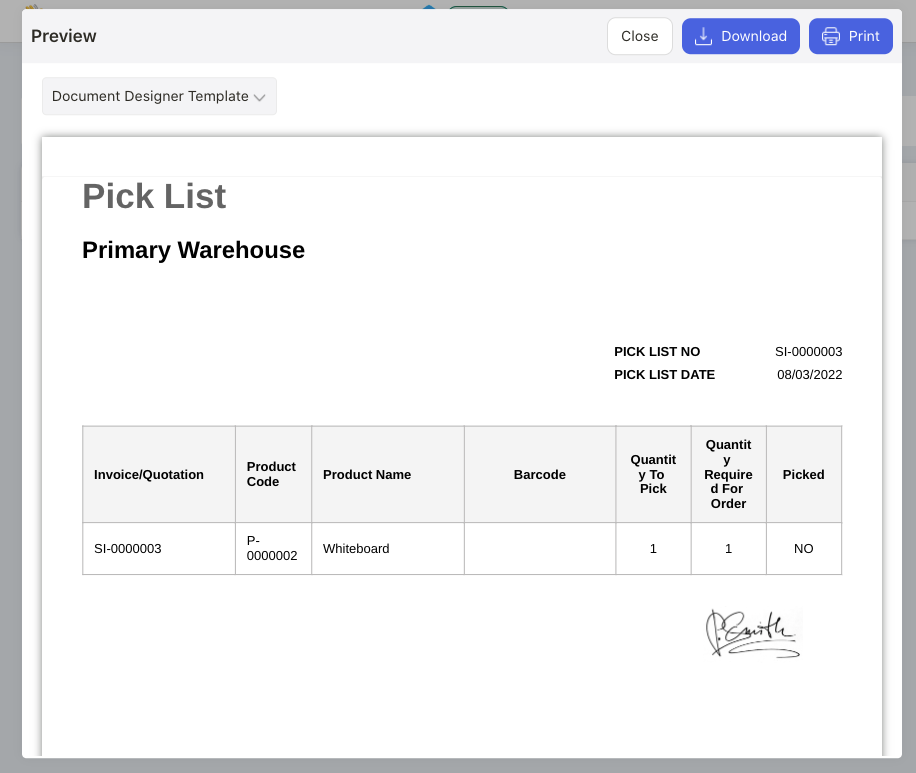
Click on the Print button to print the picking, packing, and shipping label.
You can also click on the download button to save this template in pdf format.
How can I edit the default picking, packing and shipping label?
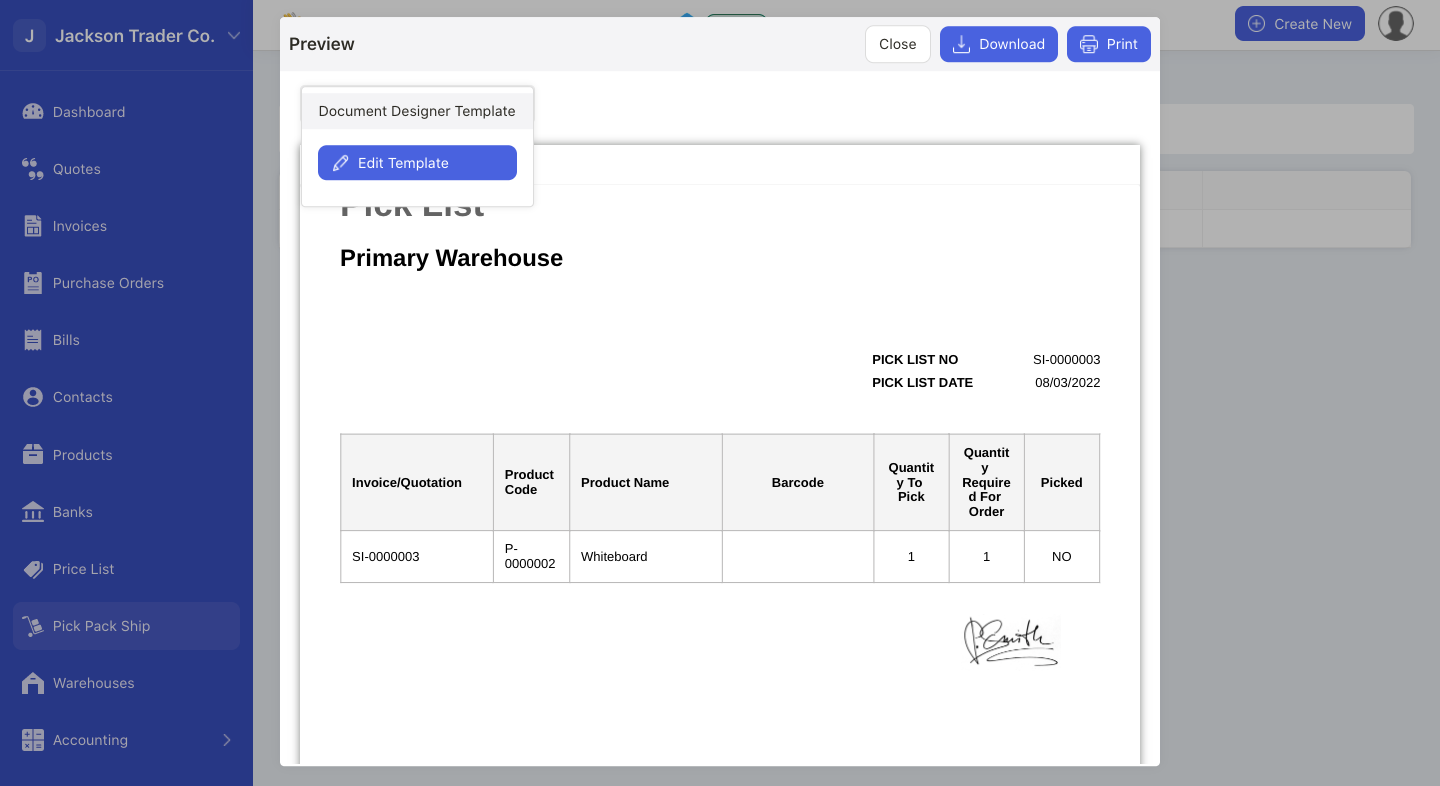
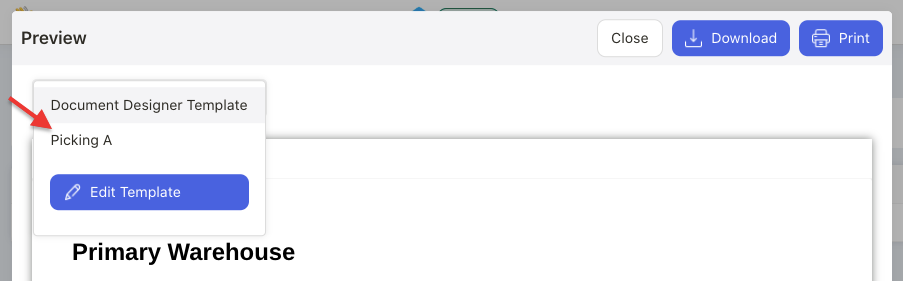
Click on the drop-down arrow next to the document designer template.
Select the Edit Template button. The system will re-direct you to our document designer template page.
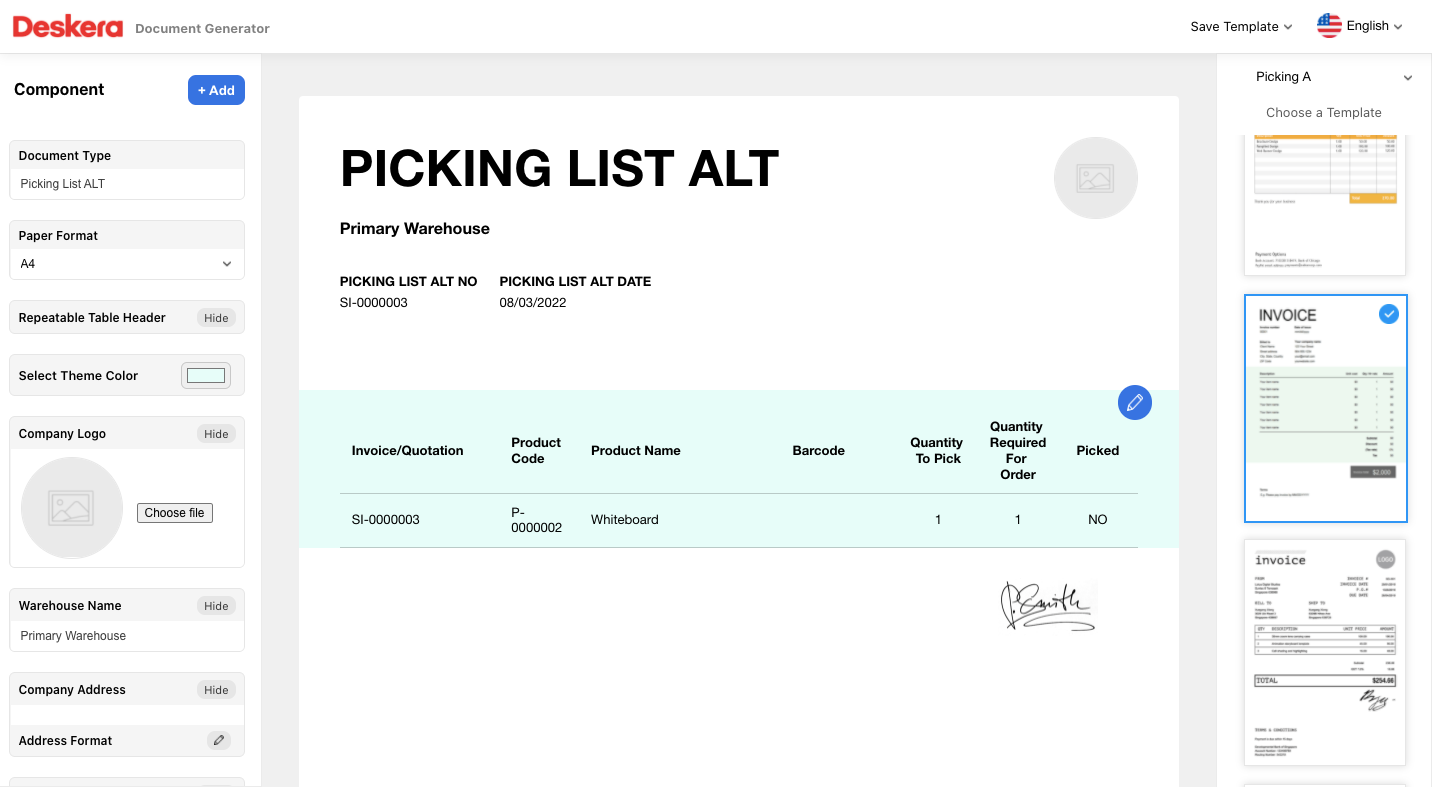
On this page, you can choose your preferred template on the right-hand side panel.
On the left-hand side panel, you can;
- edit the document type here
- choose you preferred label format
- you can choose to either hide or show the repeatable table header
- show or hide the company address
- show or hide the picking/packing/shipping list number
- choose your preferred date format
- choose the picking/packing/shipping list date date
- show or hide signature
- show or hide terms and conditions field
- show or hide notes
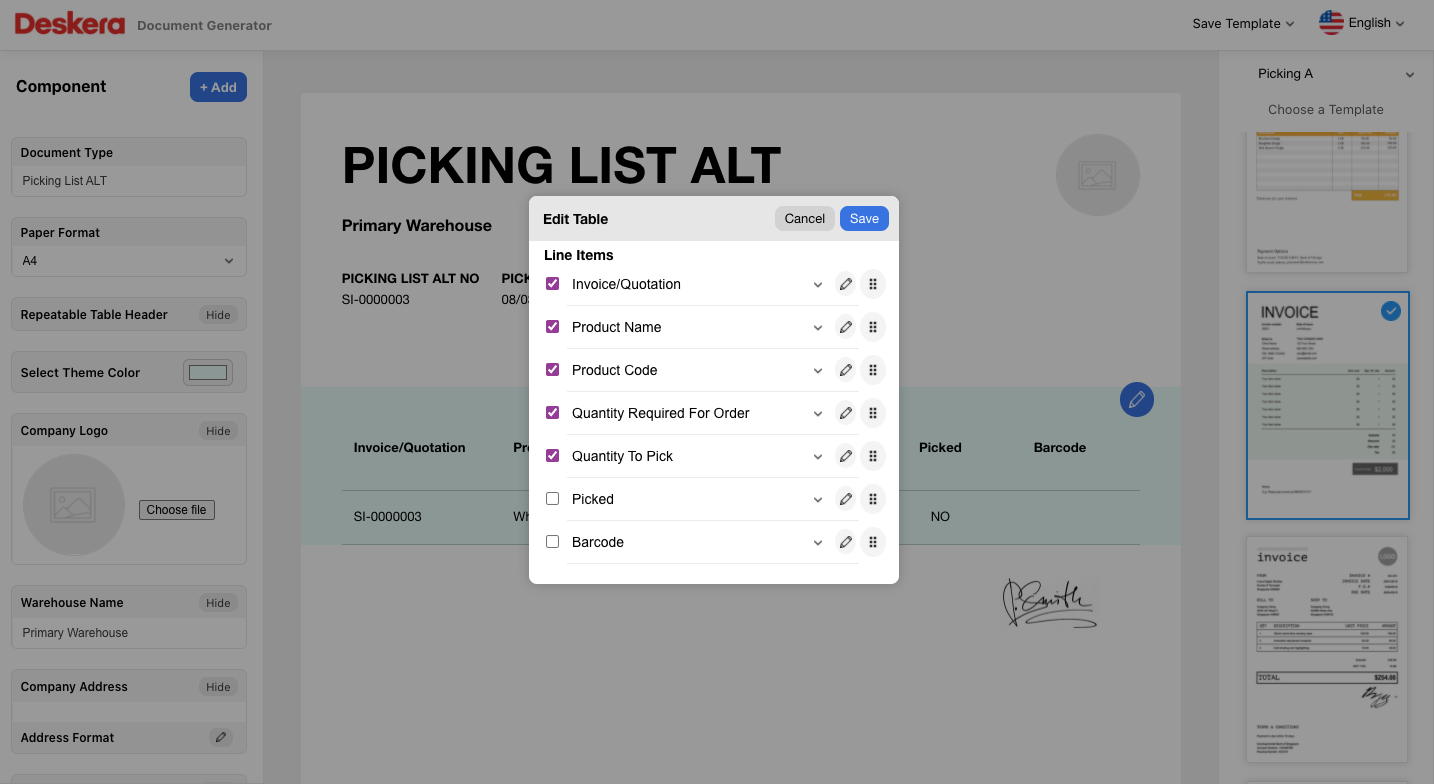
In addition, you can click on the edit button on the table to configure the table header. You can edit, change or disable table header as per your requirement.
Click on the grid icon to rearrange the table’s sequence from left to right.
Finally, click on the save button.
Go back to the preview page. Click on the drop-down arrow again.
You should be able to choose newly created Pick, Pack and Ship label.
How can I delete the picking, packing and shipping order?
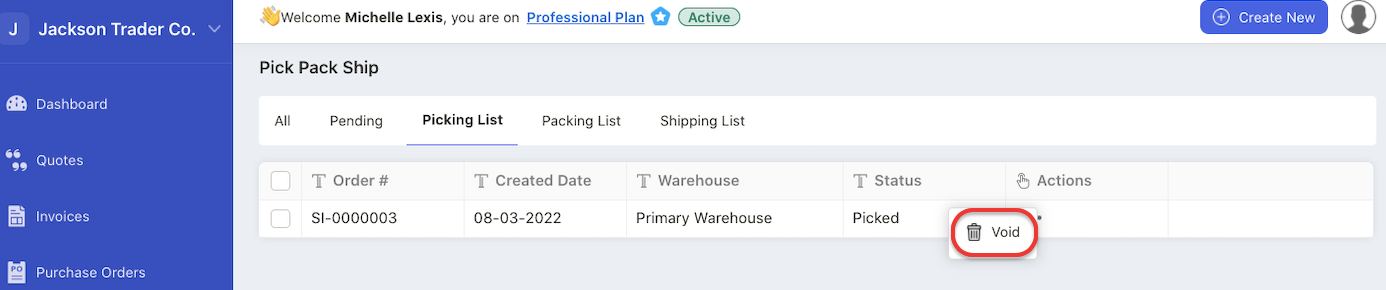
In the respective tab, click on the void button to delete the picking, packing and shipping order.