

We understand that it can be tedious and time-consuming to create sales invoices manually.
Hence, with the import sales invoices feature, we hope to take your blues away.
This article will guide you on how to import sales invoices to Deskera Books with a few easy steps.
To find out more, please read more below.
How can I import sales invoices to Deskera Books?
To import sales invoices to Deskera Books, you can follow the steps as mentioned below:
- Login to your Deskera account.
- On the sidebar menu, click on the Sell tab.
- Next, click on the invoice tab to switch to the invoice page.

4. On the invoice page, click on the Import button.
5. This action will direct you to the following screen as shown below.
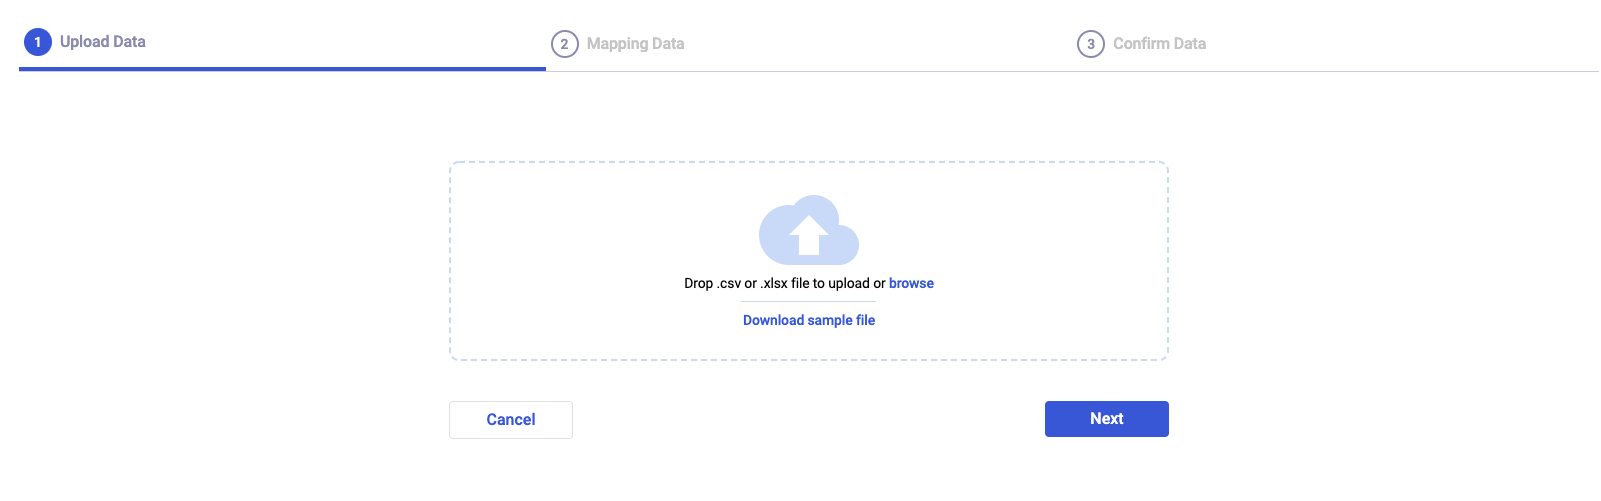
6. There are three steps that you need to go through to import the sales invoices successfully:
- Step 1- Upload data
- Step 2- Mapping Data
- Step 3 - Confirm Data
Step 1 - Upload Data
Follow the steps stated below:
- You will need to retrieve the sample file from our system by clicking on the download sample file button at this stage.
** Please note that it's mandatory to use our sample import file without changing the fields in it. If you use your sample file, our system won't be able to detect the version of your file.
2. Open the file once you have downloaded it. As you can see in the image below, the file downloaded contains the fields you need to fill-up.

3. Fill in the following fields as shown:
- Invoice Number* - The invoice's sequence number
- Contact name* - Choose the contact name that is already available in the Contact Module. If not, the system couldn't identify this contact.
- Invoice Date* - The invoice creation date. Follow the date format as per the company tab.
- Invoice Due Date - The due date for the customers to make payment
- Currency - The currency used to transact with the customers
- Exchange Rate - The conversion rate involved
- Unit Price is Tax Inclusive - If the price is inclusive of tax, enter true. If not, you can set it as false.
- Memo - Description of the invoices
- Fulfillment Status* - Enter FULFILLED if your customers already receive the products. Enter as UNFULFILLED if you have not delivered the goods
- Warehouse - The place you used to store your goods
- Product Name* - The product's name. Ensure that this product is already available in the Product Module
- Product Description - The product's specification
- Product Quantity* - The product's quantity available in the warehouse
- Unit Price* - The price of a single unit of product
- Tax - The tax amount of the product in a flat amount
- Discount - The discount given to the product in a flat amount
Fields with * are mandatory fields.
4. Once you have filled in the respective fields, save it in a CSV file or .xlsx format.
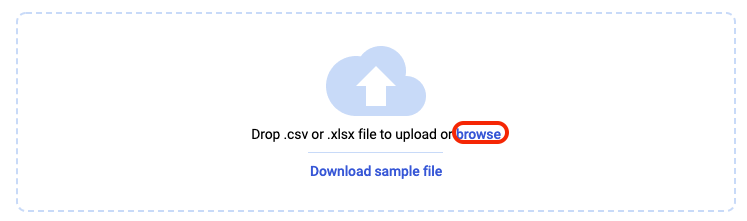
5. Click on the Browse button >> Enter the file name >> Click Next
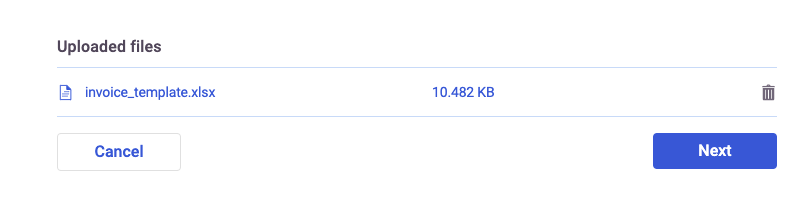
6. You can view the uploaded file here with the file size information. Click on the bin icon to remove it if you have accidentally uploaded the wrong file.
7. Click Next.
Step 2: Mapping Data
- In the second stage, you will need to ensure that the Deskera Header, Imported File Headers, and sample values are matched.
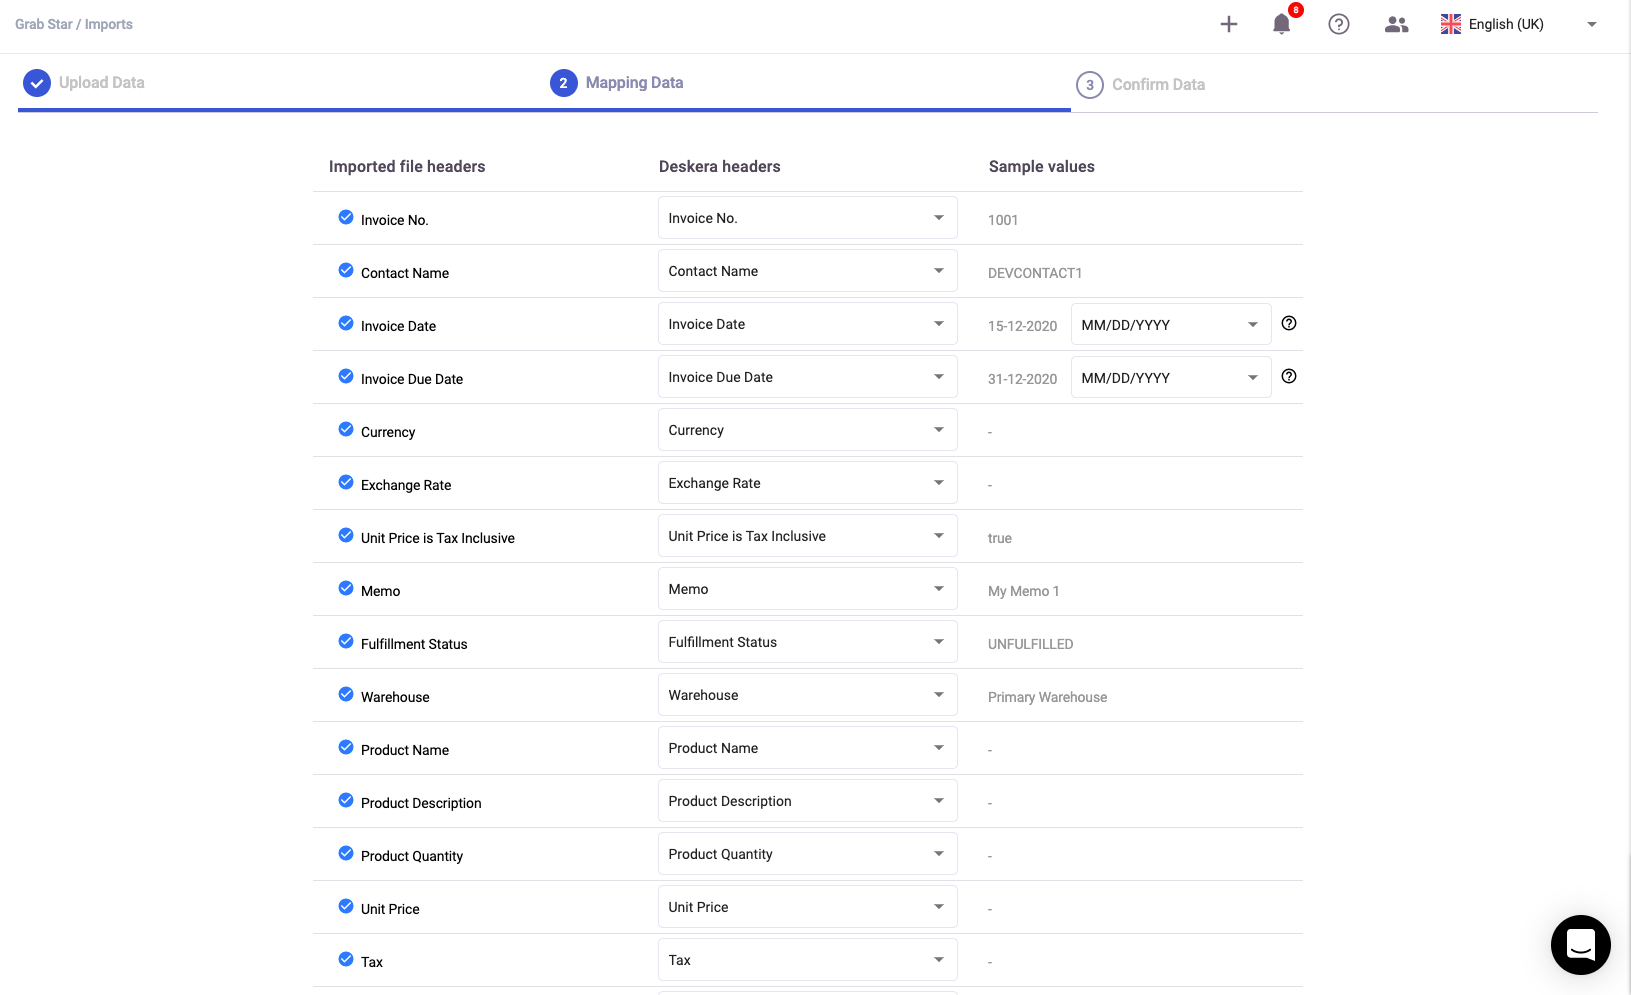
2. You can always change the imported file header fields by clicking on the drop-down arrow. This action will change the sample values accordingly.
3. Change the date format for this file by clicking on the drop-down arrow for the invoice date and invoice due date.
**The date format is populated as per your organization setting.
4. Once you have verified all the information here, click on the Next button.
Step 3: Confirm Data
- After mapping the data, you will need to confirm the data's format and accuracy in the following stage.
2. If the system cannot verify the respective field, then the field will be highlighted in red boxes as per the image below.
3. Click on the exclamation mark icon to identify why the system cannot verify the respective field.

4. You can also tick the invalid record checkbox so that the system can populate all the invalid records.
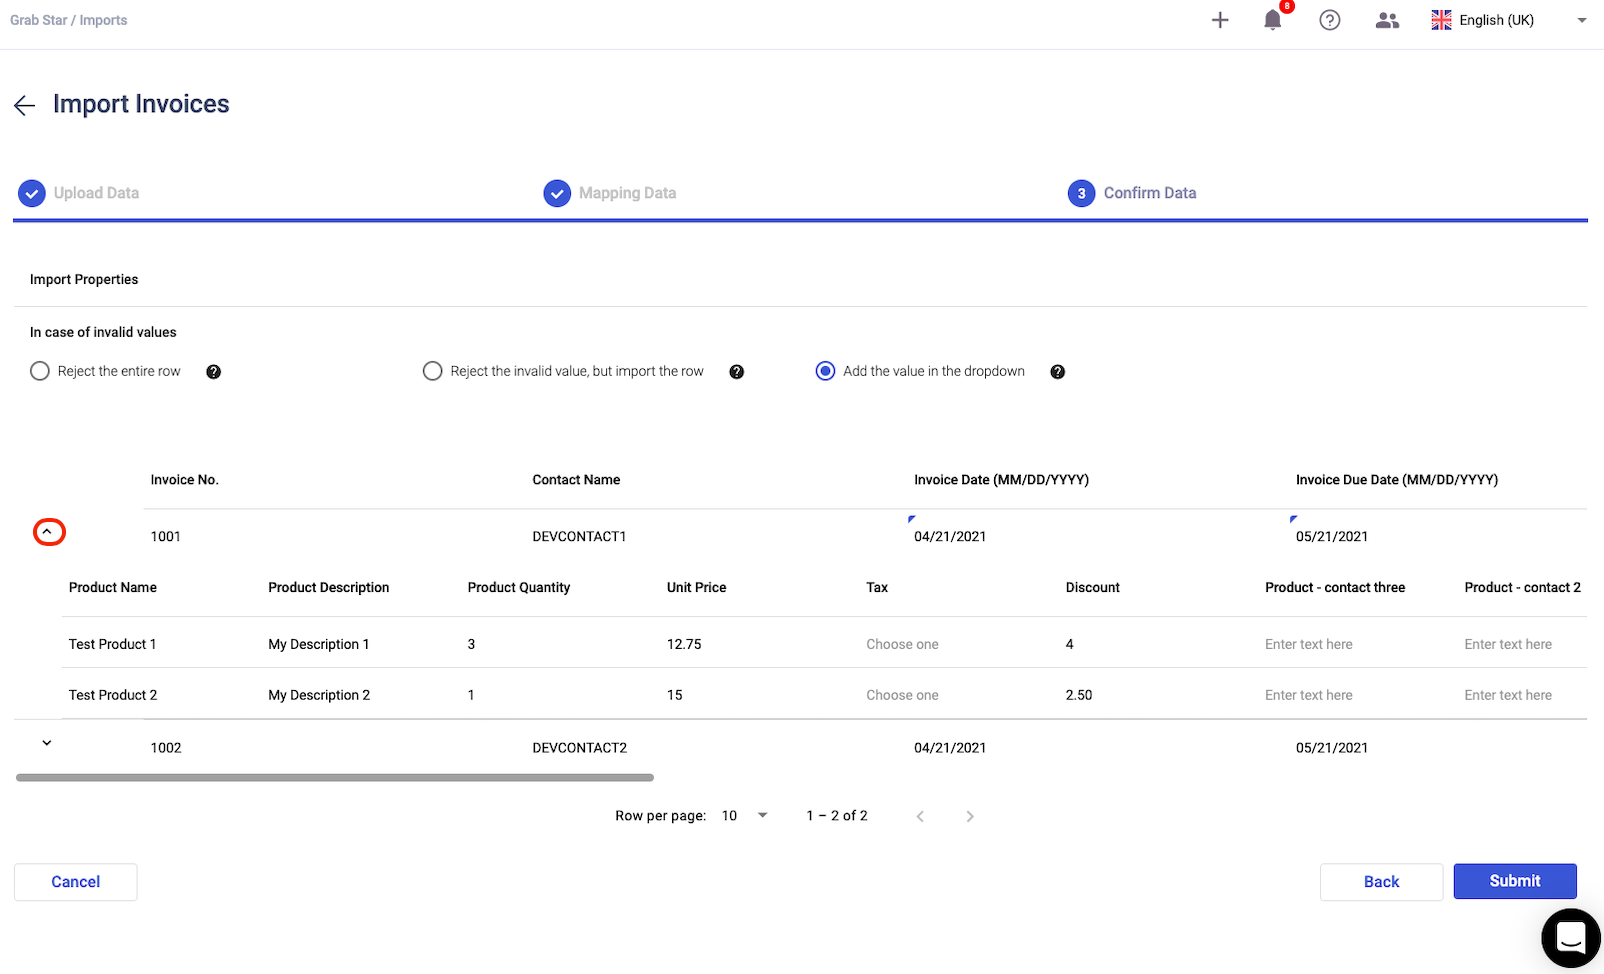
5. Click on the drop-down arrow next to the invoice number to view the product line item.
6. Edit all the invalid records manually so that it becomes valid for a successful import.
7. Click on the Submit button
8. You will be prompted with a message stating that all the sales invoices are imported successfully.
Where can I view the rejected file? And why is the file rejected?
For any failed records, the system will prompt you with a message, as shown below.

To view the rejected file, please follow the steps mentioned here:
- Go to Settings on the sidebar menu.
- Click on Import Log.

3. You can view the original file, imported file, and rejected file on this page. Click on the document icon to download it.

4. If you click on the rejected file, you can view why some of the records failed to be uploaded.
5. For example, if the invoice number already exists in the system, our system won't import the data again.
6. Besides, if you have yet to create the contact profile in the contact module, you cannot import this record as well.
Once you have identified the errors, you can repeat step 1 to step 3 again to quickly restart this process.