

As part of the government’s initiative to streamline invoicing processes nationwide, the IMDA has introduced e-invoicing among businesses, currently known as InvoiceNow. This initiative helps businesses speed up their operational process, improve payment cycles, and help reduce business costs in the long run.
Deskera is a proud member of the Certified Access Points and Solutions Providers. You can write to us for your request to join the PEPPOL network once you have successfully signed up your Deskera Books account.
We will assist you to register for a PEPPOL ID so that you can start using the InvoiceNow feature immediately. To find out more about the listed solution providers by IMDA, check this link here.
If you wish to find out more about the eInvoicing flow in Deskera Books, read more below.
How do I indicate my PEPPOL ID in Deskera Books?
If you already have an existing Peppol ID, that’s great.
Follow the steps below to indicate your Peppol ID in Deskera Books.
1. Login to your Deskera Books account here.
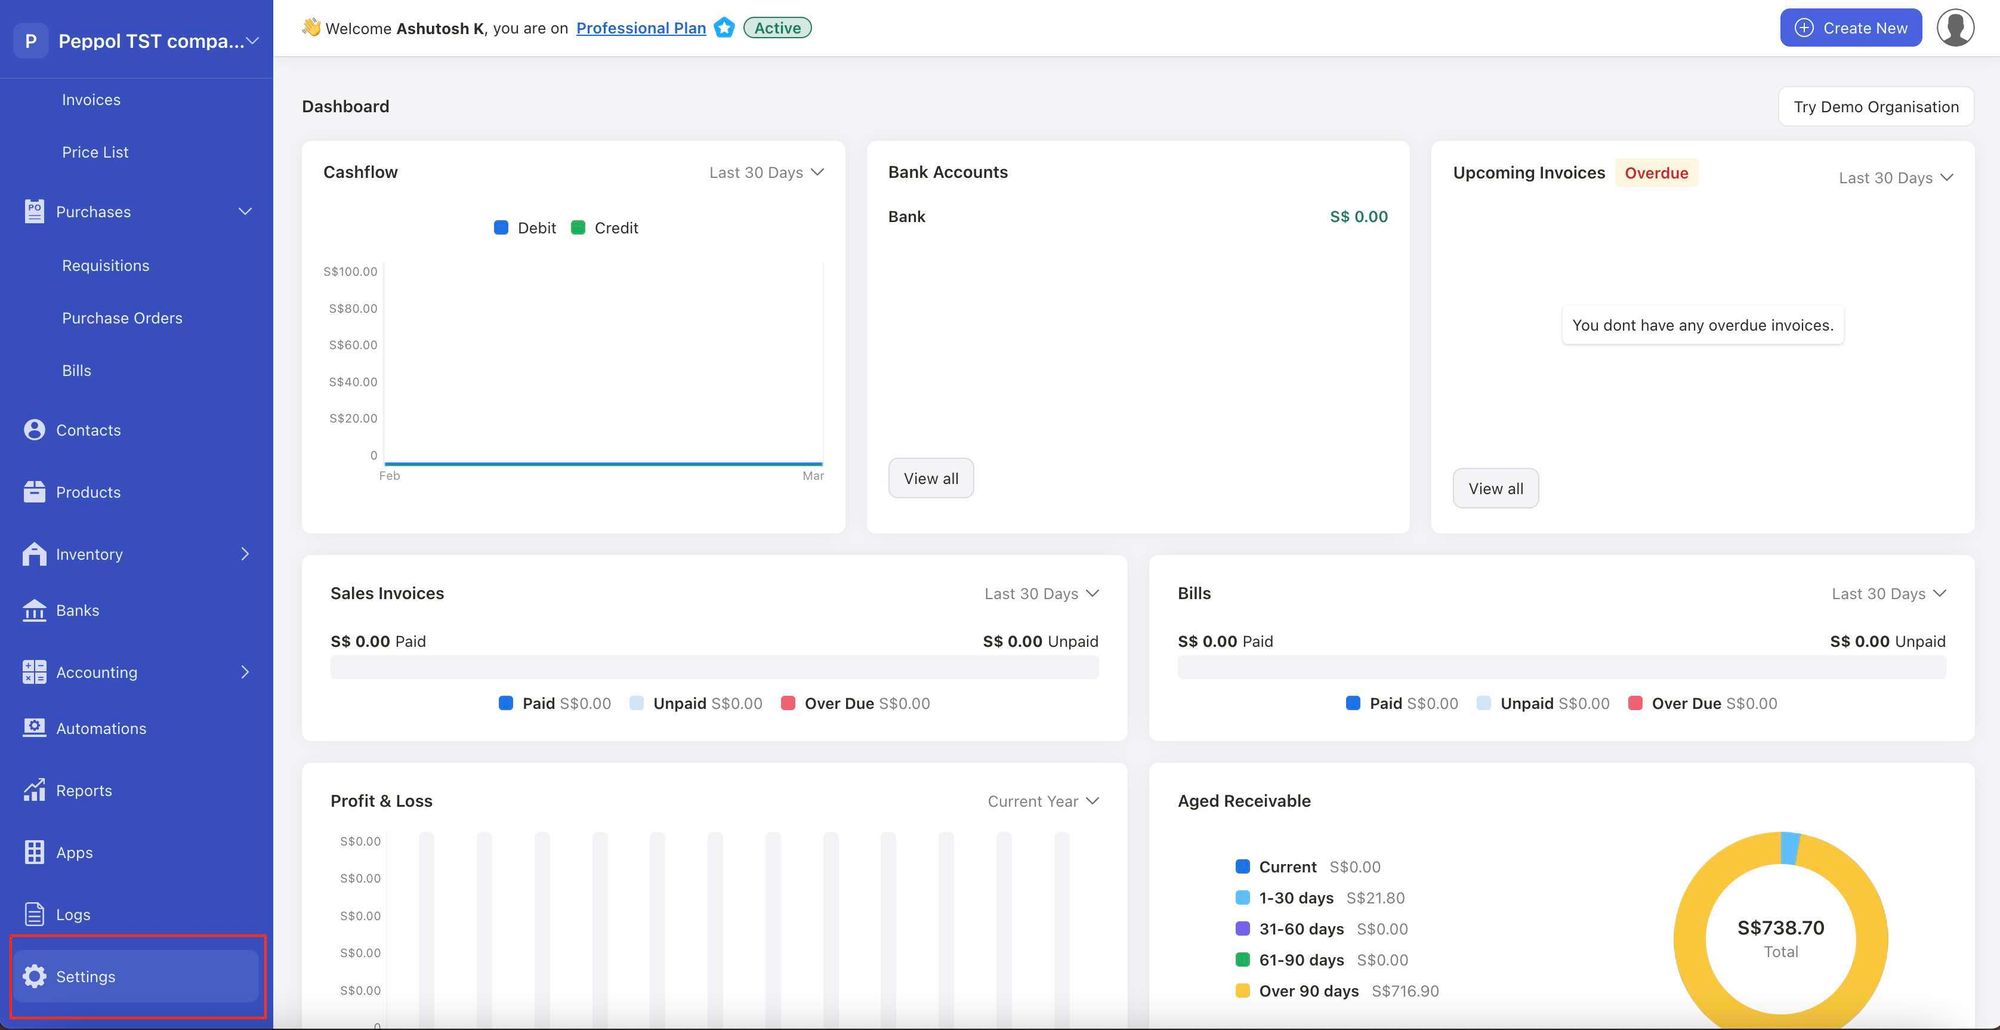
2. Click on Setting via the sidebar menu.
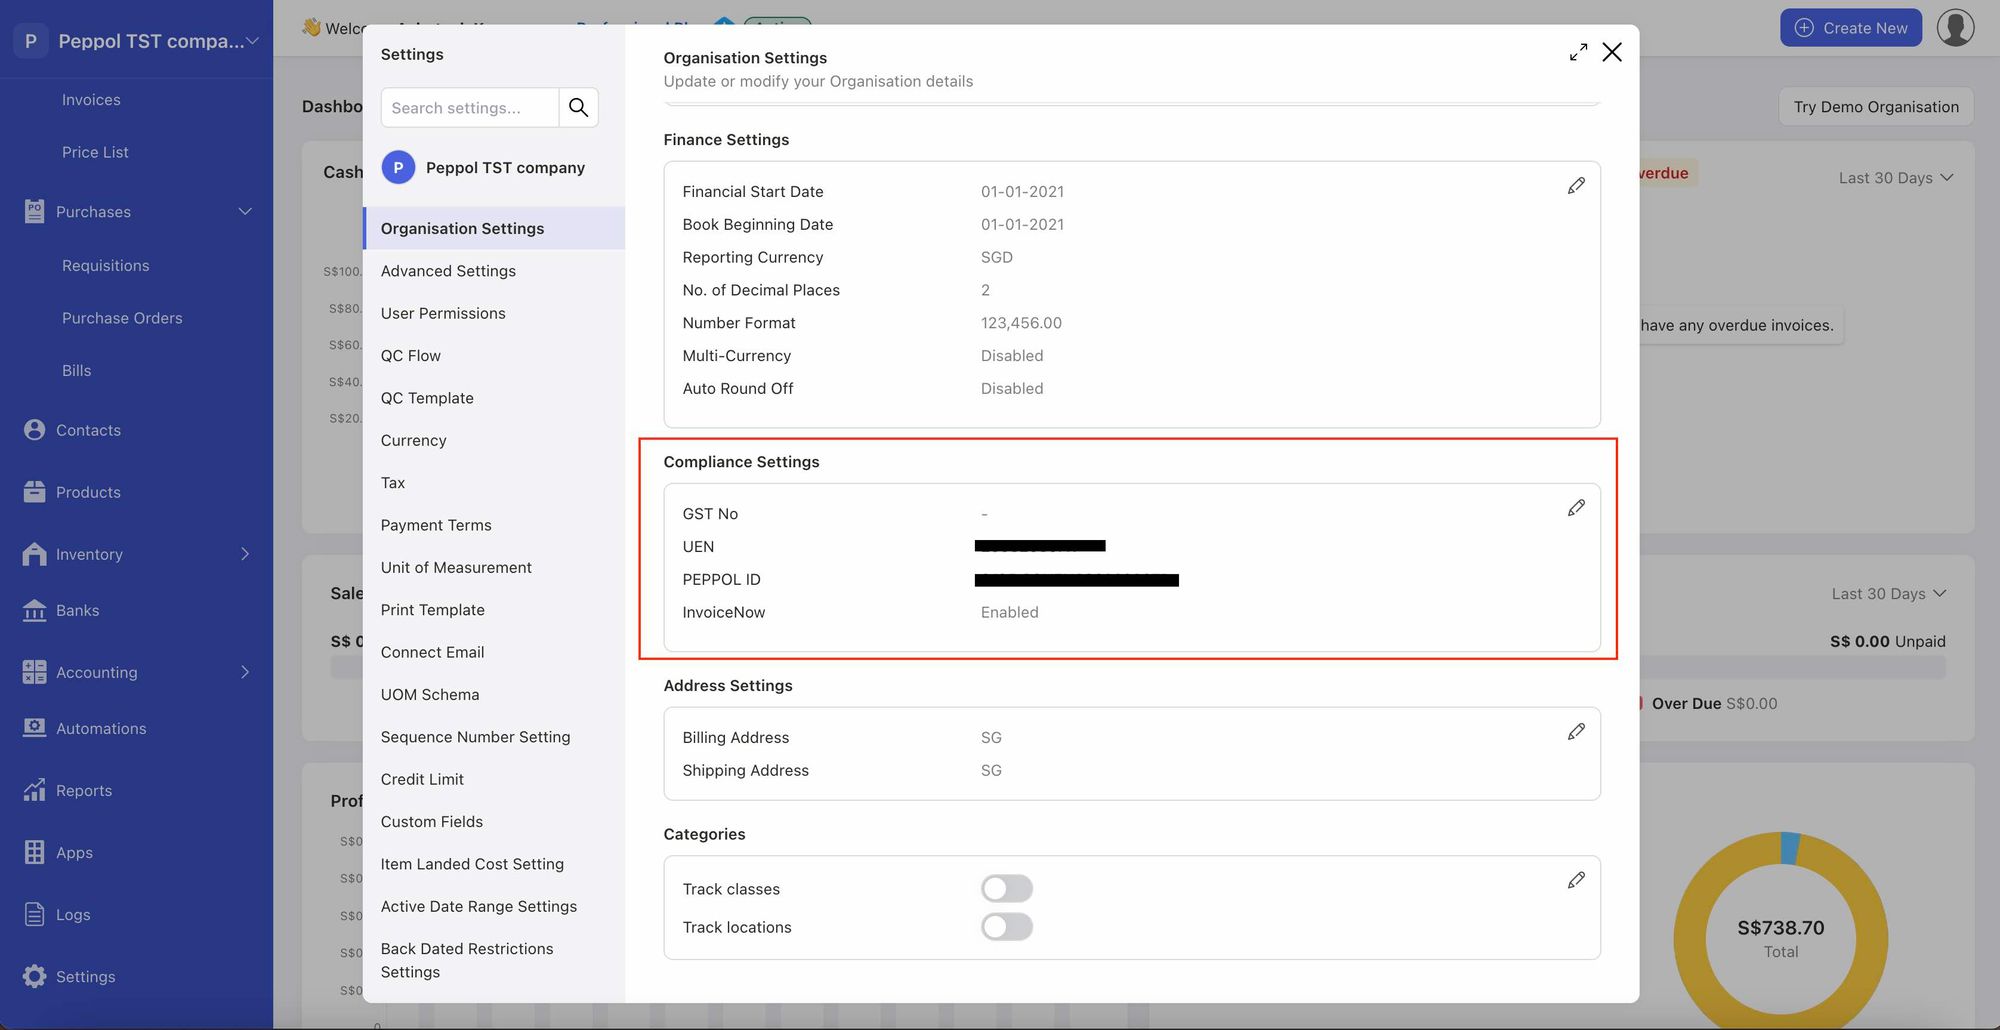
3. Under Organisation Profile, scroll to Compliance Setting, and click on pencil icon to edit the details.
4. Switch to Compliance tab.
5. Enter your business UEN number, your GST number and enable the InvoiceNow toggle.
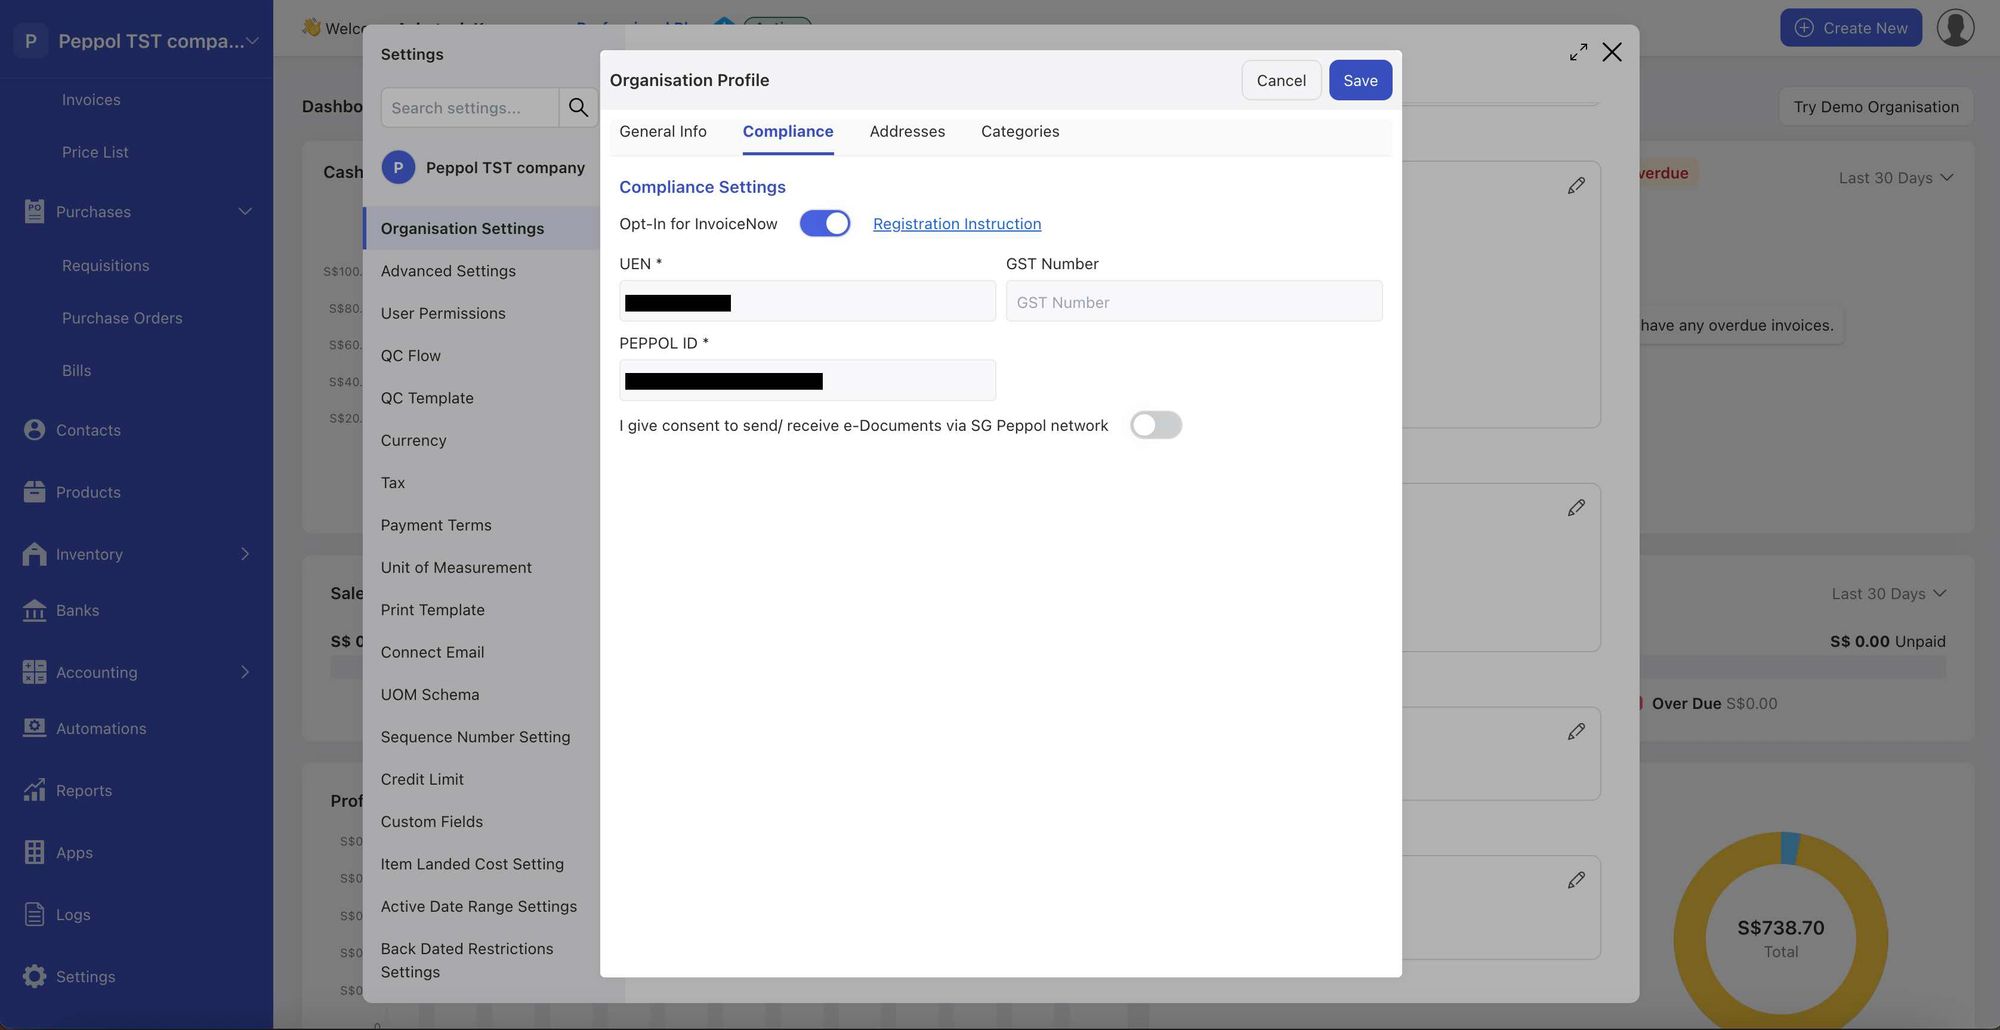
6. After you have enabled the InvoiceNow toggle, enter your Peppol ID and vendor ID.
7. Click on the Save button.
Note: You have to be a Singapore registered company to join the Peppol network.
How do I authorize Deskera to register for my business PEPPOL ID?
1. Once Deskera has registered your company's Peppol ID , you will receive an email via your company's CorpPass.
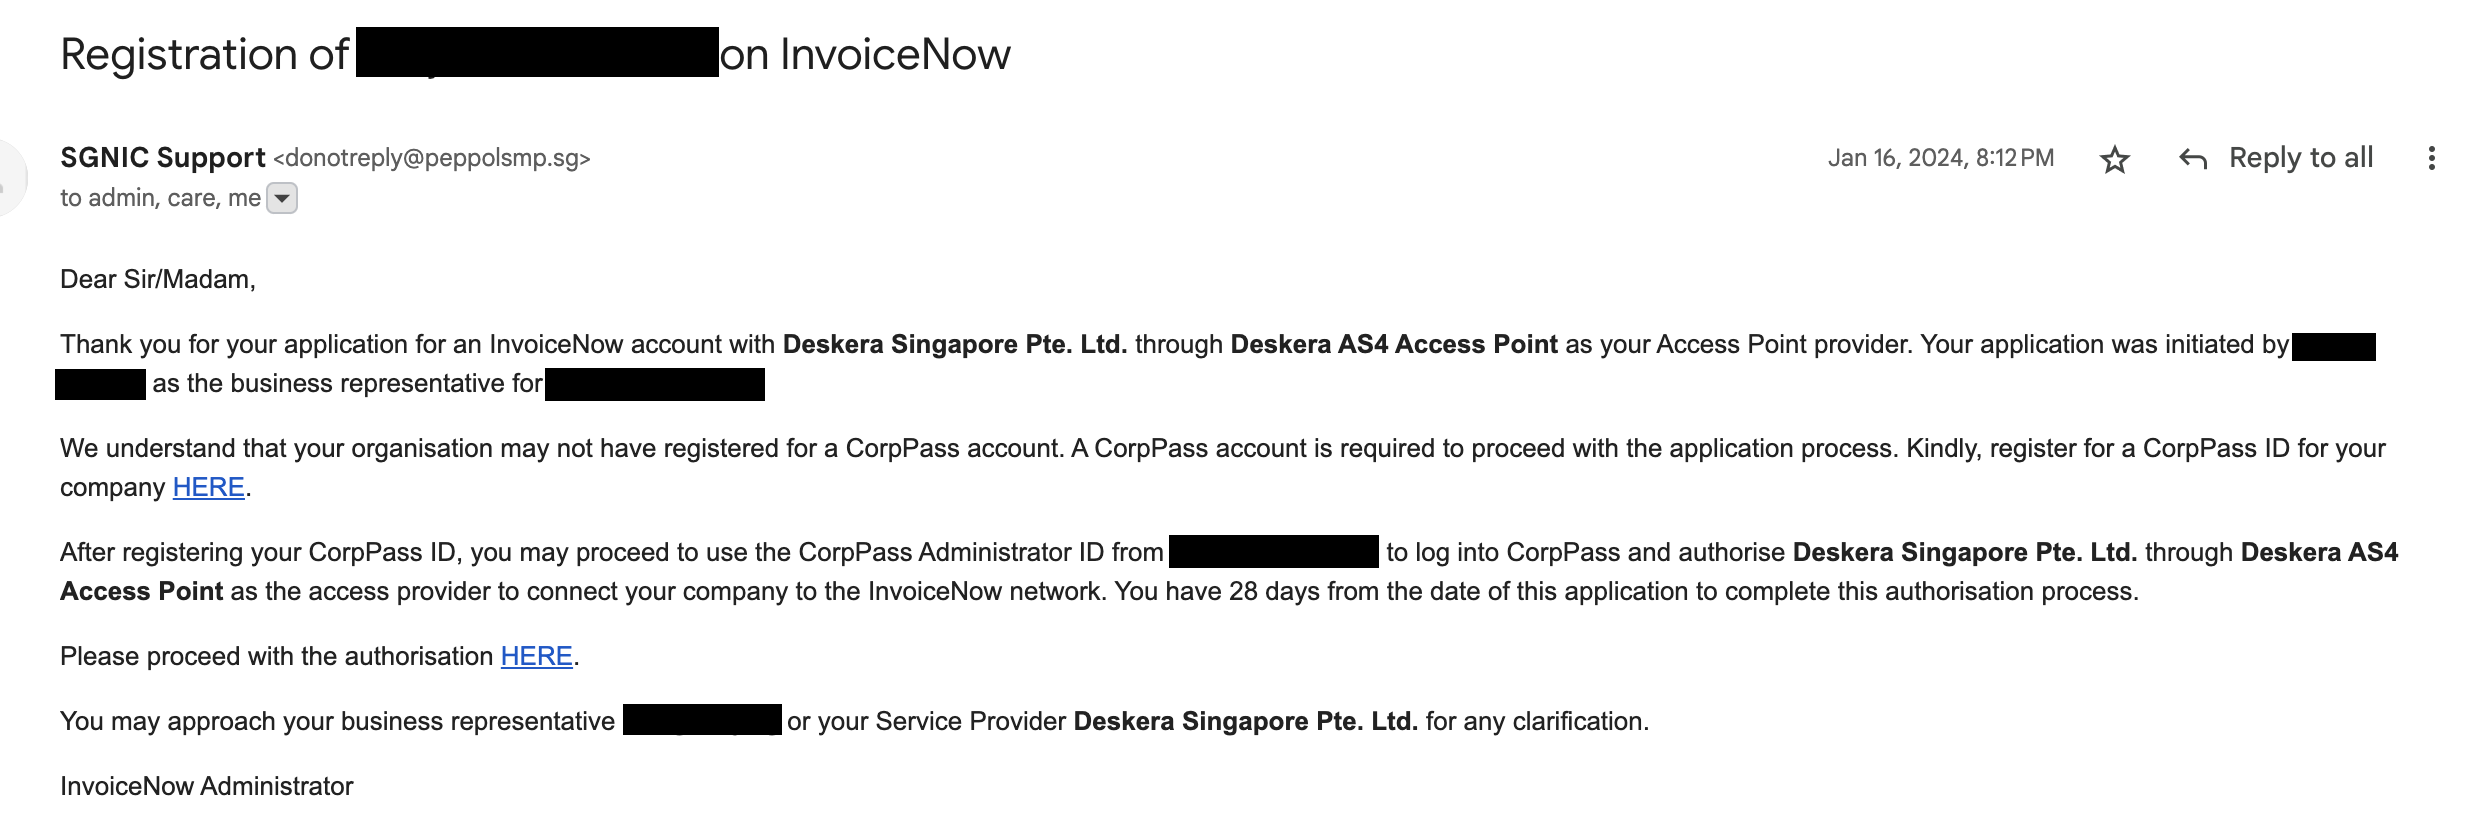
2. Your CorpPass representative will receive the email with the URL link in it. They will have to authenticate and authorise the AP and be registered on the InvoiceNow network using your Singpass ID.
3. After your SingPass validation, you will have to choose the right entity to access your company's CorpPass. Choose the company you are representing.
4. You will see a display on your screen showing successful registration after the system confirms the credential of the company you represent.
Note: You will need to register for a CorpPass ID to complete the PEPPOL registration successfully. The respective user will need to be assigned as a user by the company. If you are not the CorpPass user, the authorisation will fail.
How do I send an E-Invoice using InvoiceNow?
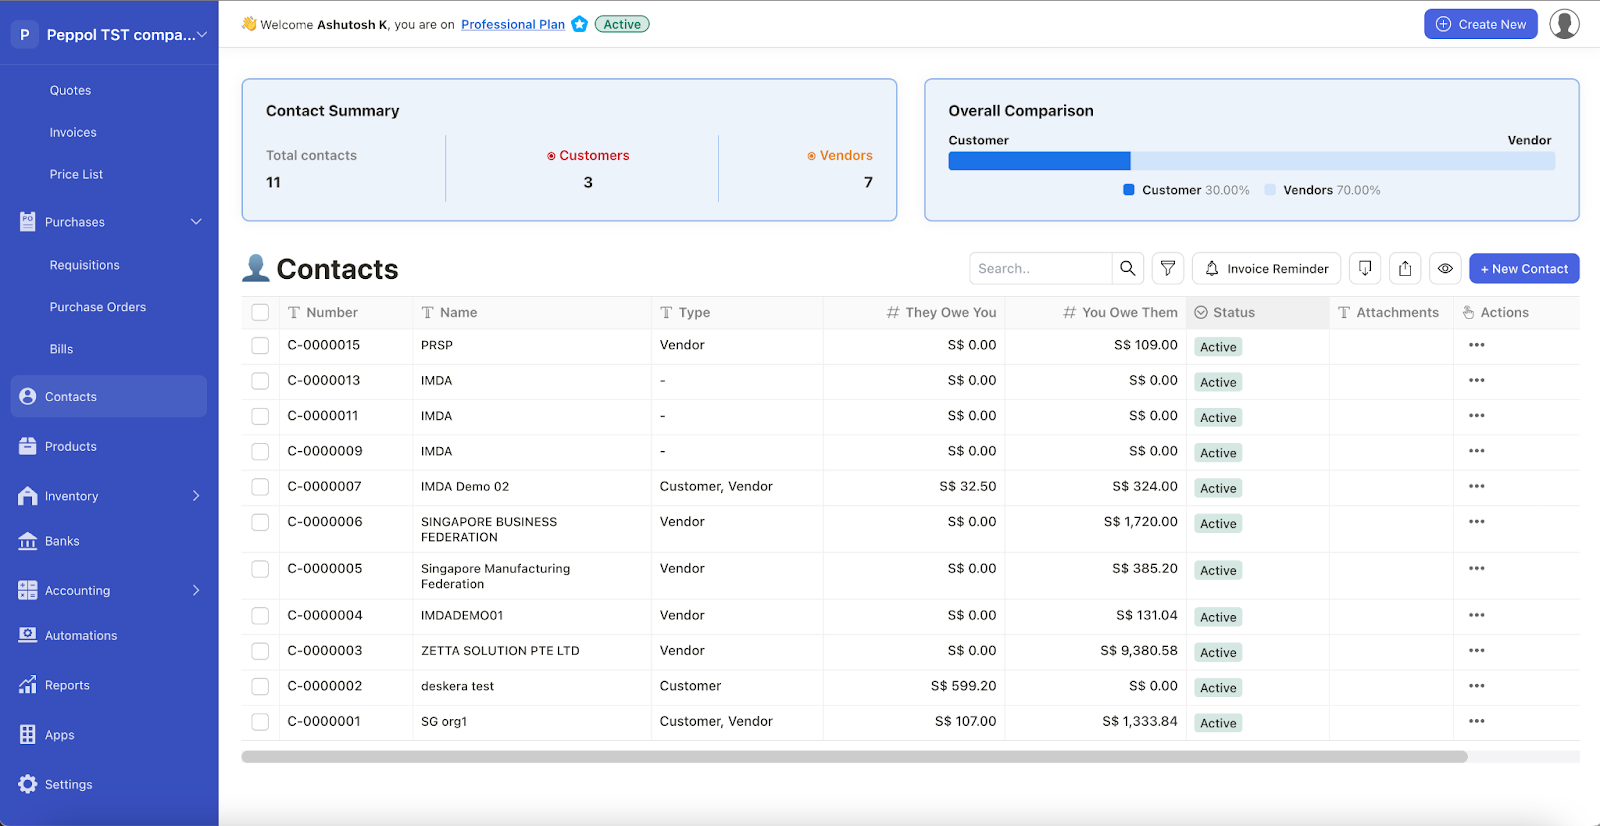
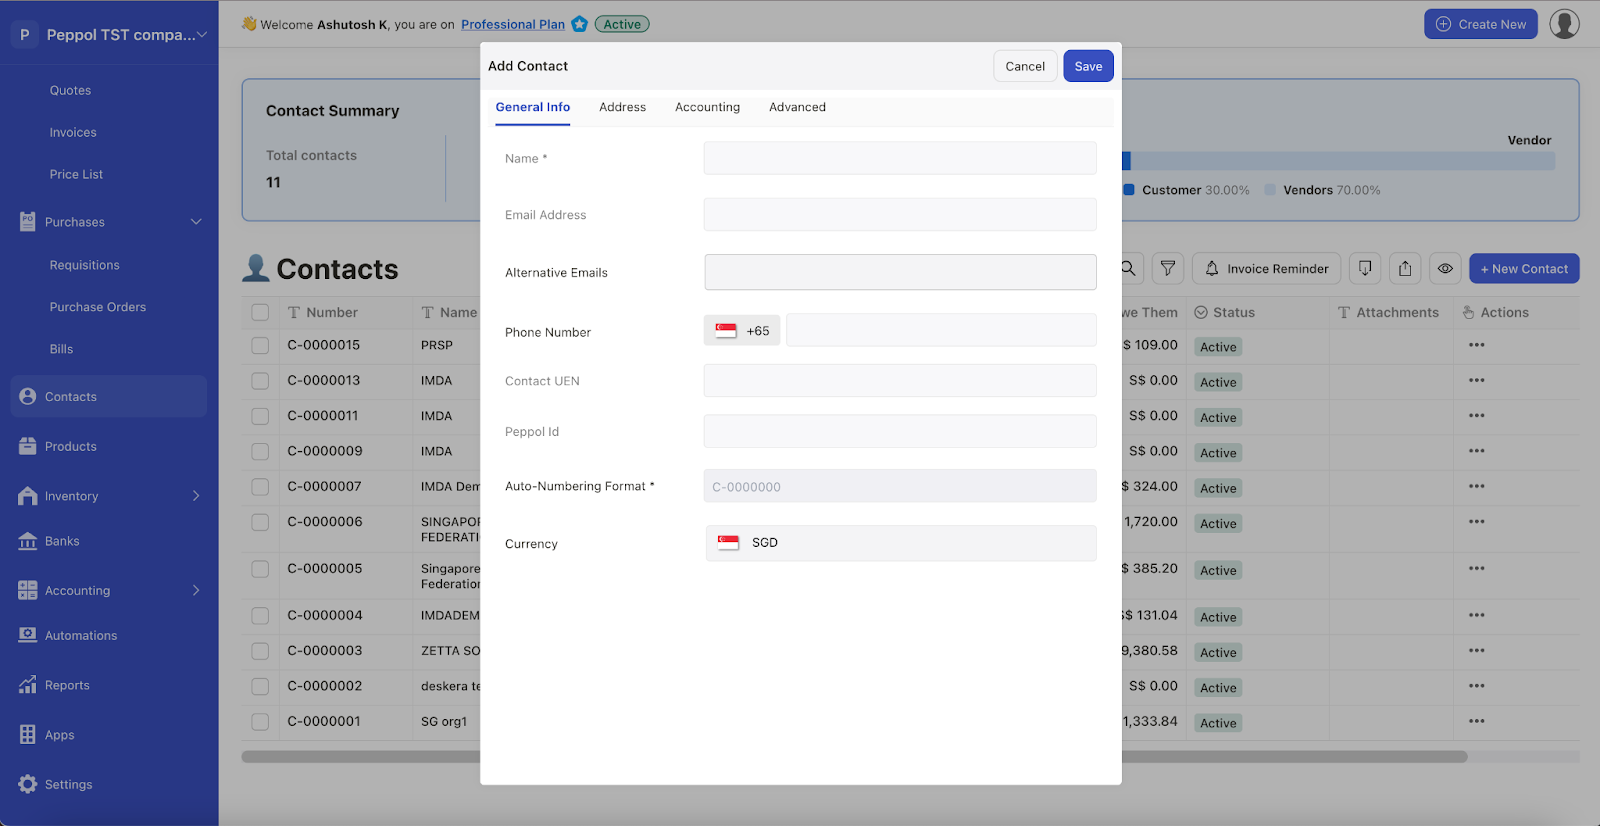
1. Once you have entered your Peppol ID in Deskera Books, go to Contact Module, and create a contact.

2. Enter your customer’s UEN number and Peppol ID in order to connect them to the PEPPOL network.
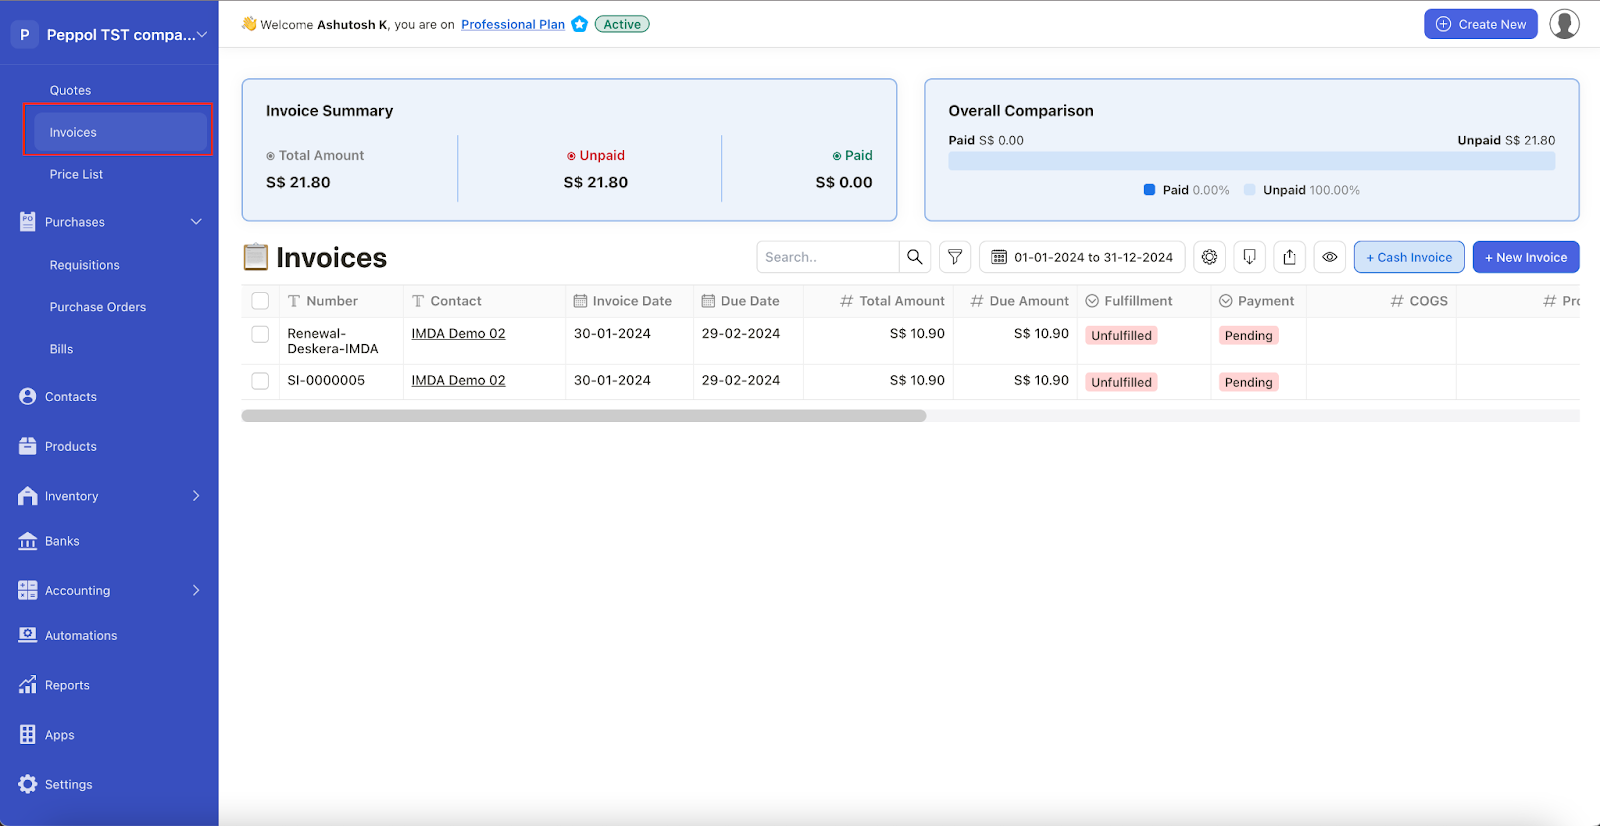
3. Next, create an invoice against the contact that you have created in Deskera Books. Save the invoice.
4. After saving the invoice, click on the three dots (the contextual menu).

5. Click on the Send InvoiceNow button. Deskera system will prompt a message stating the Invoice Now has been sent successfully to your customers.

6. Your customers will receive the invoice directly in their accounting software.
7. If your customer is using Deskera software, they should be able to view the invoice under the Buy Module >> Bill tab.
8. Your customers may send Invoice Response via their accounting software which you will receive in Deskera.
How do I send E-Invoice to Singapore Government Agencies?
The Accountant General's Department (AGD) has partnered with IMDA to promote eInvoicing via InvoiceNow amongst the government agencies in Singapore.
Businesses can now send E-Invoice to government agencies through the Peppol network, with the AGD as the central recipients for all the e-invoices submitted to the government sectors.
The AGD will evaluate, verify, and subsequently process the e-invoices received from the businesses before sending them to the respective government agencies.
Refer to the steps below on how to send an eInvoice to the government sector:
- Login to your Deskera account. Click on Books on Deskera Console, and the system will redirect you to Books Dashboard.
- Make sure that you have activated your Peppol ID as per the instructions above. (refer to the section "How do I authorize Deskera to register for my business PEPPOL ID?")
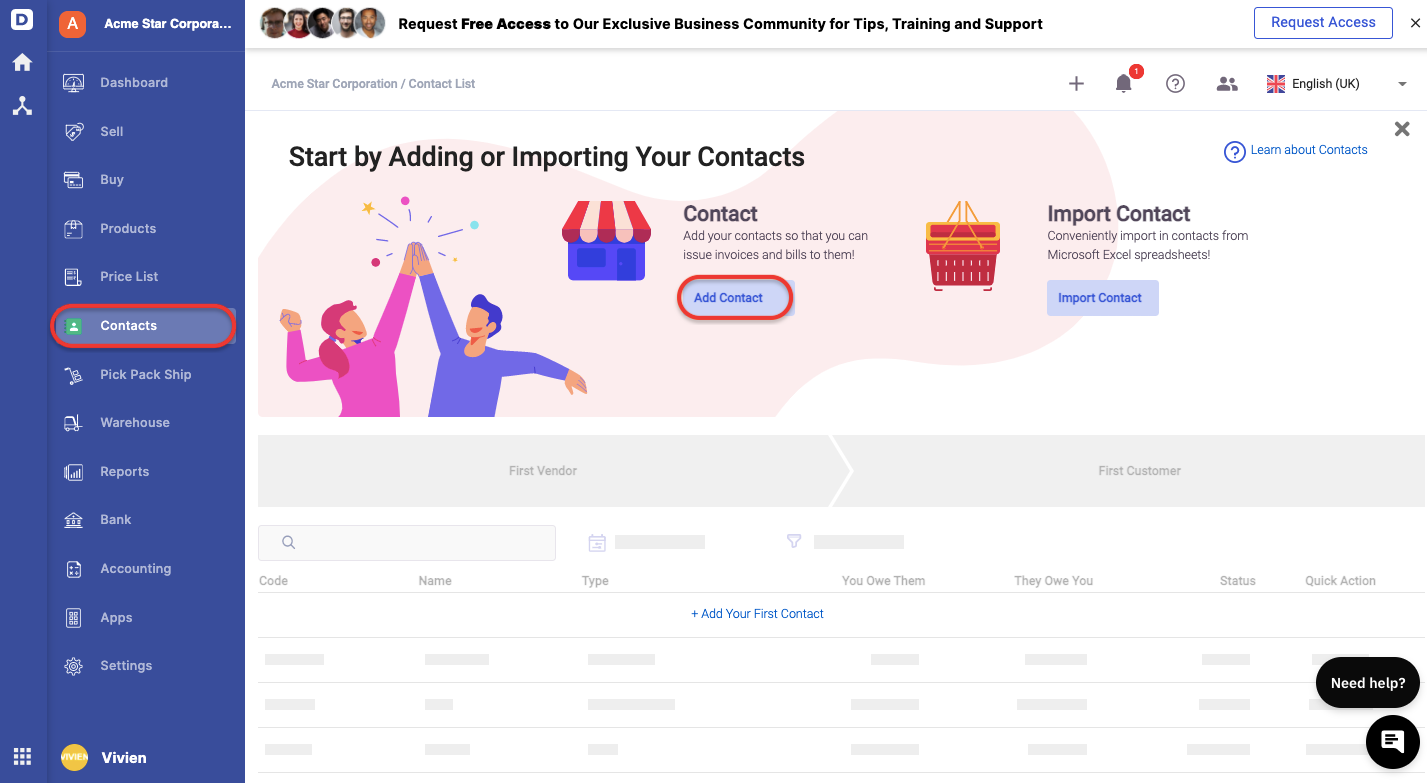
3. In Deskera Books, click on Contact on the sidebar menu to set up the government agency profile. Click on the Add Contact button.
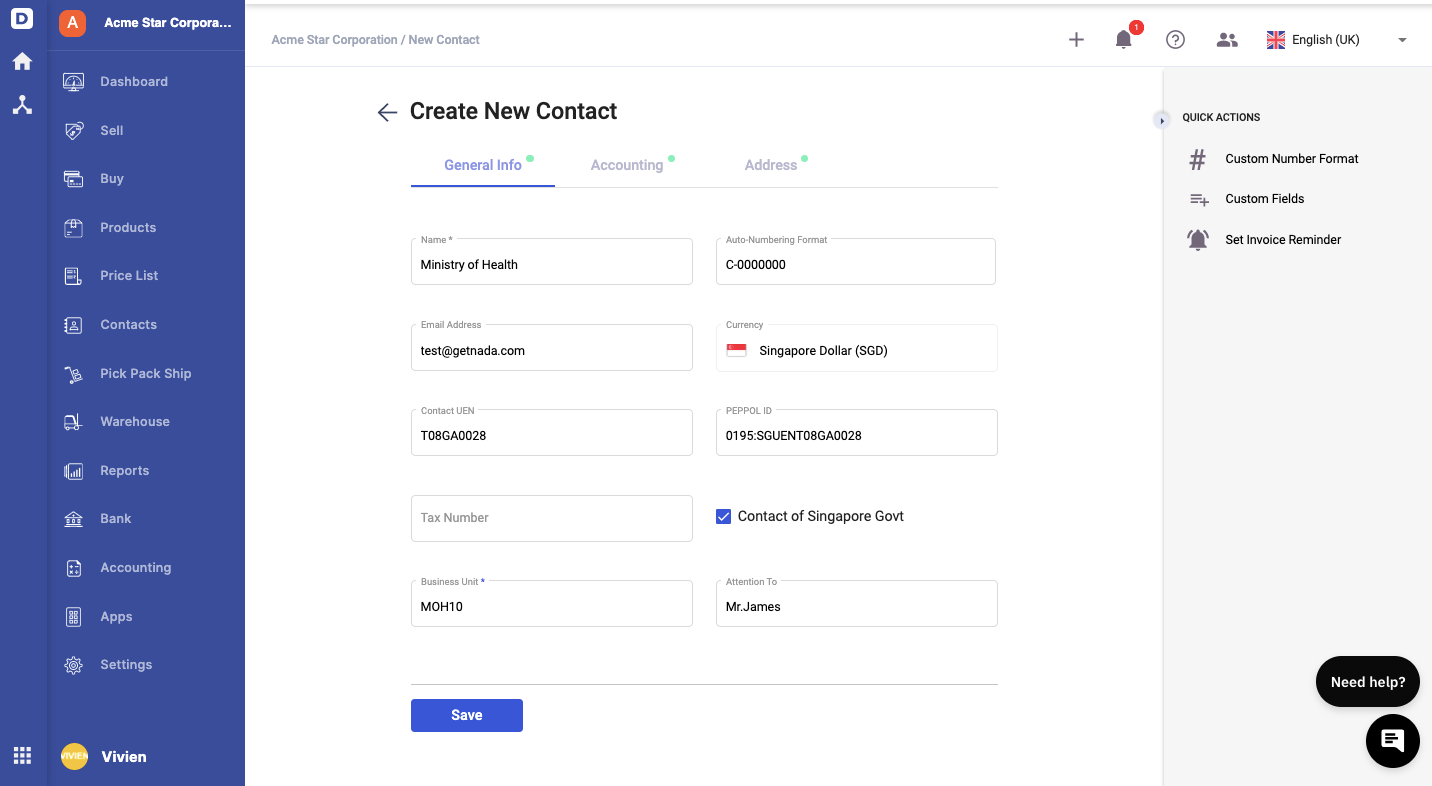
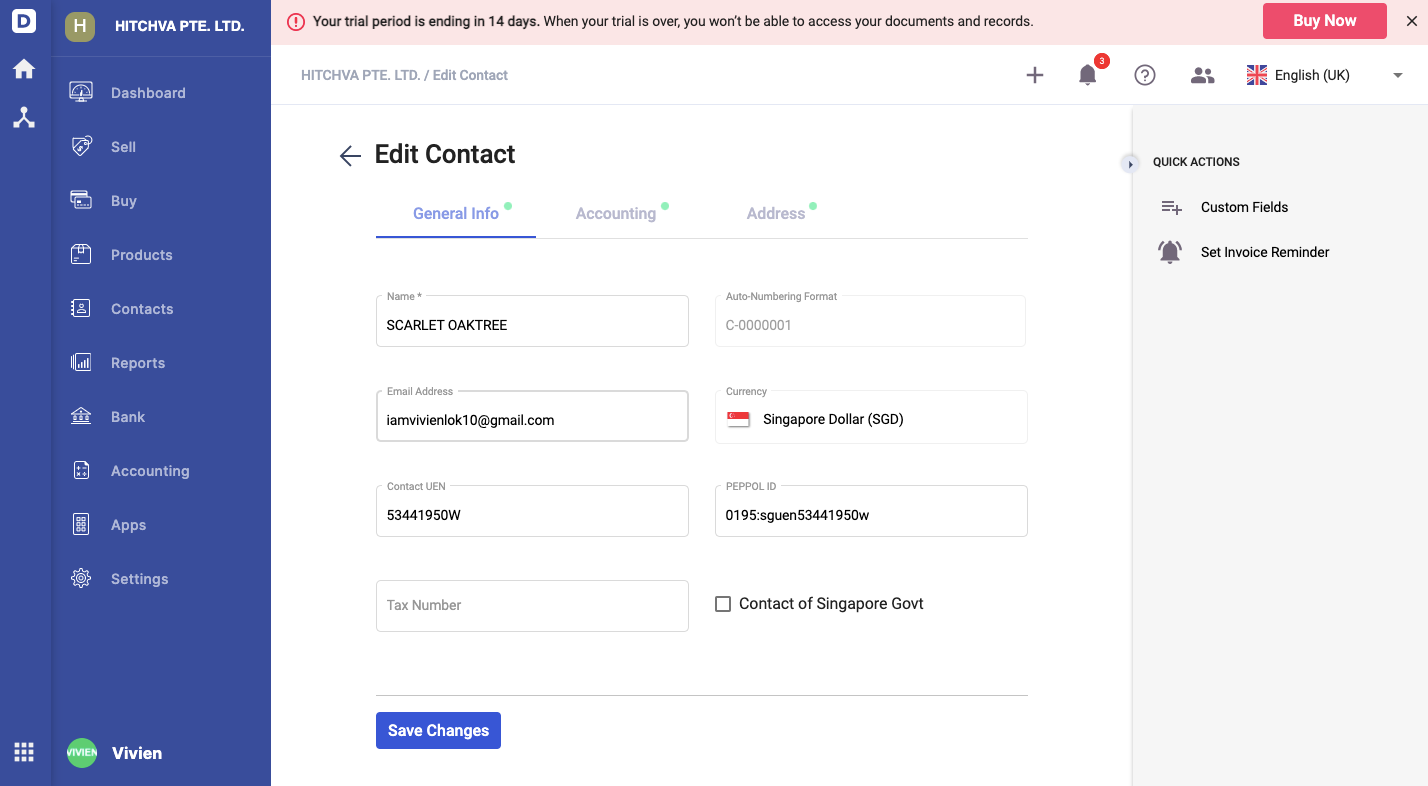
4. During contact creation, you are required to fill in the fields below:
- Name - The name of the government agency
- Auto-numbering format - Enter the Contact's sequence number in the system. You can refer to this guide to configure the document sequence in the Contact Module.
- Email address- The Contact's email address
- Currency - The currency used to transact with this Contact
- Contact UEN- Enter the government agency UEN. The UEN to be entered here is T08GA0028A (AGD UEN)
- Peppol ID - Enter AGD Peppol ID, which is 0195:SGUENT08GA0028A
- Tax number - Enter your business tax number
- Business Unit- Enter the government agencies' business units. If you are unsure of the business unit code, you can refer to the AGD website for your reference.
- Enable the checkbox "Contact of Singapore Government."
- Attention To- Enter the name of the recipient
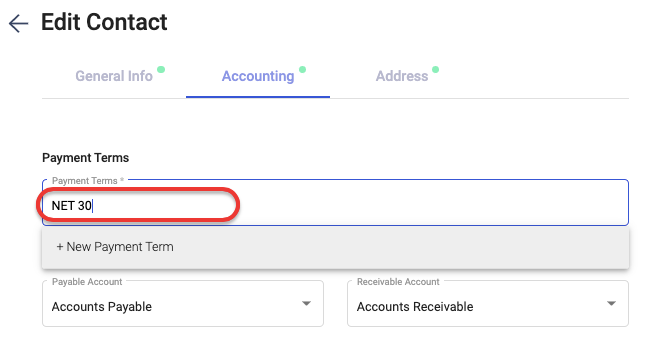
5. Under the accounting tab, please make sure that you have indicated the correct payment term for this contact. This is a mandatory field. If you're unsure on how to create a new payment term in the system, you can find out more from this guide.
6. Make sure that you have filled up all the fields in Accounting and Address Tab. Once you're done, click on the save button.
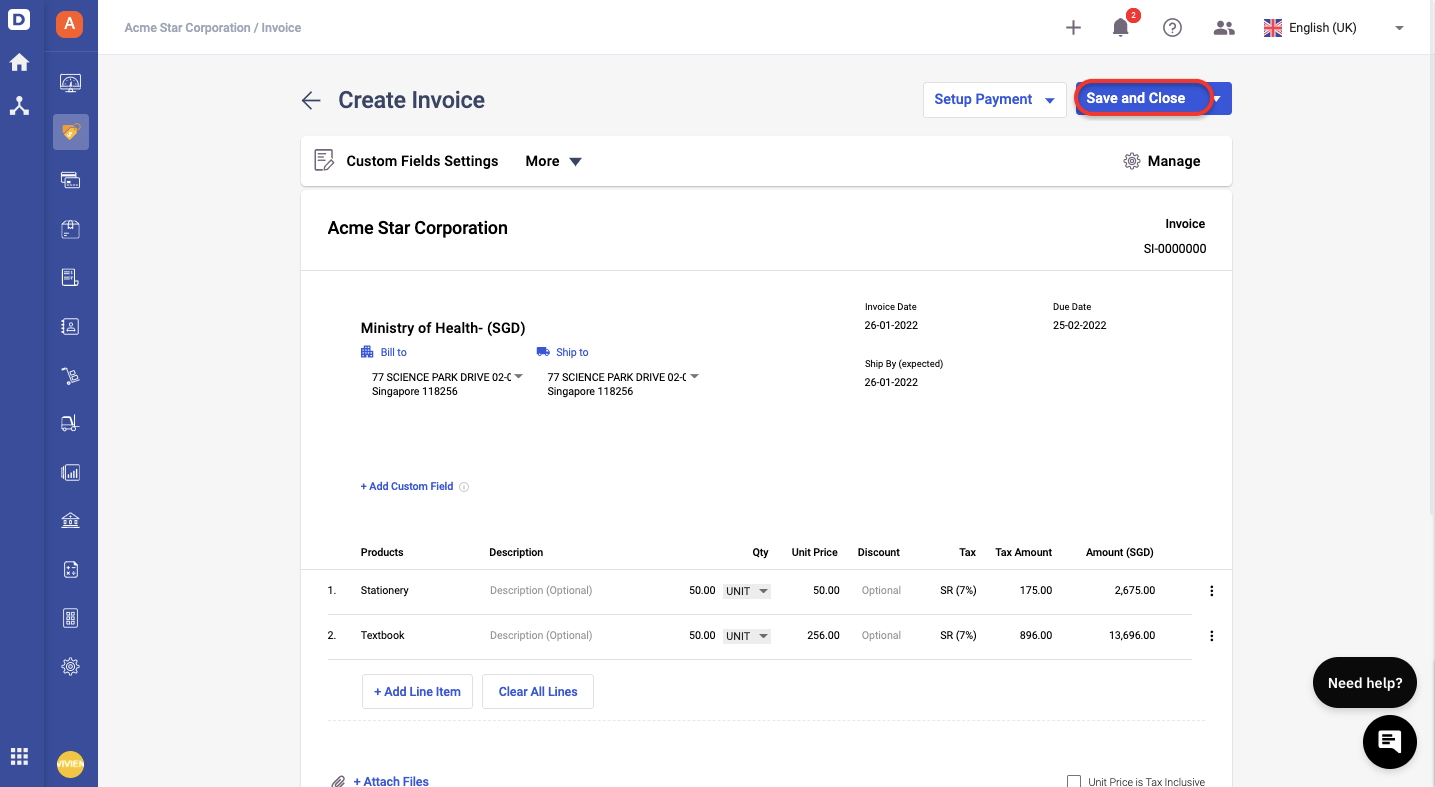
7. Next, go to Sell Module. Create a new invoice tag to your Contact (the government agency). Enter the line items, quantity, unit price, discount, and tax for each line item. Click on the Save button.
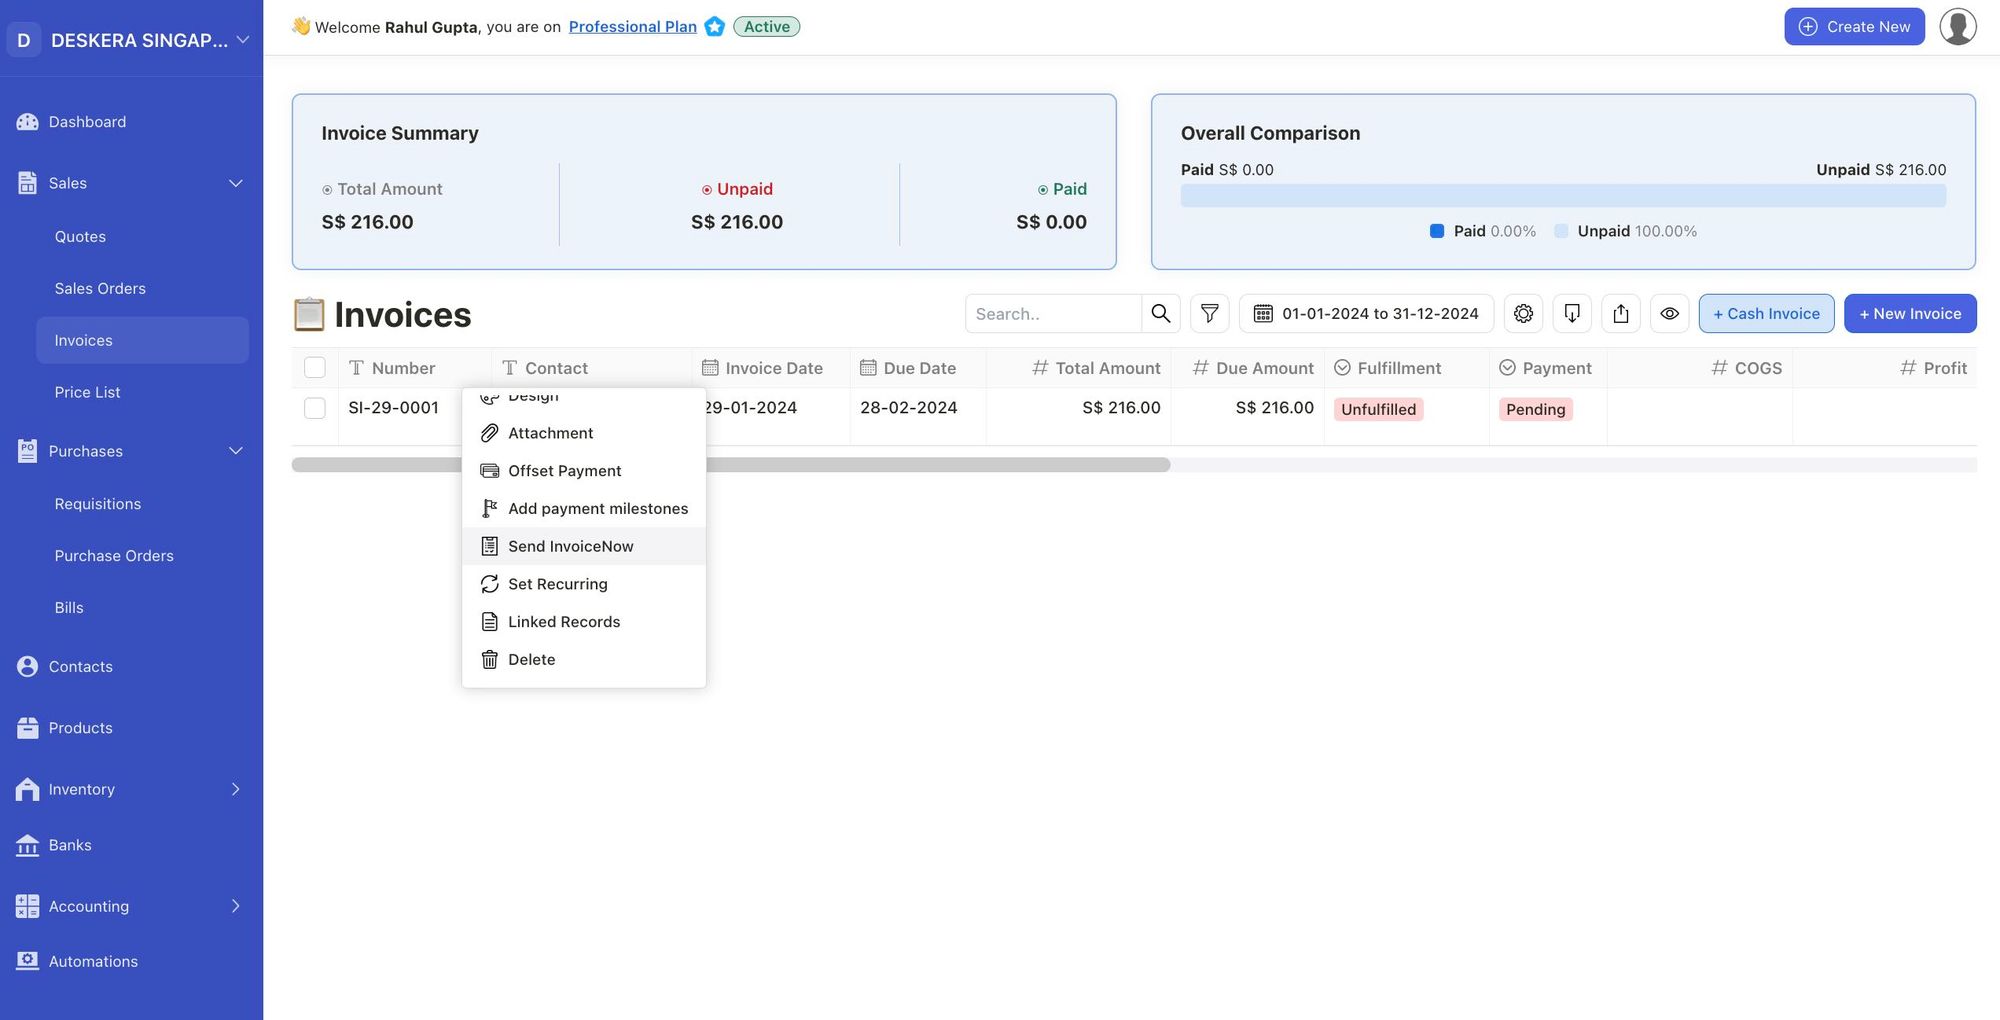
8. In the Invoice Summary List, click on the three dots (contextual menu) and select Send InvoiceNow button.
9. The AGD will receive the eInvoice and process this invoice to the respective government agency.
How do I receive a bill from my supplier?
Share your UEN and your PEPPOL ID with your supplier so that they can add you to their PEPPOL network.
For instance, if your supplier is using Deskera software, they can add you in their Contact Module. They will need to enter your Peppol ID, UEN, and email address and they can send you an e-invoice thereafter.
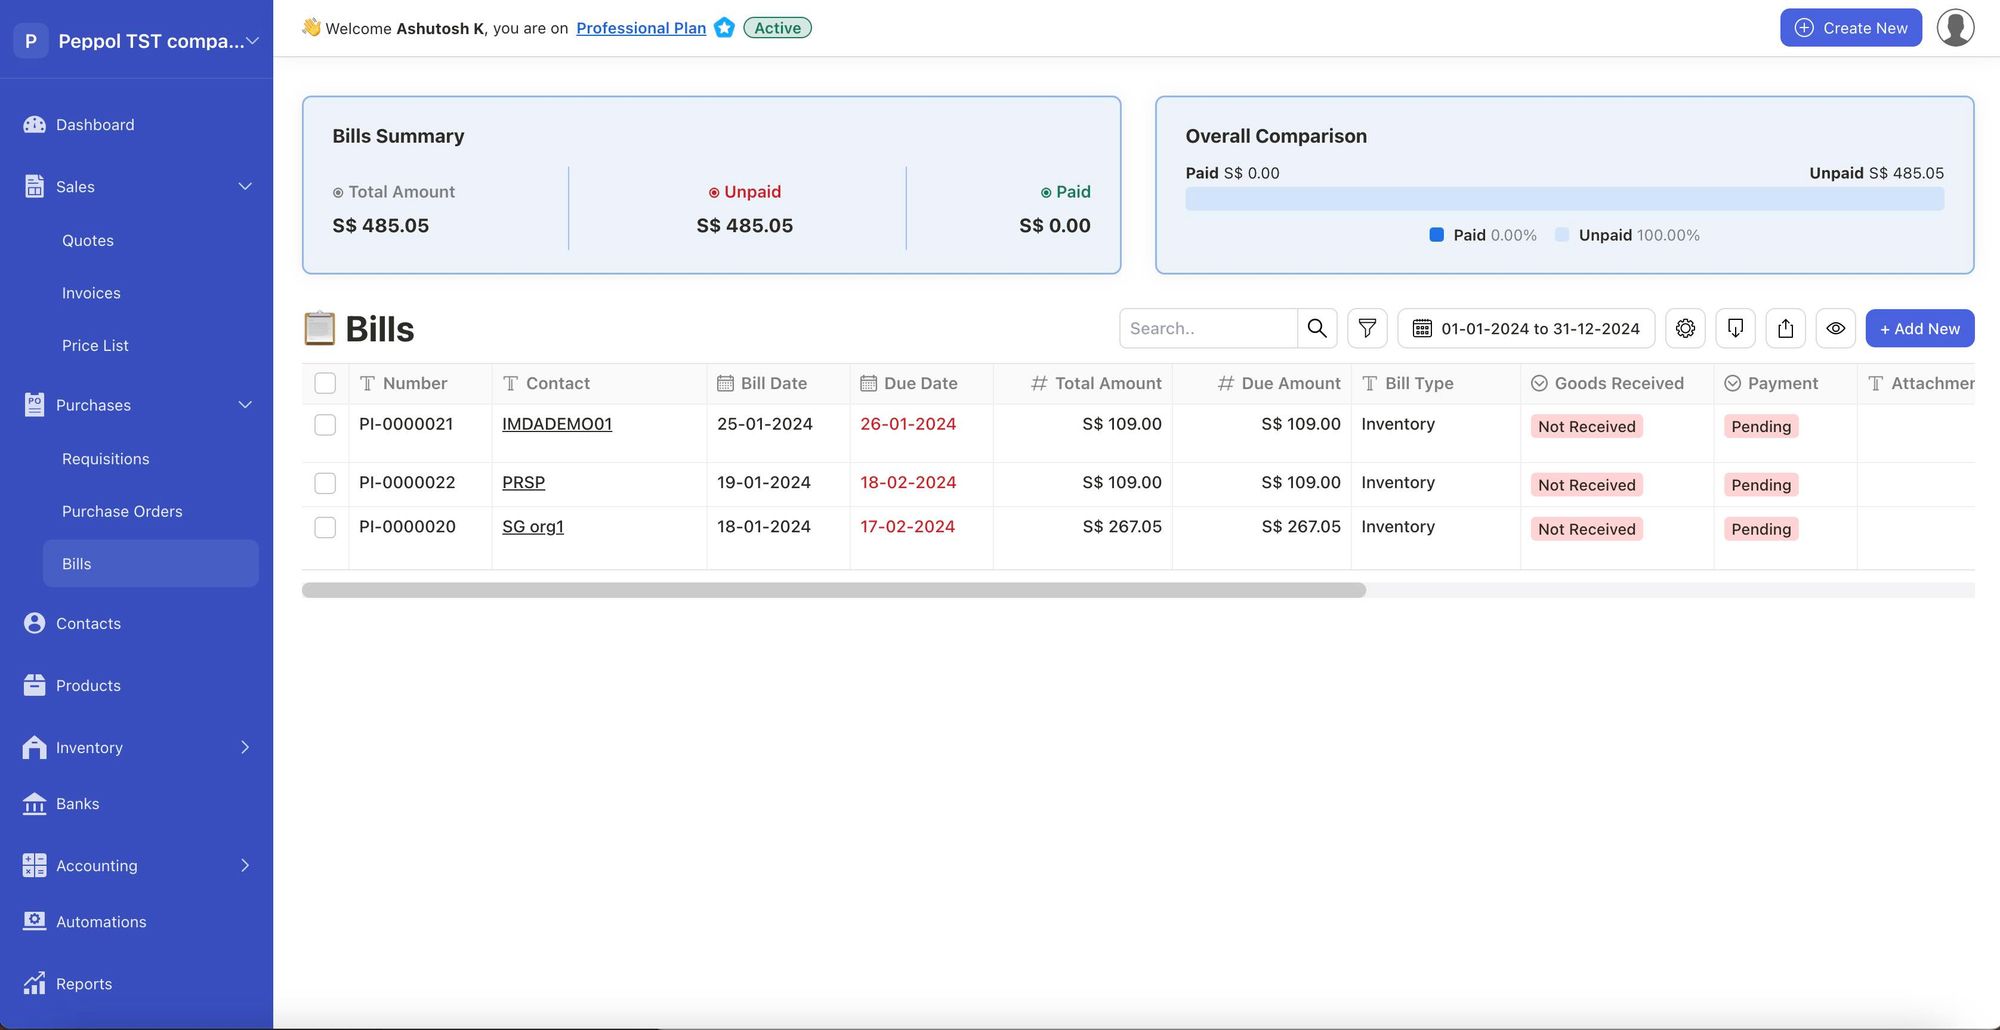
You should be able to view the invoice from your supplier under the Buy Module (bill tab) in Deskera Books.
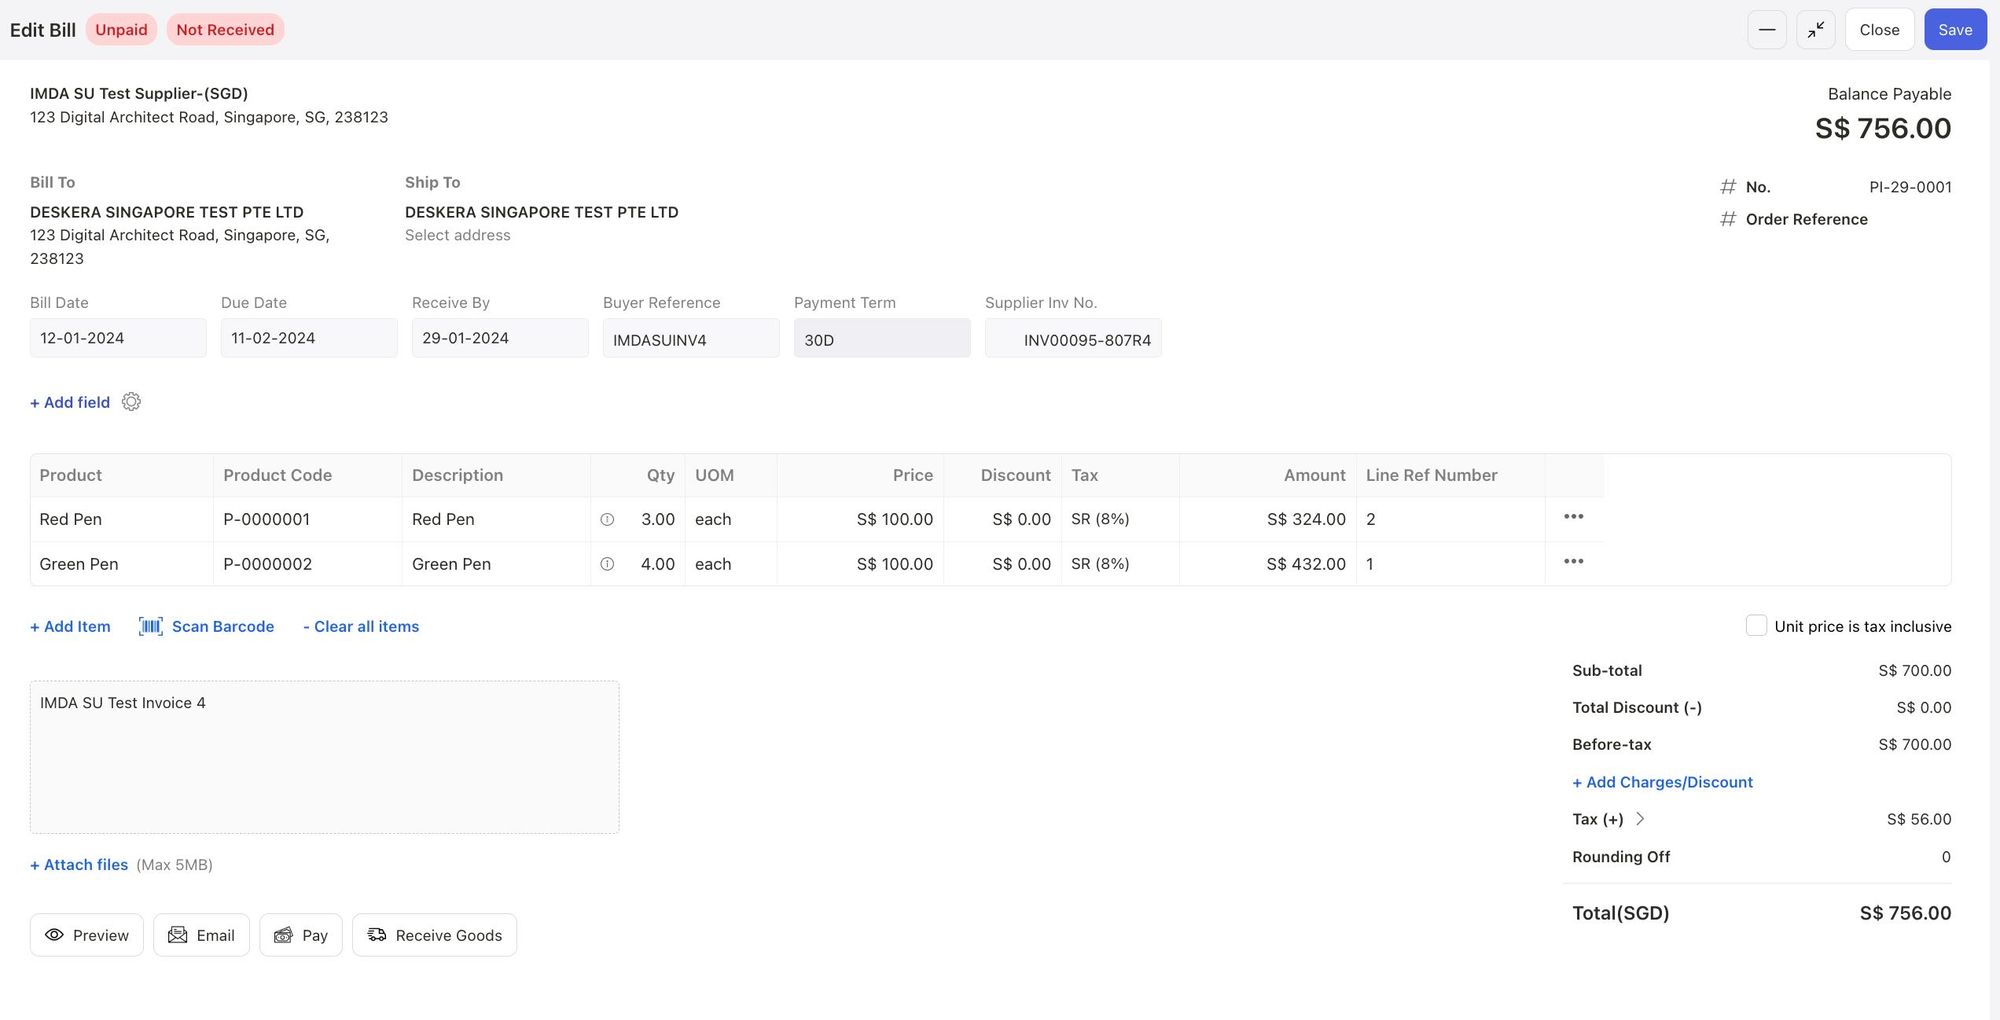
Review the bill document and check whether the contact name, line items, tax rate, and accounts are populated correctly. Proceed to make payment if all the information in the bill is accurate.
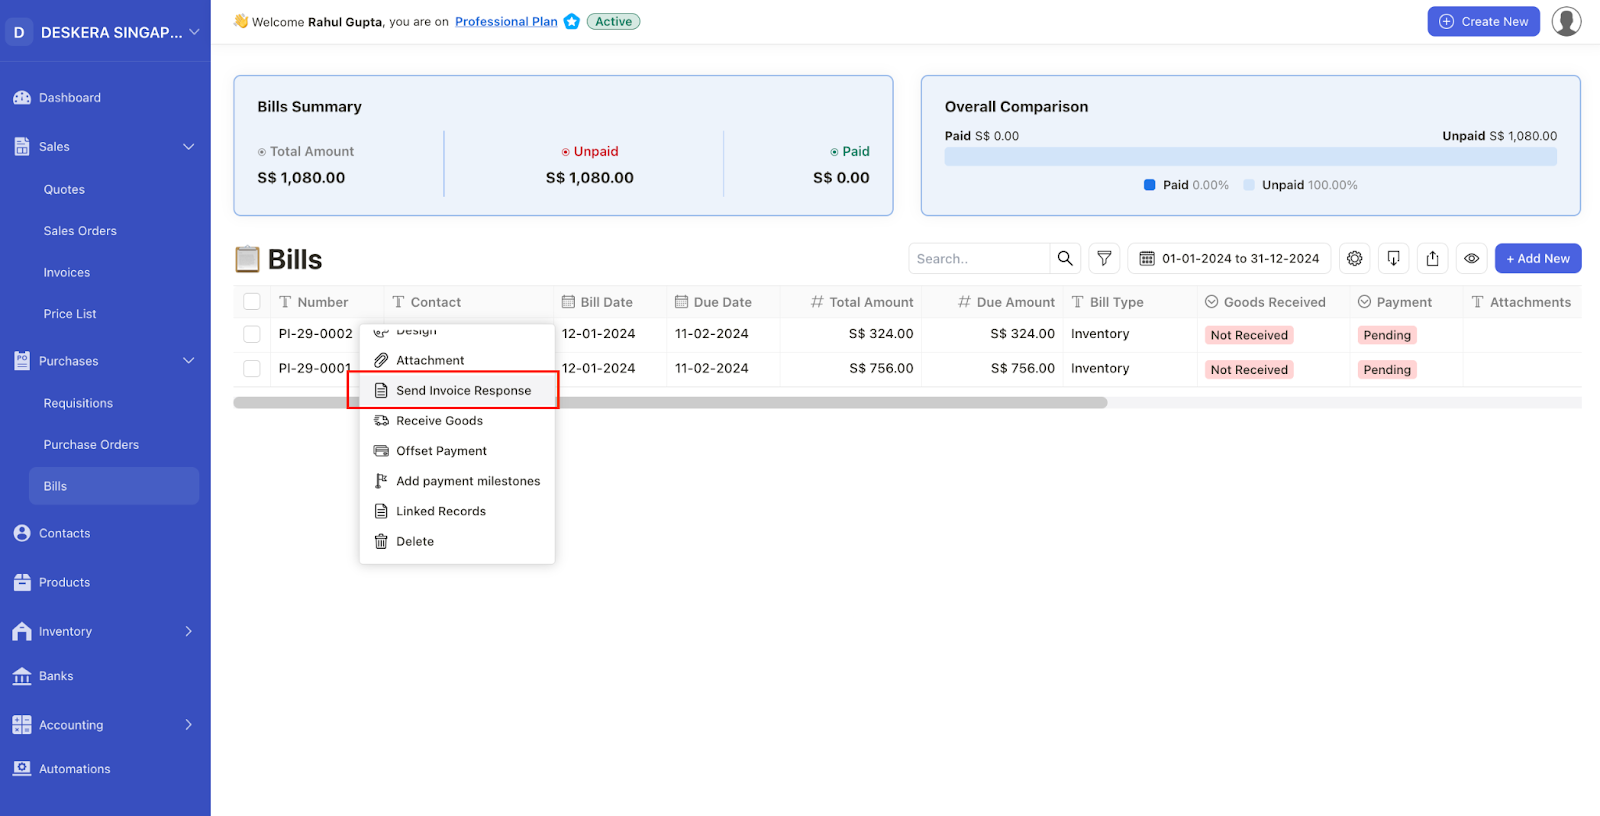
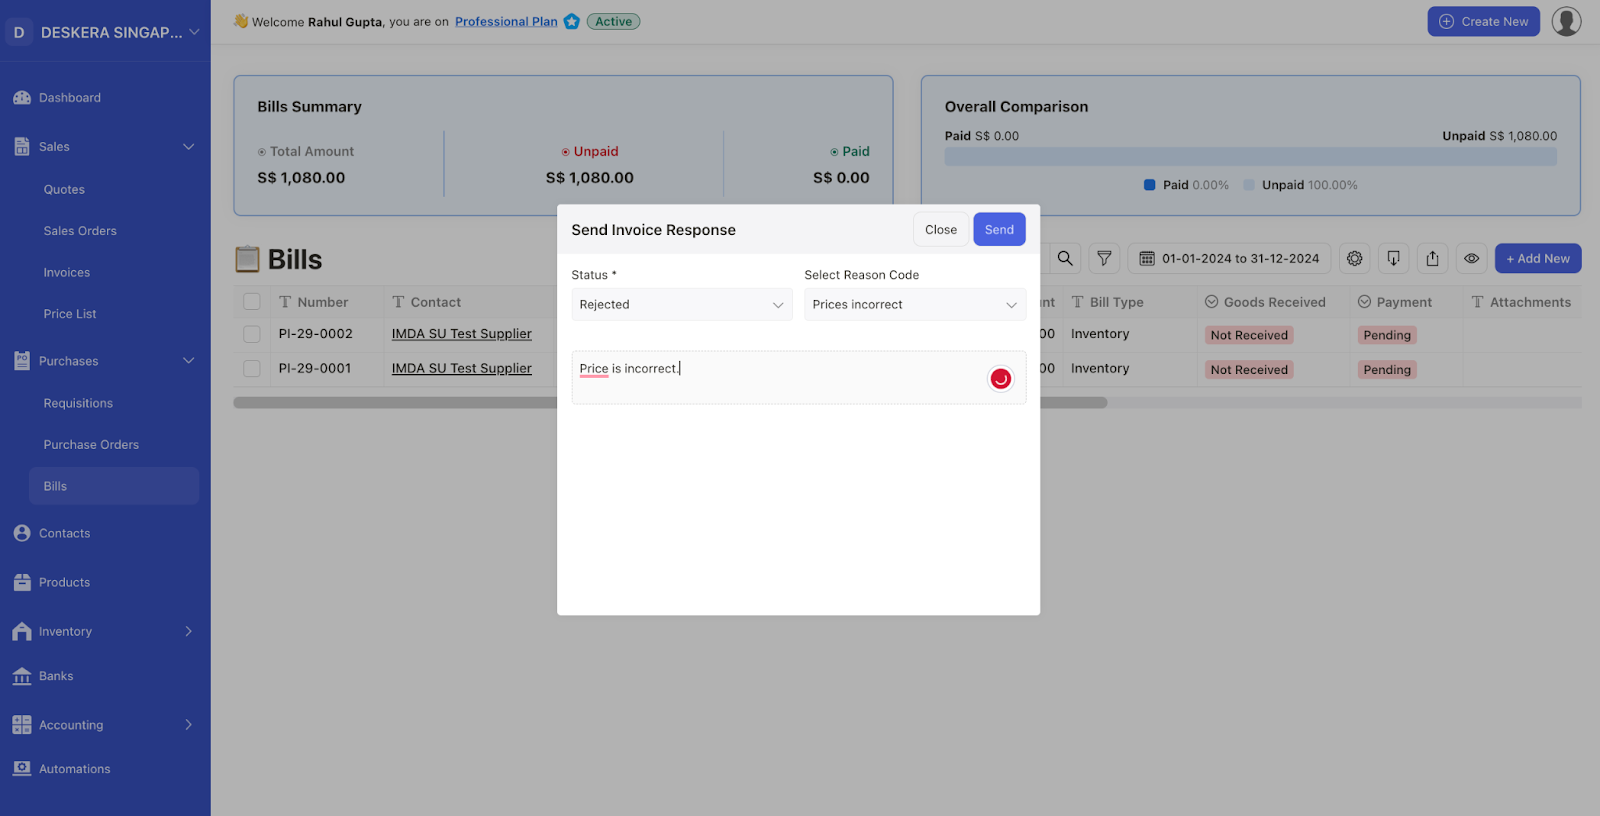
How do I send Invoice Response for a bill from my supplier?
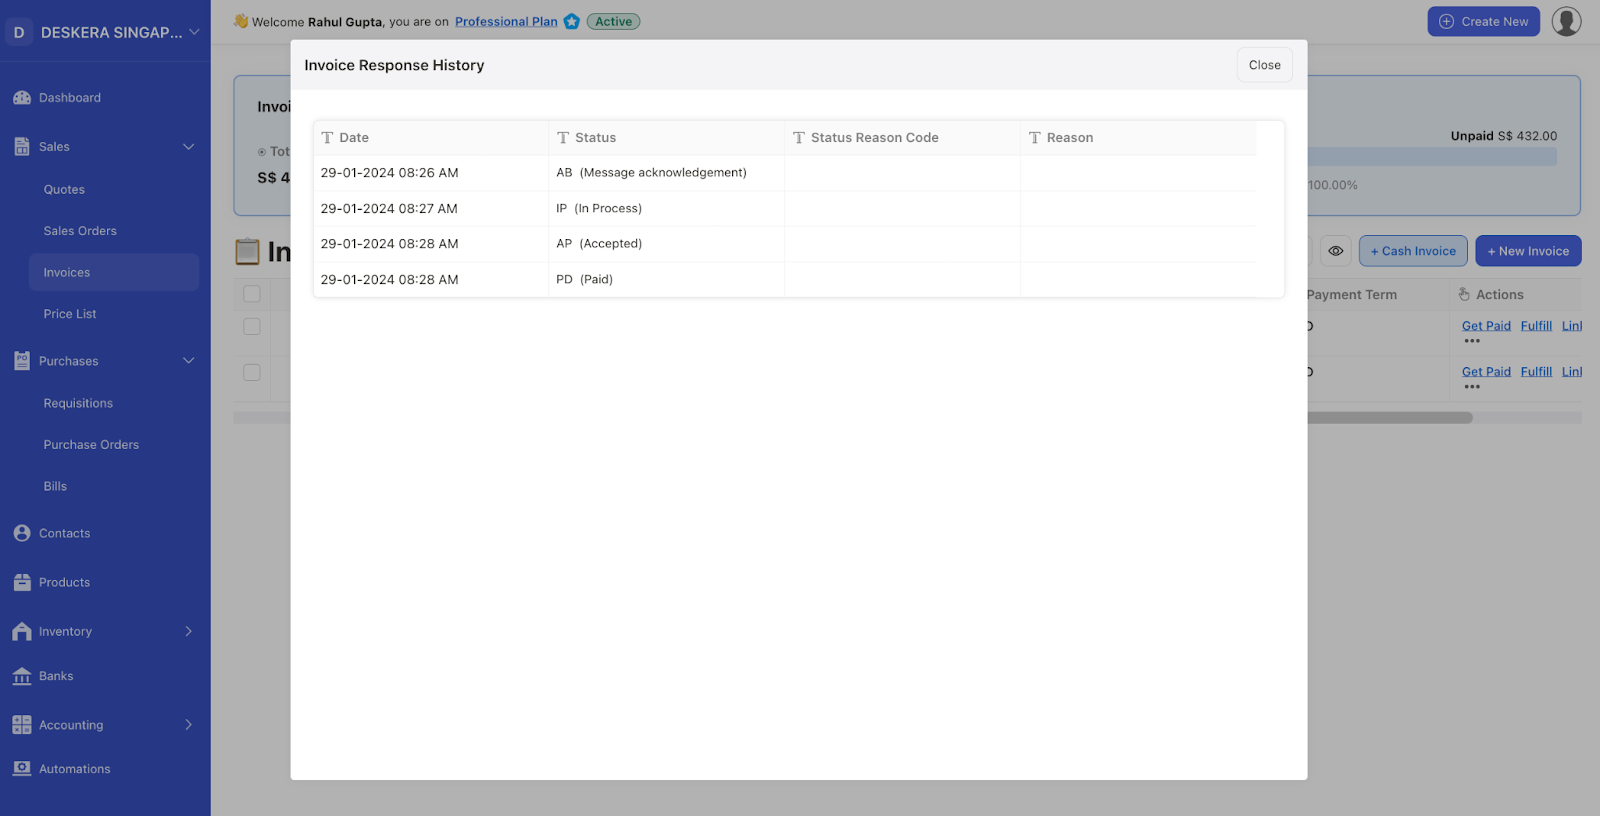
Click on the three dots (the contextual menu) next to the bill, and click on Send Invoice Response.
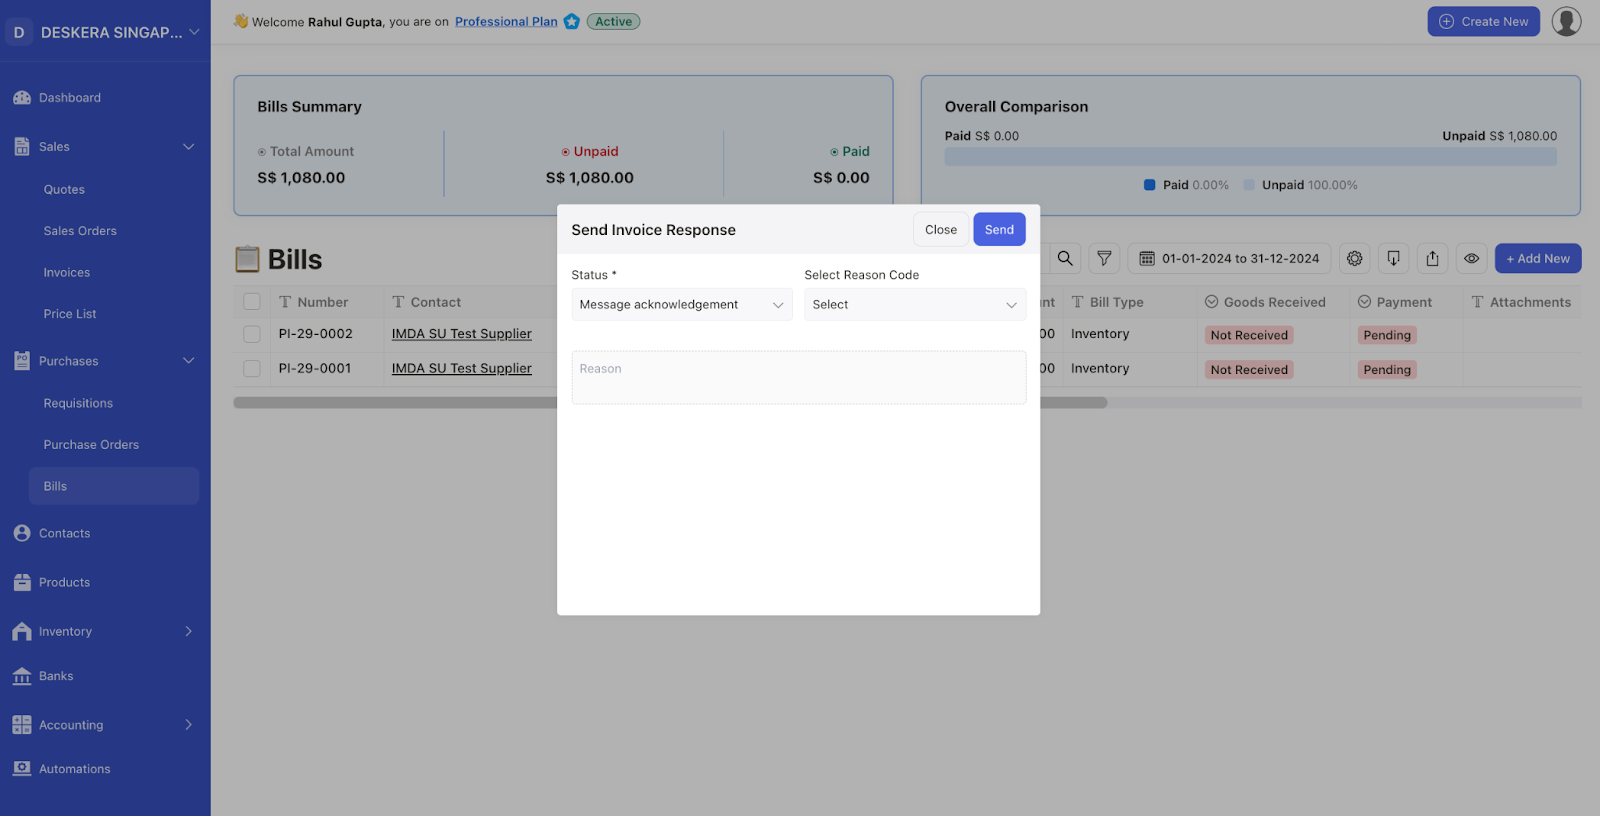
Subsequently, you may send different Invoice Responses as you process the received invoice further.
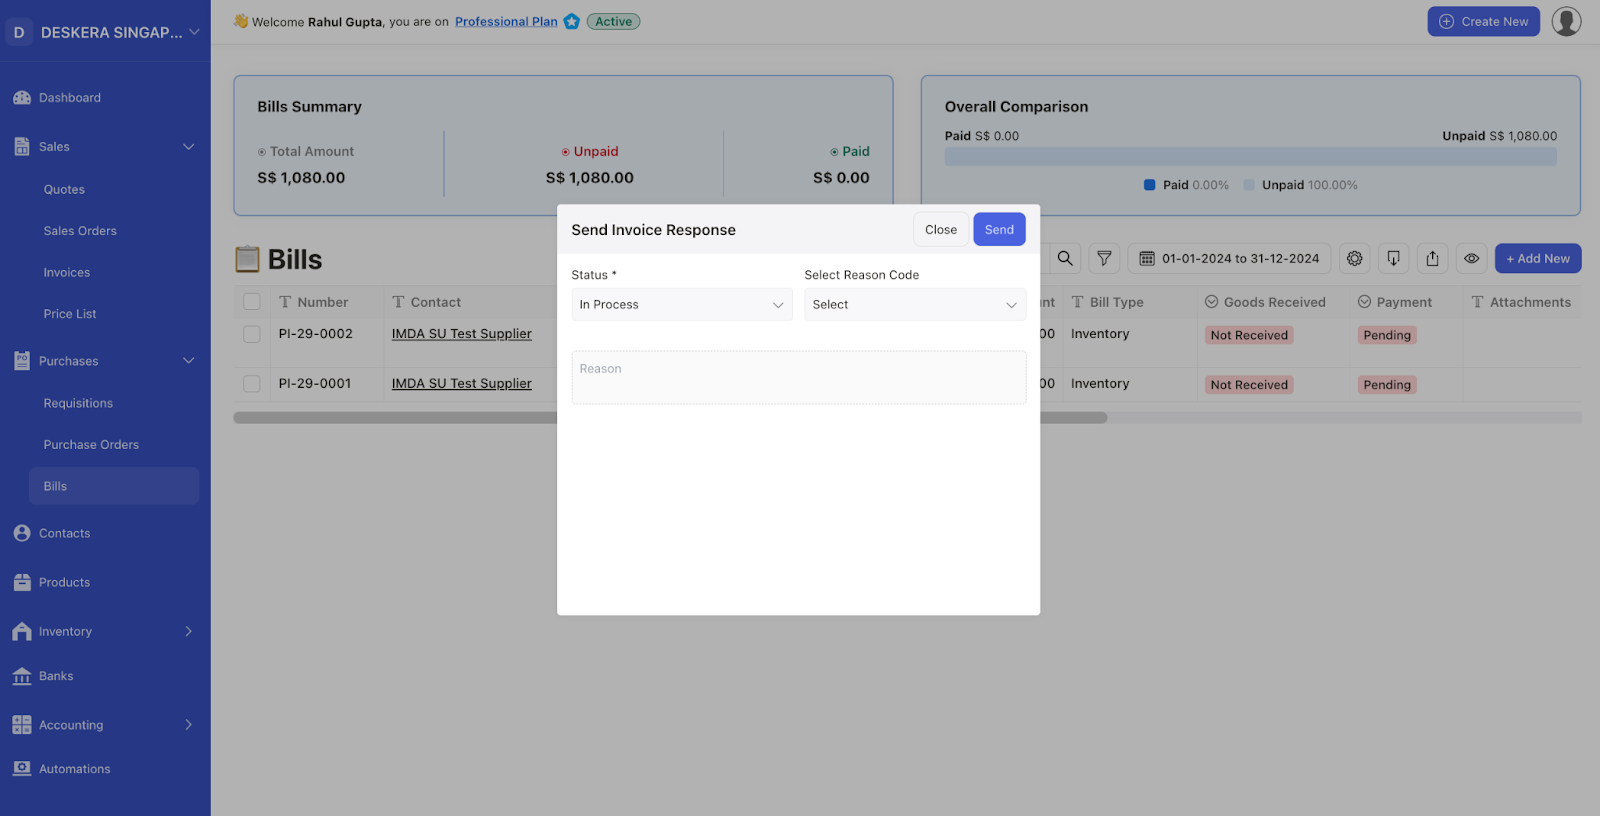
You may either “Accept” the bill

or, “Reject” it, and provide a reason.
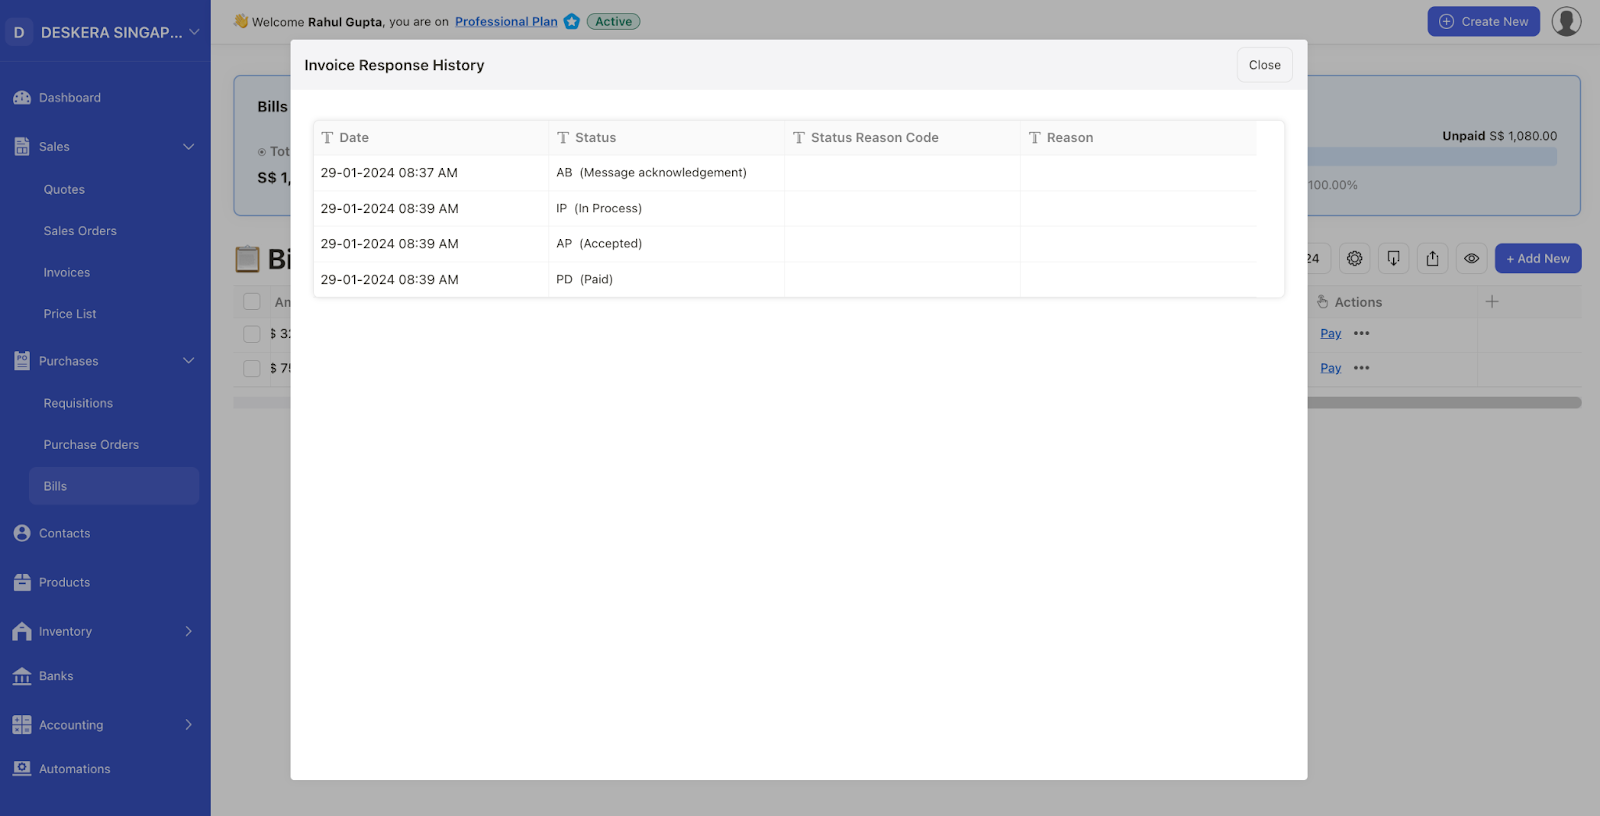
You may view Invoice Response log.
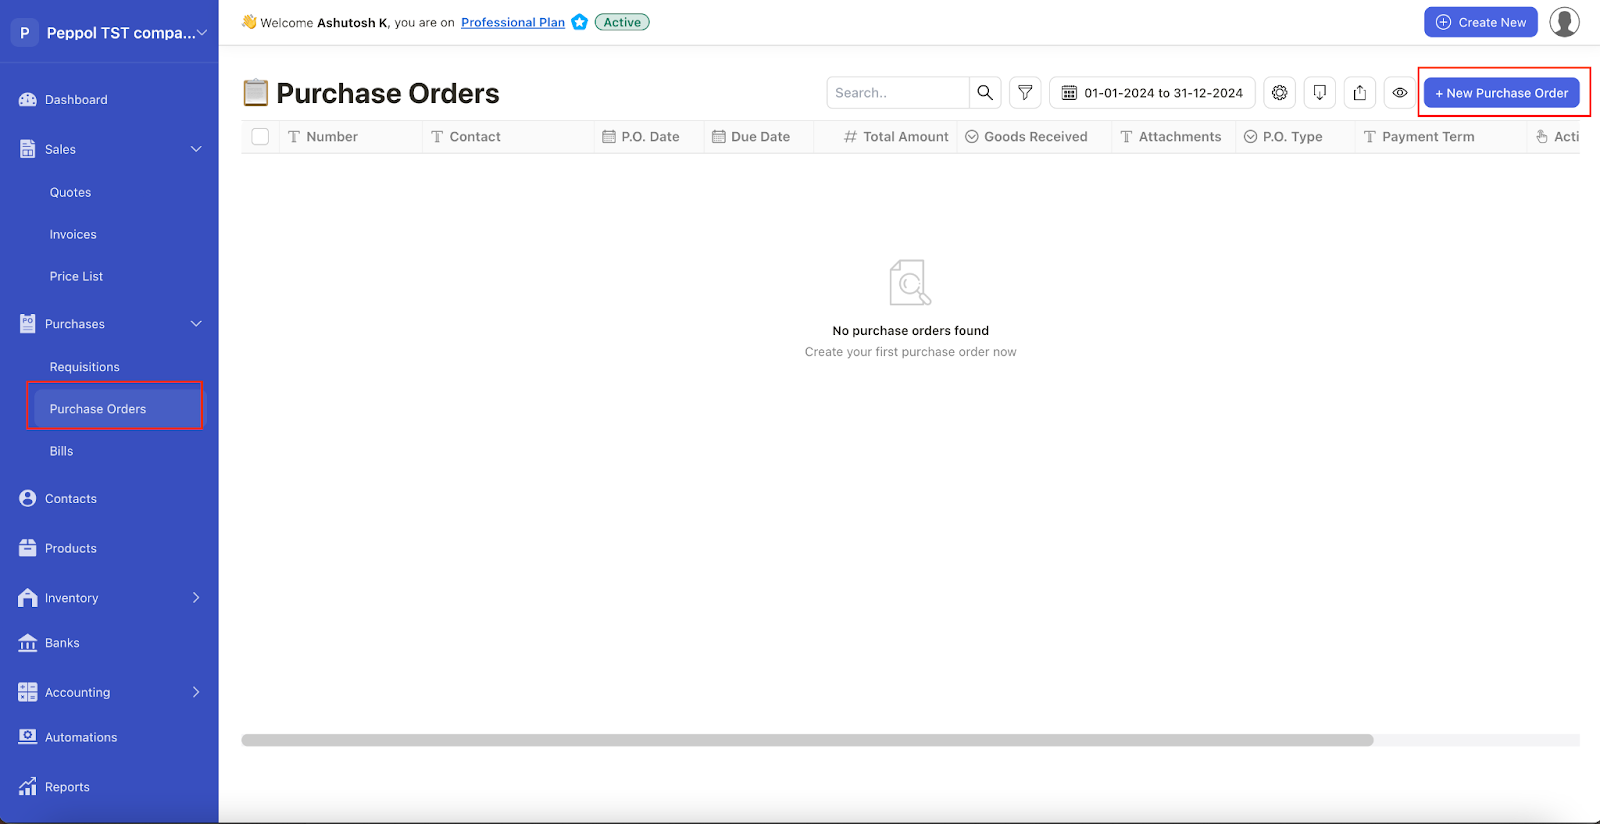
How do I send an E-PO using InvoiceNow?
1. Go to Purchase Orders module, and click on New Purchase Order to create.
2. Fill the required information in the Purchase Order form
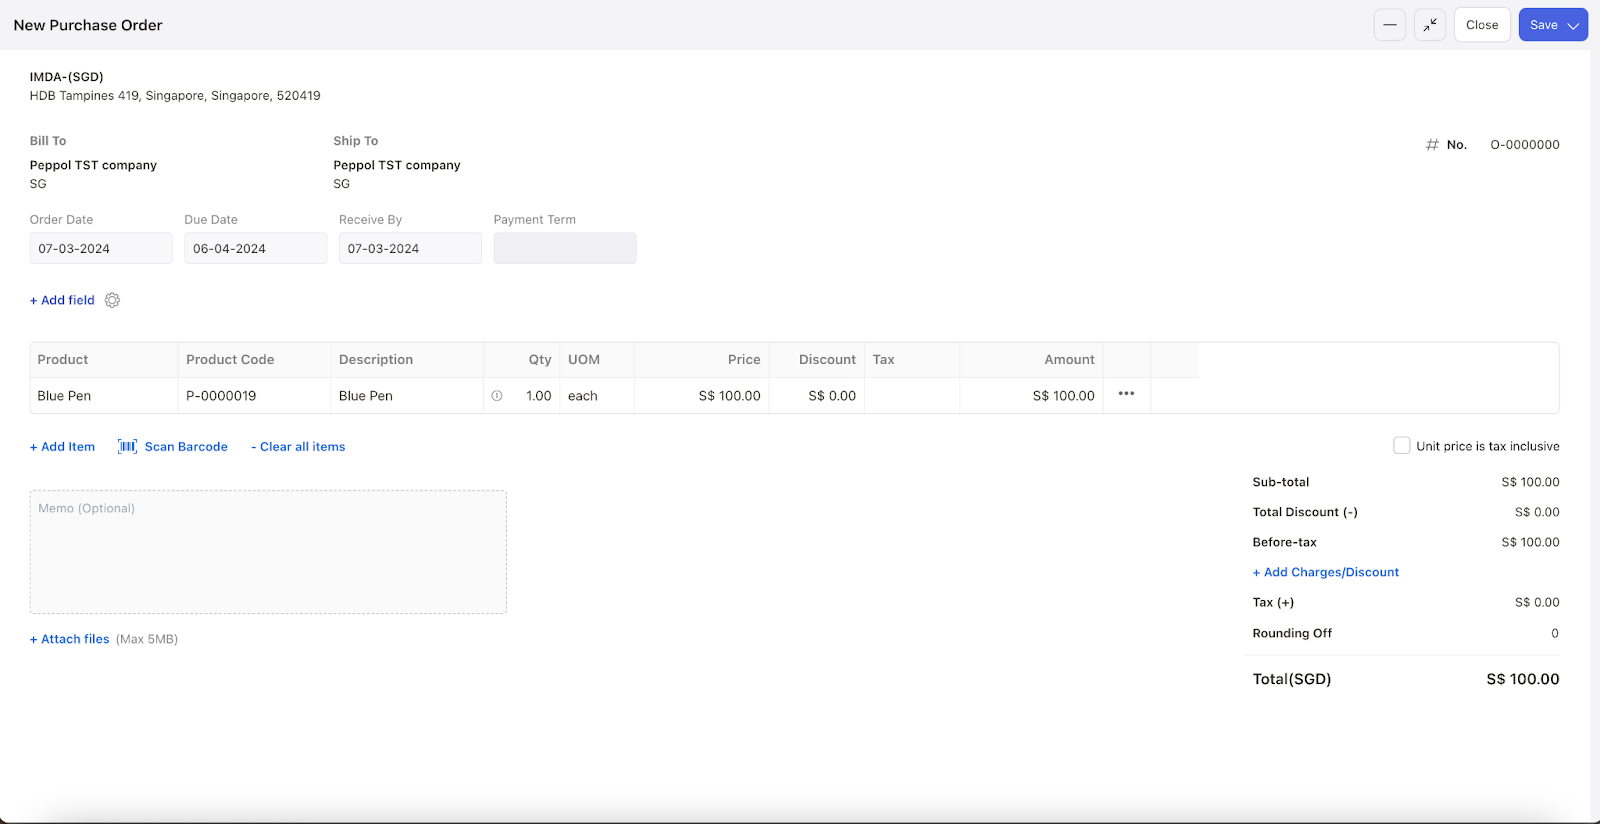
3. Click on Save to create a Purchase Order
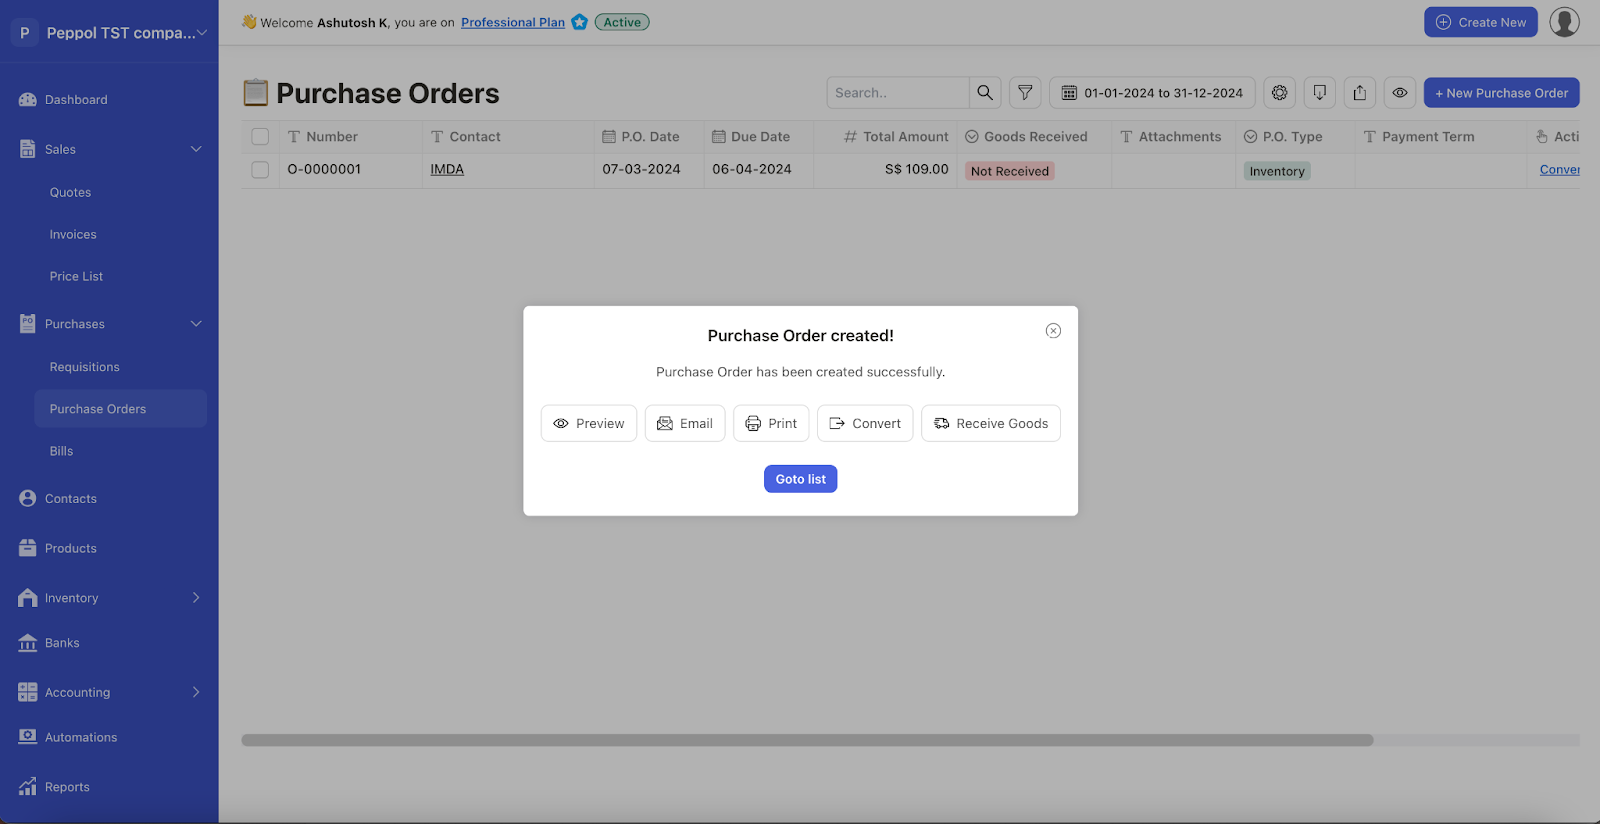
4. Click on three dots (the contextual menu) next to the purhcase order and click on Send E-Purchase Order.

How do I receive E-PO from my customer?
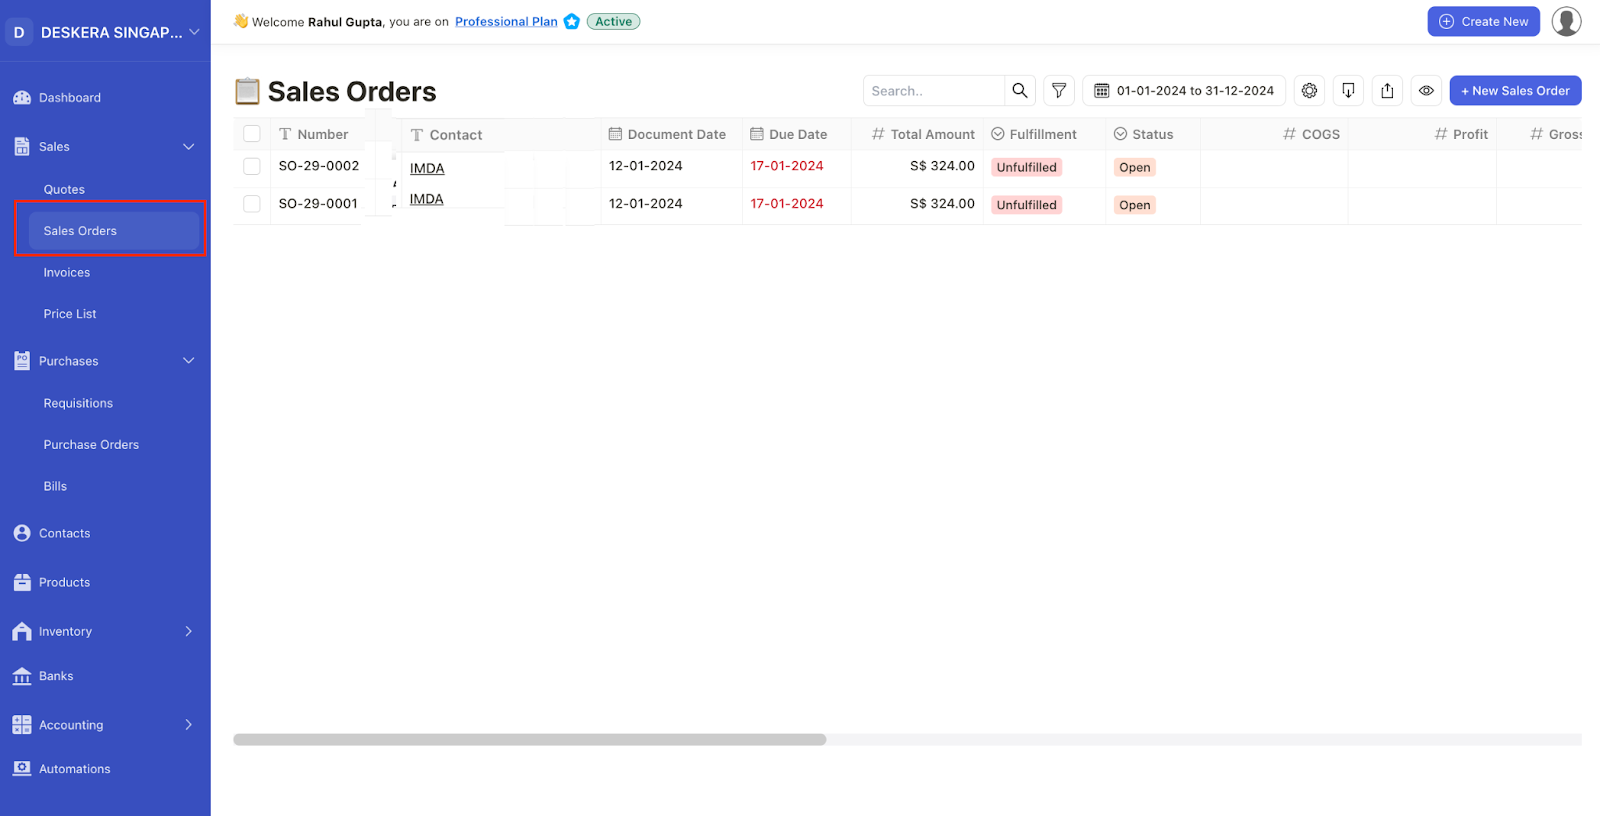
The system automatically fetches InvoiceNow for companies registered with correct PEPPOL details and creates Sales Orders in the system. It can be accessed from the “Sales Orders” module.
How do I convert received E-PO to Invoice?
1. Click on the three dots (the context menu) next to the Sales Order you want to convert to invoice, and click on Convert to Invoice.
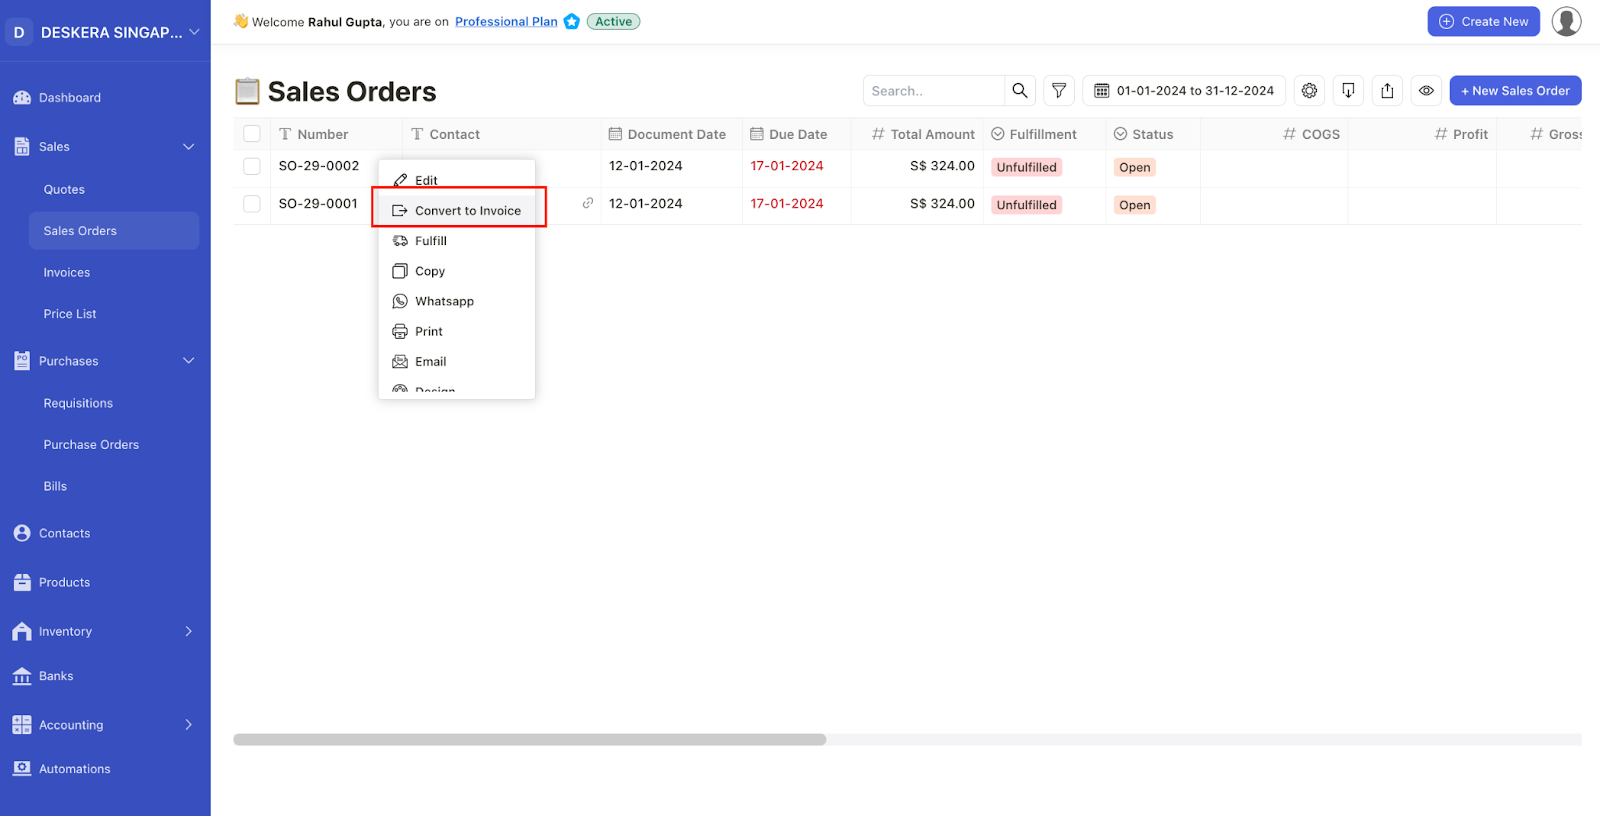
2. Choose an appropriate conversion option
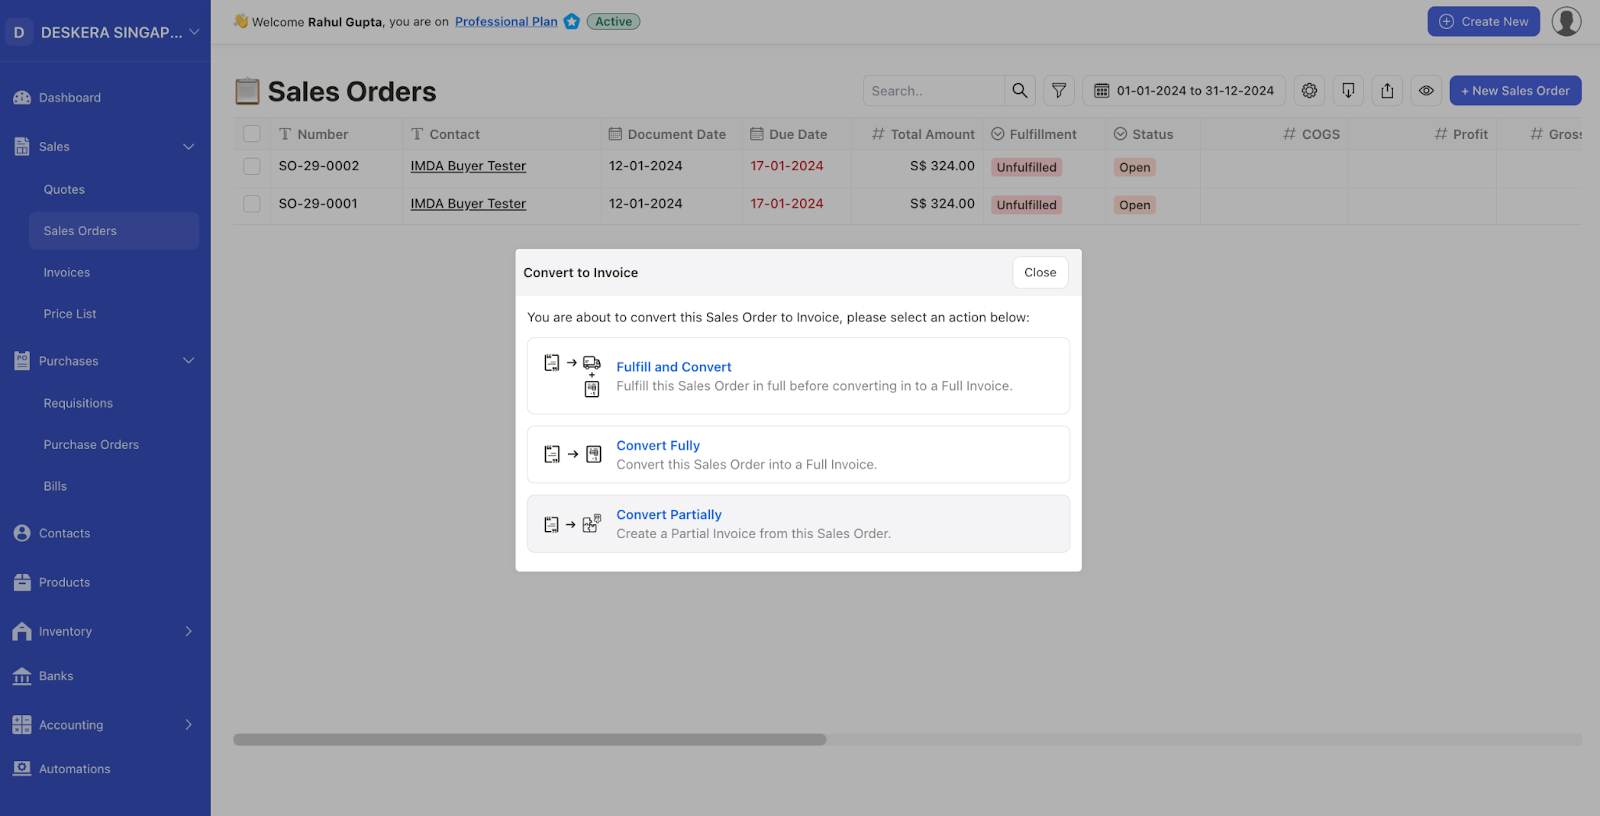
3. Update the invoice details as required
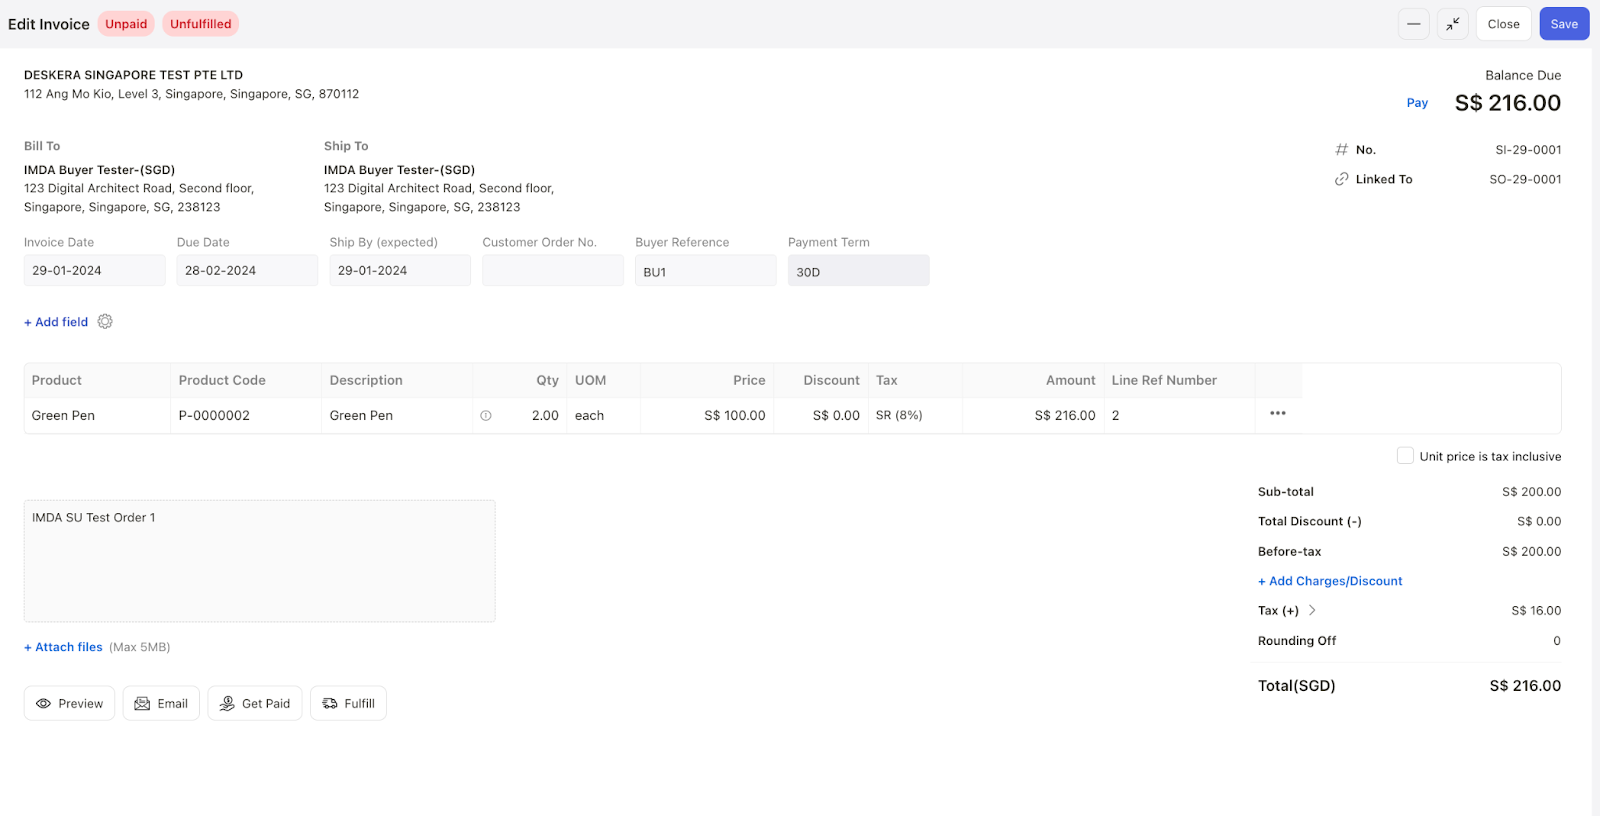
4. Click on Save.
5. The new invoice will be visiable in Invoices module.
6. You may send this invoice as an E-Invoice using InvoiceNow.
How do I inform my Contacts about Using InvoiceNow network?
1. Go to Contacts module, and select one or more contacts.
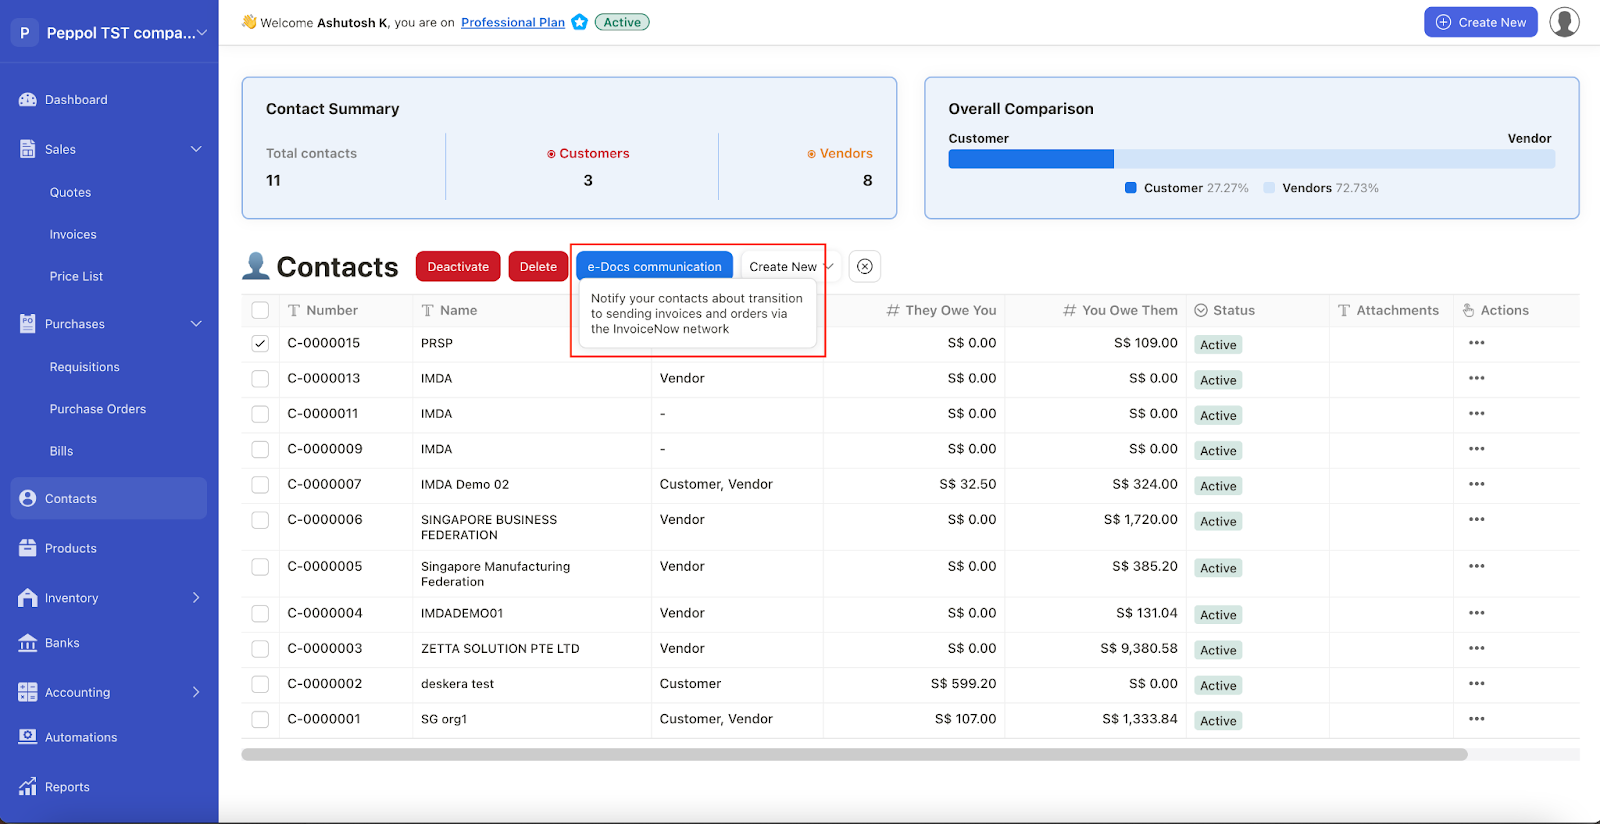
2. Click on e-Docs communication button
3. It will open an email message popup with a pre-populated message.

4. Click on send to send the email.