

Once you have finalized your purchases from your vendors, you can convert your purchase order document to bill document.
Follow the steps below to convert a purchase order to a bill document in Books+:
- Login to your Books+ account.
- Go to Purchase Order document on the sidebar menu.
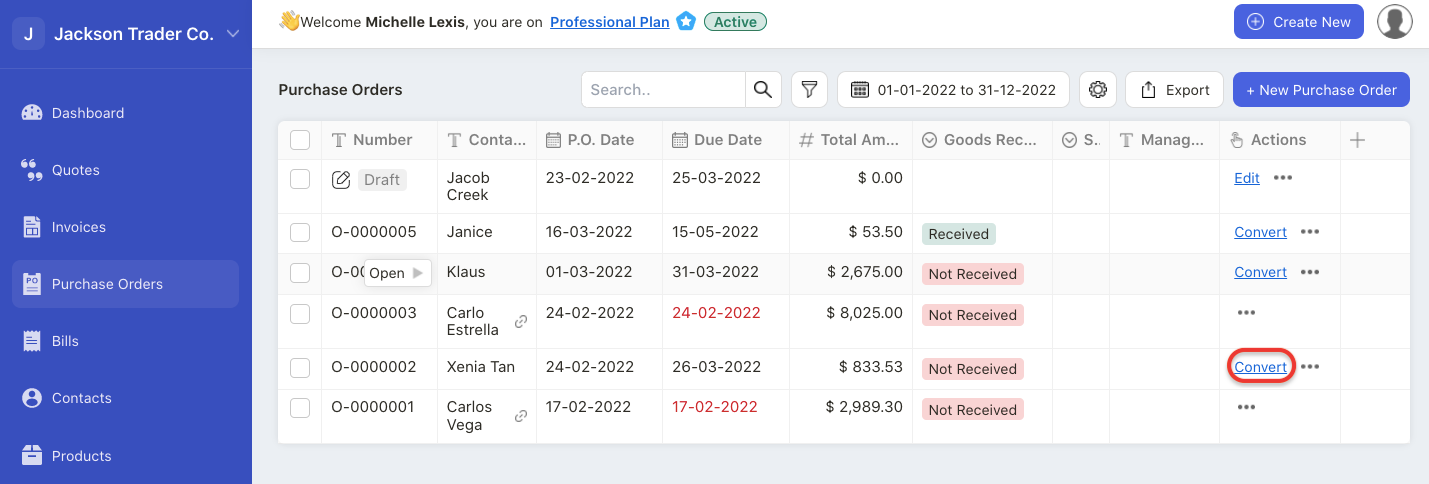
3. On the Purchase Order page, click on the convert button under the action column for the respective Order document that you wish to convert.
4. A pop-up menu will appear.
5. The Order date will be reflected as the day you create the Order. This cannot be edited. You can only change the Bill date here.
6. There are three types of conversion here. You can choose to:
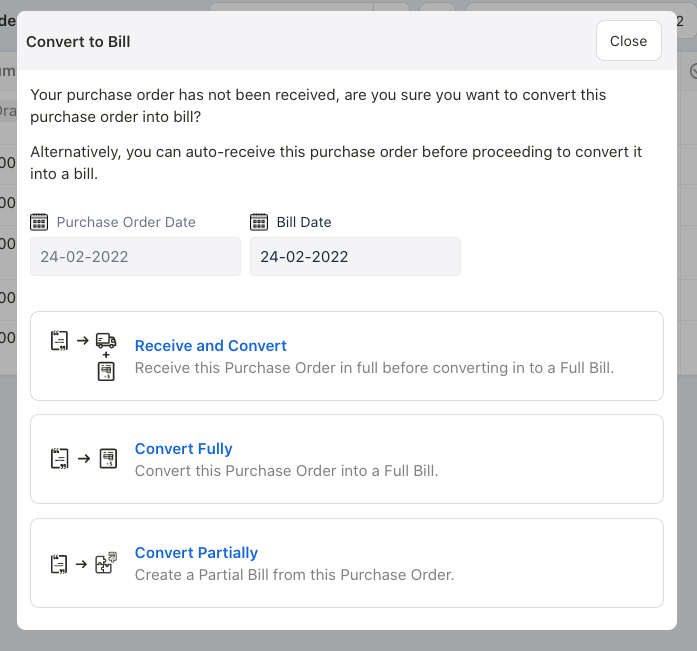
- receive and convert: convert the Order to Bill and mark all the goods as received in this document
- convert fully: convert the Order to Bill fully without receiving goods
- convert partially: convert the Order to Bill partially. You can create multiple Bills tag to an Order document. The total quantities in each line item in your bill documents cannot exceed the total quantity of each line item in the linked Order document
7. Once you have converted the Order to Bill, go to Bill Module.
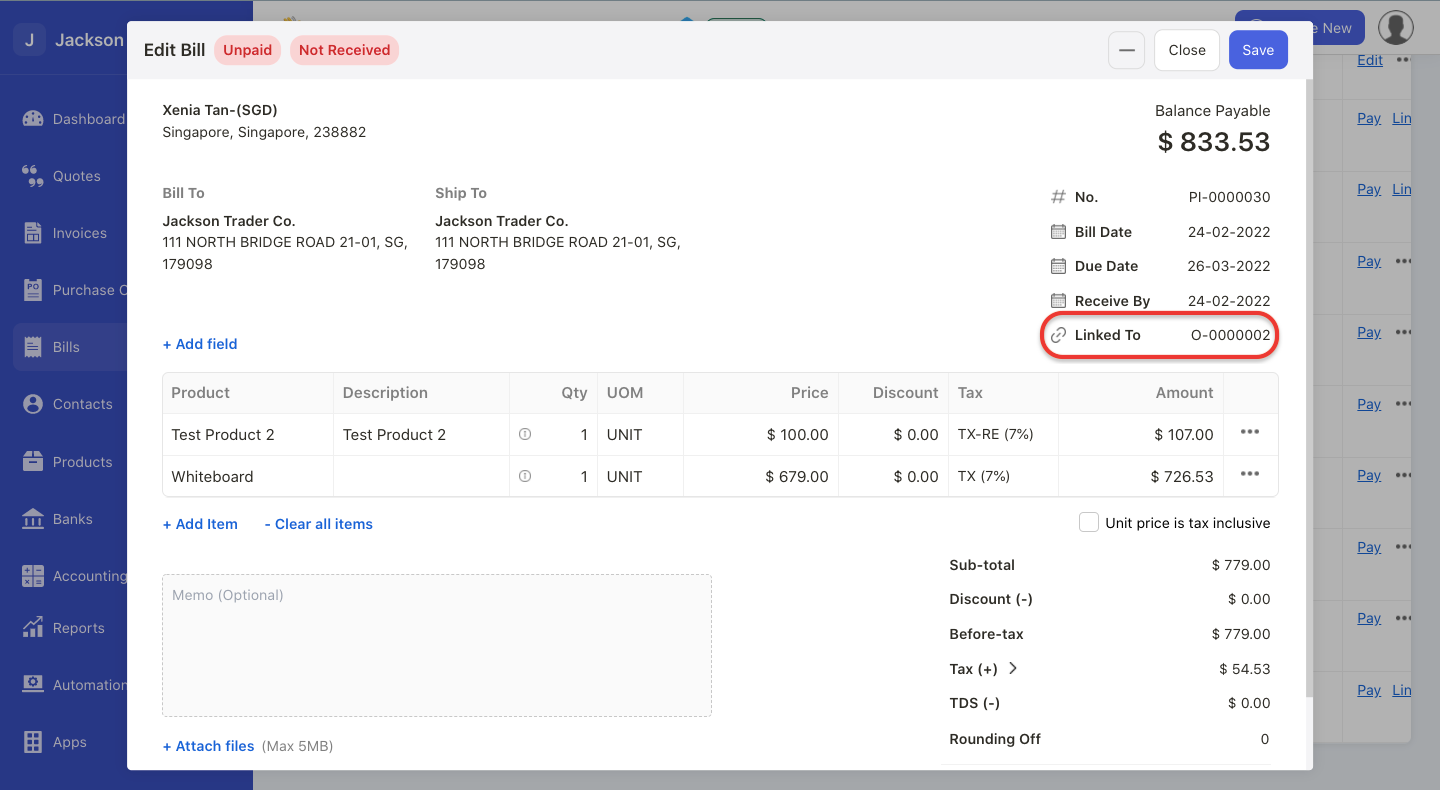
8. Open the bill document and you should be able to view the linked order number in the Bill page. If you wish to reverse this action, you can delete this Bill by clicking on the delete button in the Actions Column.
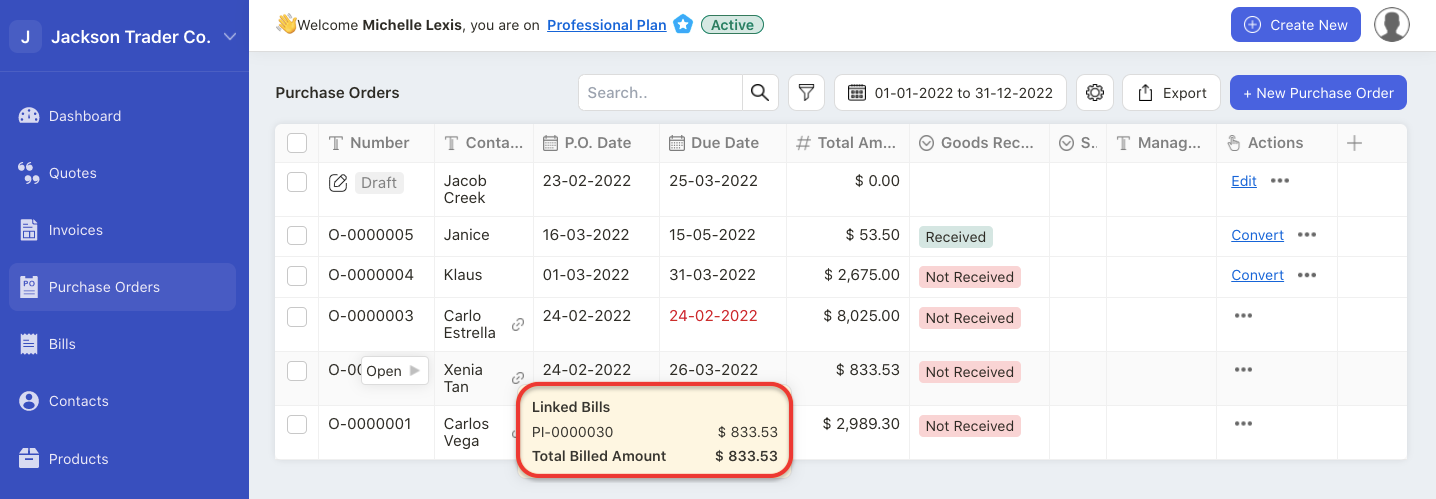
9. All the Orders converted to Bills will still be reflected in the Order page, with a linked icon next to it, except if you have deleted the linked Bill document, then the link icon will disappear.
10. Hover your mouse on the linked icon in the Order Summary List. You can view the Bill number linked to this Order document.