

Designing a document template is made easy with Deskera Books Plus' document generator feature.
As a small business owner, if you have limited time to create a brand new quote, invoice or invoice template, you can quickly generate these templates directly from Deskera Books Plus.
To change your quote, bill, invoice, or order template, you can follow the steps below:
- Login to your Books+ account.
- Next, go to Quote, Invoice, Order, or Bill Modules.
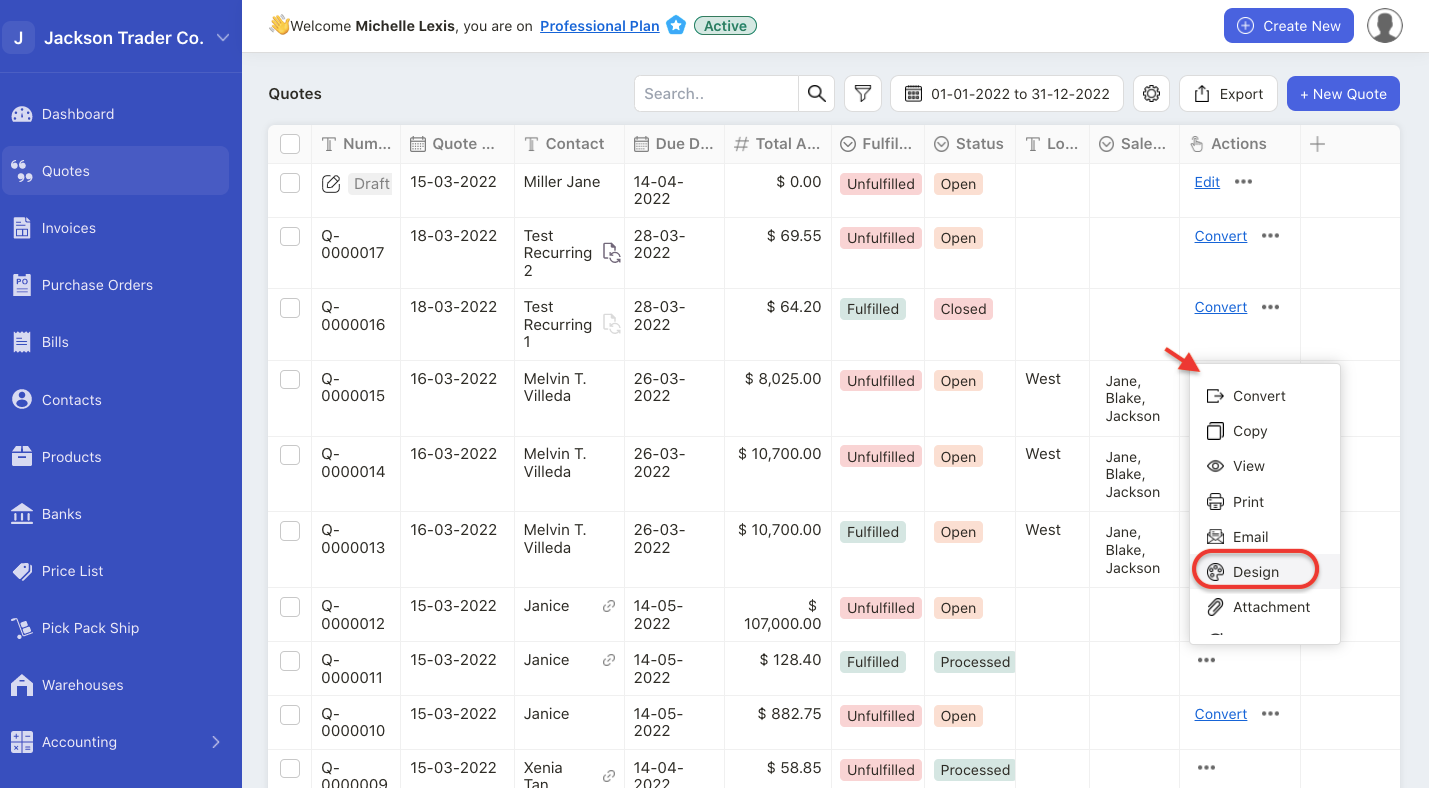
3. In the respective Module, you can click on the three dots and select design button.
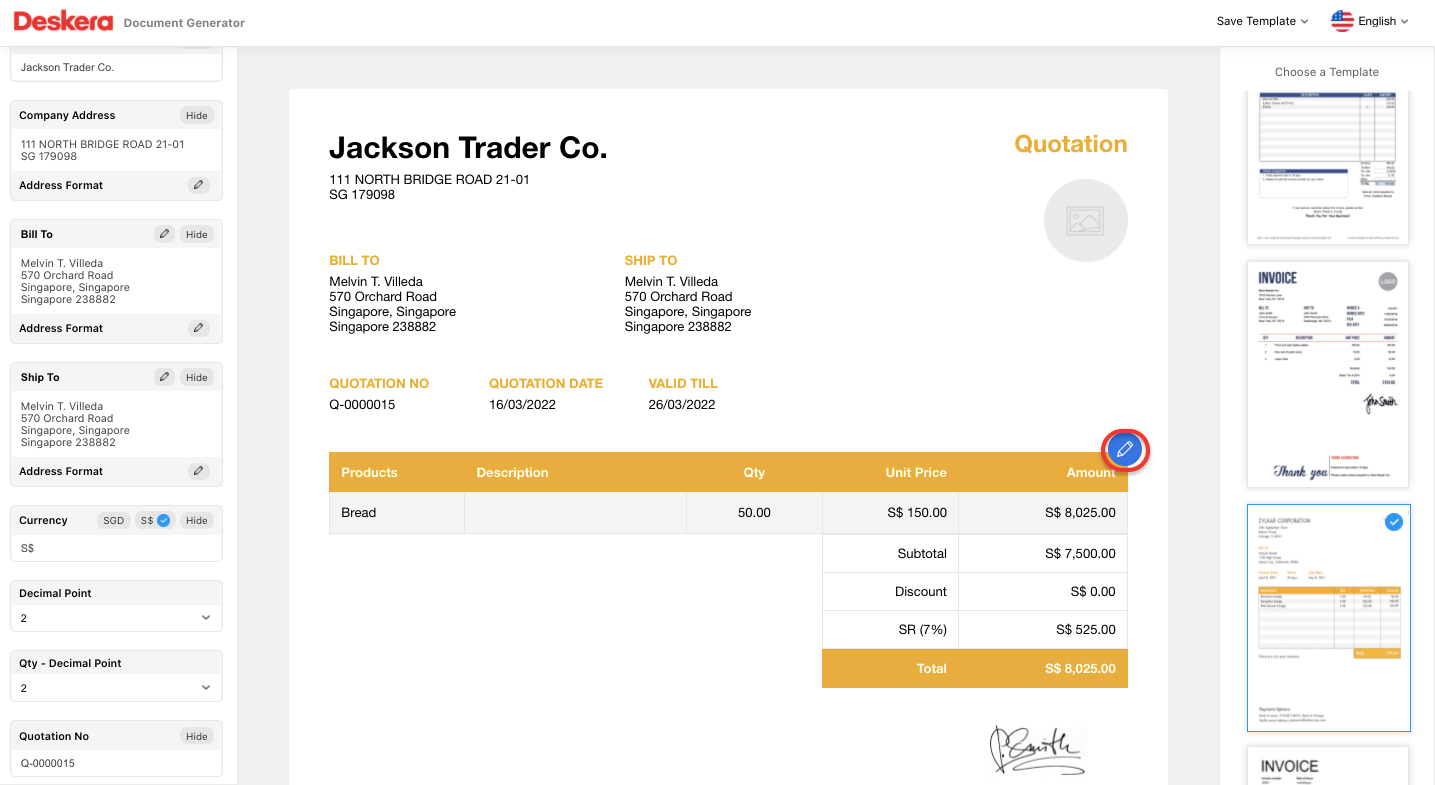
4. The system will re-direct you to Document Generator page.
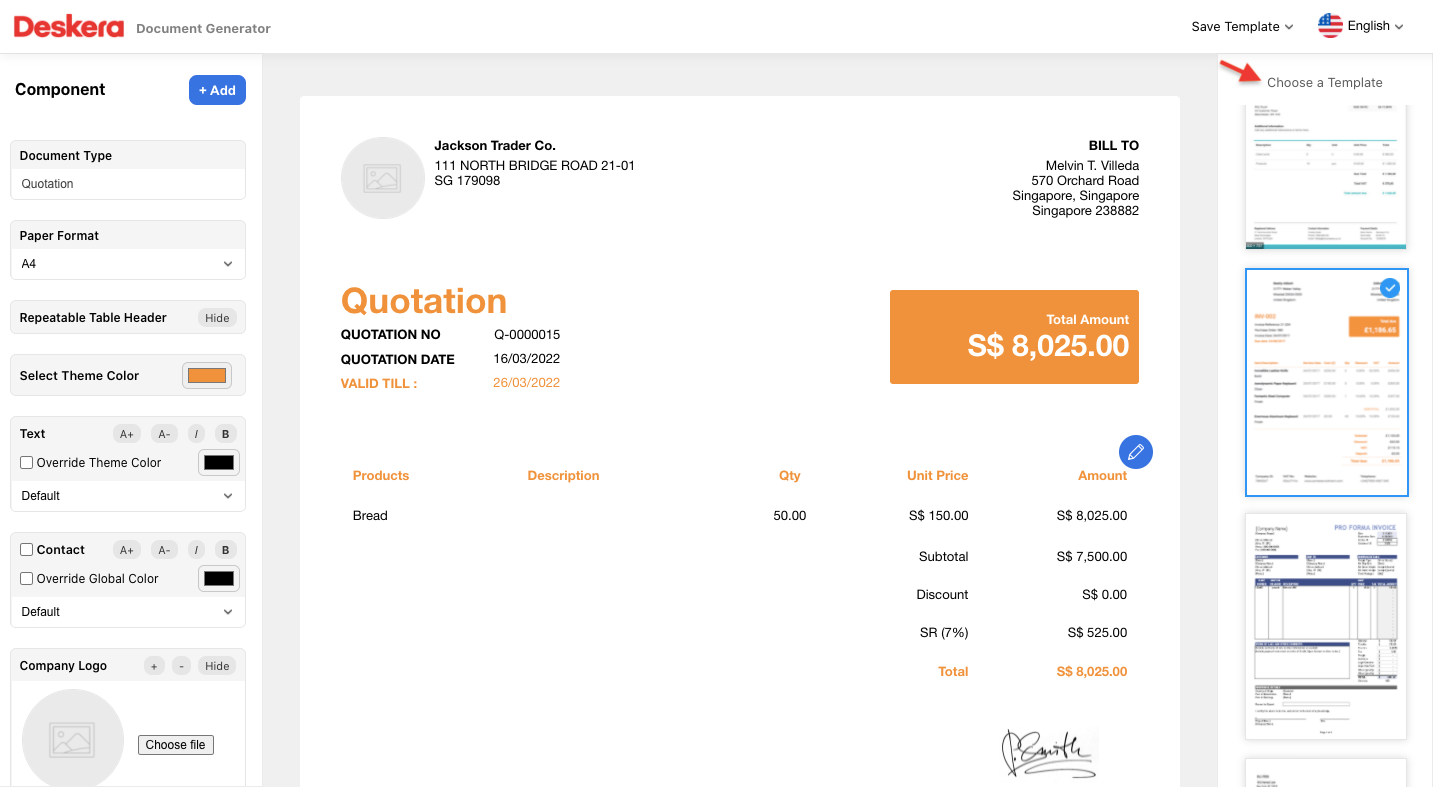
5. On the right-hand side panel, you have the option to choose various document designer templates. Choose your preferred template.
6. On the left-hand panel, you can configure the fields in your document template such as;
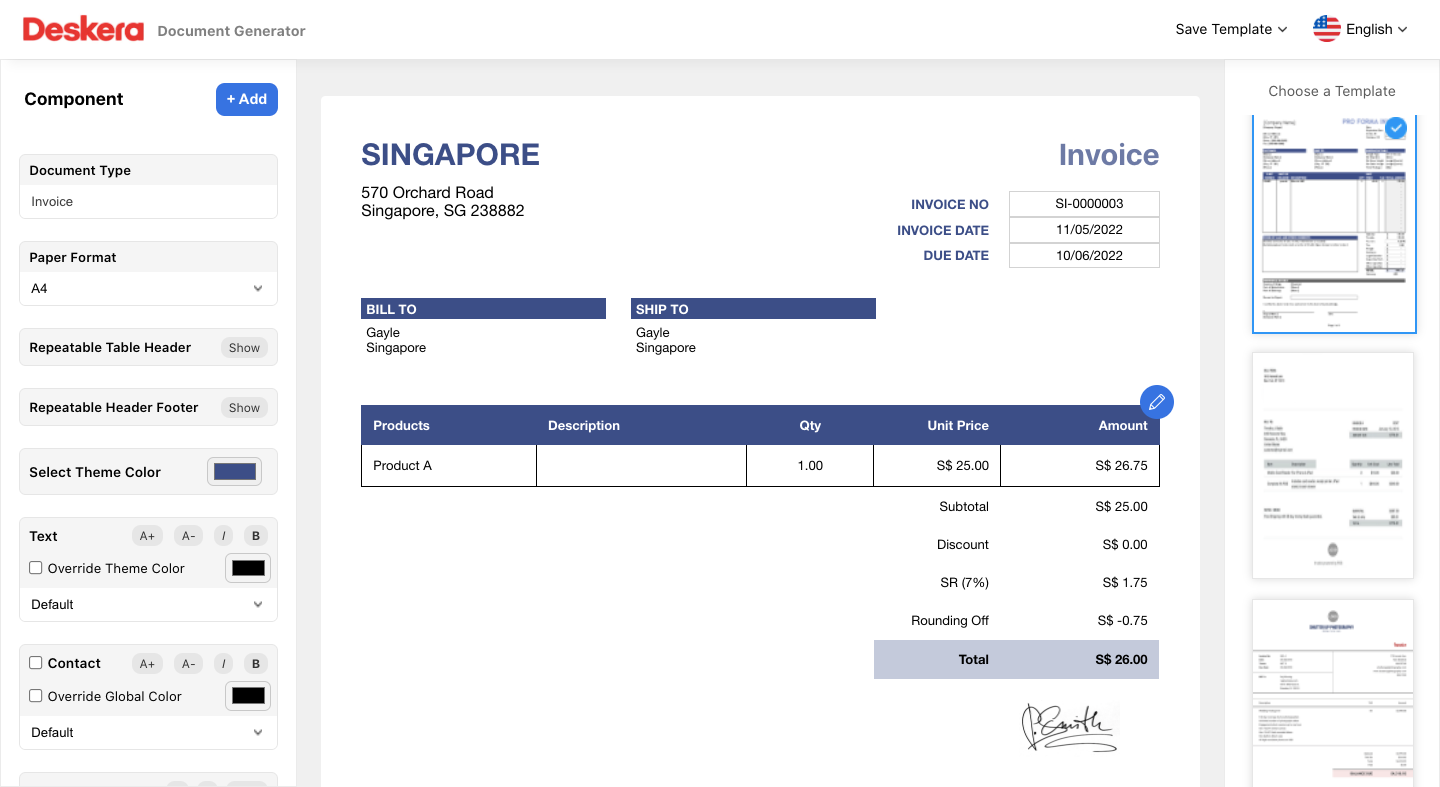
- component: you can add image, text, signature, watermark and custom fields. The component features are only applicable for a single-page document.
- document type: choose your preferred document type here. If not, you can always edit the document type directly on this field
- paper format: choose your preferred template size. You can choose from A4, A3, A5, legal, letter, 3.5 or 4.6
- repeatable table header: Show this field if you wish the header to reflect in multiple pages
- repeatable table header: Show this field if you wish the footer to reflect in multiple pages
- theme color: select the template's theme color. Changes will apply as per the theme color selected
- text font: you can choose to maximize or minimize the text font, change the font type, and the font color
- contact font: you can choose to maximize or minimize the contact text font, change the contact font type, and the contant font color
- company logo: upload your company logo here. You can increase or decrease the company logo size
- company name: the company name is auto-populated from the document created
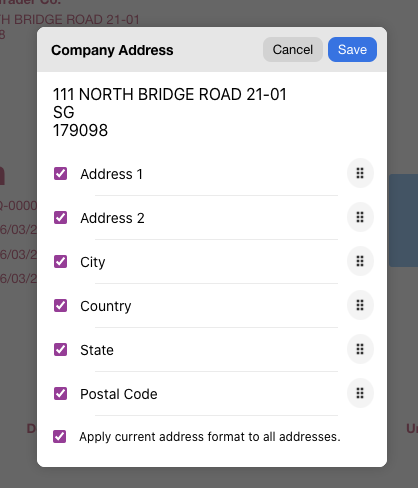
- company address: the company address is auto-populated from the document created. Click on the edit button under the address format. A pop-up will appear. You can enable the checkbox of address fields that you wish to appear in the template. Change the fields' sequence number using the drag and drop icon
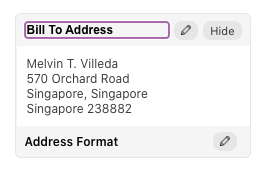
- bill to: You can edit the bill to header. Click on the edit button under the address format. A pop-up will appear. You can enable the checkbox for fields that you wish to appear in the template. Change the fields' sequence number using the drag and drop icon
- ship to: You can edit the ship to header. Click on the edit button under the address format. A pop-up will appear. You can enable the checkbox for fields that you wish to appear in the template. Change the fields' sequence number using the drag and drop icon
- currency: choose your preferred currency. You can also edit the currency field directly on this page
- decimal point: choose the document template decimal point
- quantity decimal point: choose the quantity field's decimal point
- document number: the document number is auto-populated as per your document number
- date format: the date format is auto-populated as per your document number You can change the date format as per the drop-down menu options
- document date: the document date is auto-populated as per your document number
- valid till: the valid date is auto-populated as per your document number
- ship by: the ship by date is auto-populated as per your document number
- product grouping: choose the product grouping based on custom fields if required
- signature: you can upload a snapshot of your signature to this template
- term and conditions: enter the document terms and conditions here
- notes: enter the document notes here
7. You can also edit the table's header.
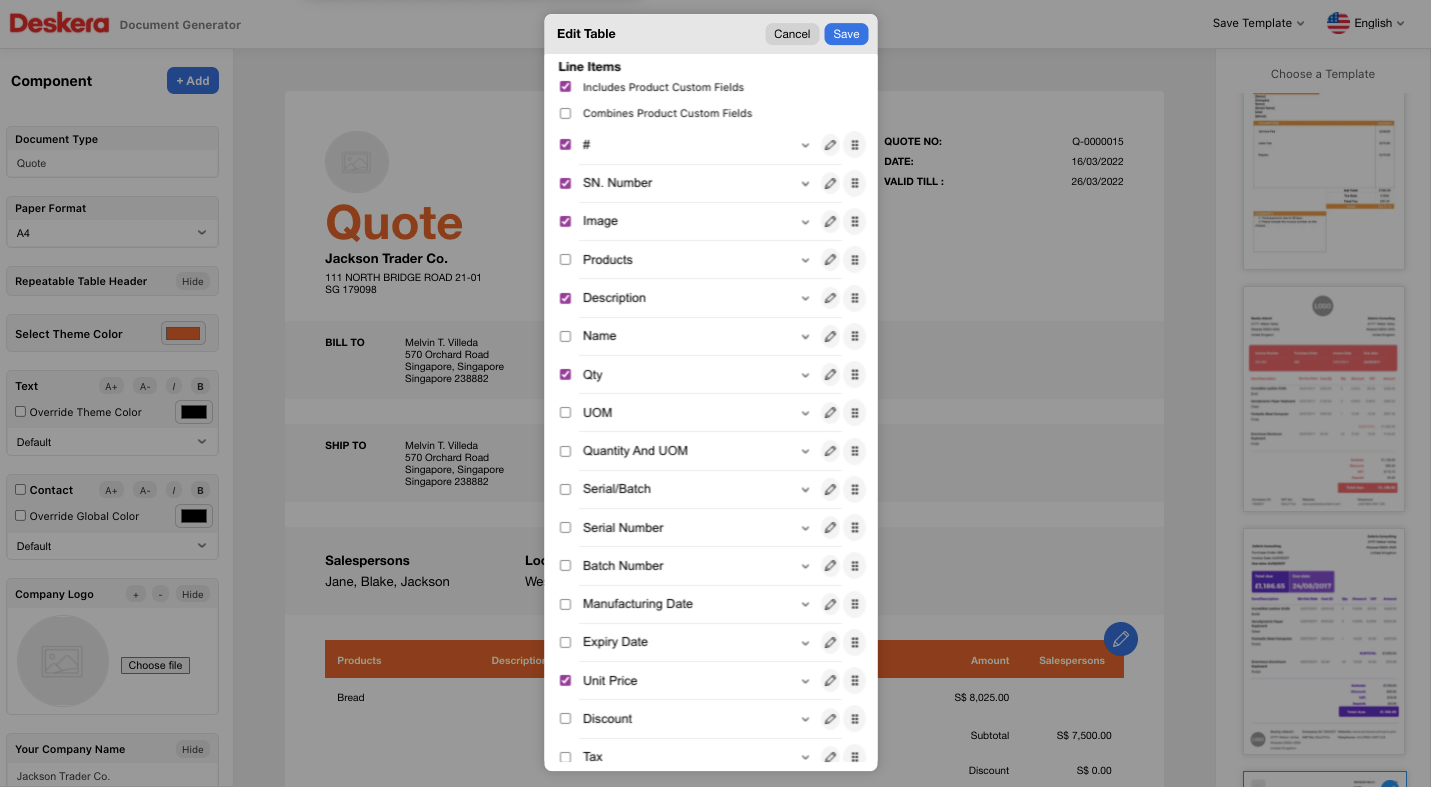
8. On the pop-up menu, you can enable fields that you wish to be visible in your table. You can choose the table's header from the drop-down options or enter your preferred table header directly on the box.
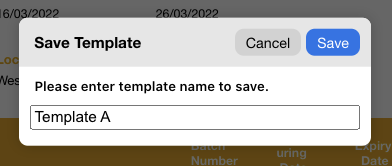
9. Once you are done designing the document template, you can click on the save template button. Click on the save button to create a new template. Enter the template name and save it. You can create multiple templates in the system.
10. You can always edit this template whenever you want to make changes. Click on the save as button whenever you want to make changes to existing template.
11. You have the option to hide fields that you do not wish to be visible on your template by clicking on the hide button.
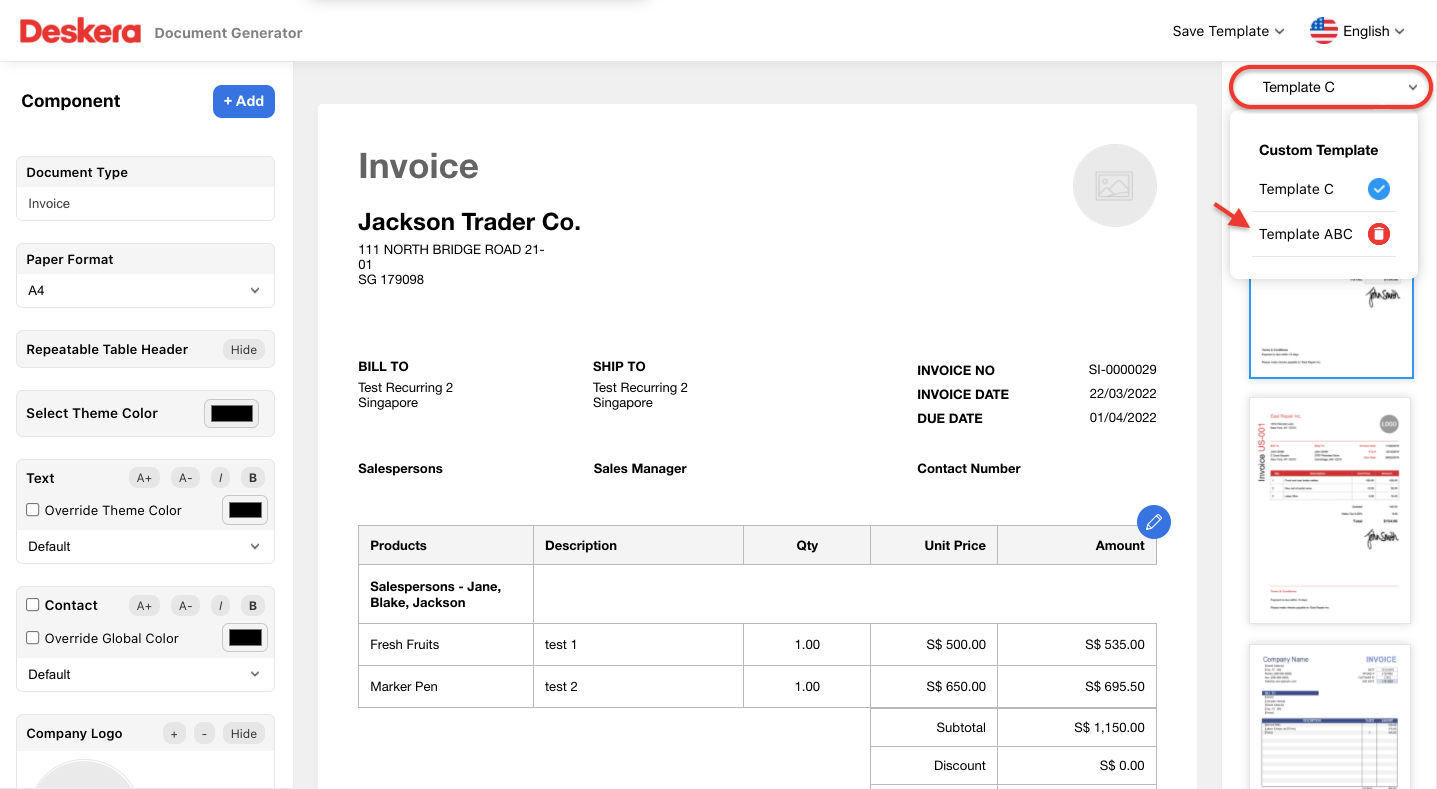
12. To delete the saved template, click on the drop-down arrow next to the custom template. Click on the delete button to remove the template completely from the system.
How can I send an email with the template attached to my client or vendor?
With Books+, users can send quotes, bills, orders, and even invoices documents to the respective recipients directly in the software.
Once you have saved the quote, invoice, order, and bill document as per the steps above, you can send an email with the template attached.
Follow the steps mentioned below:
- Go to your respective quote, order, bill, and invoice document.
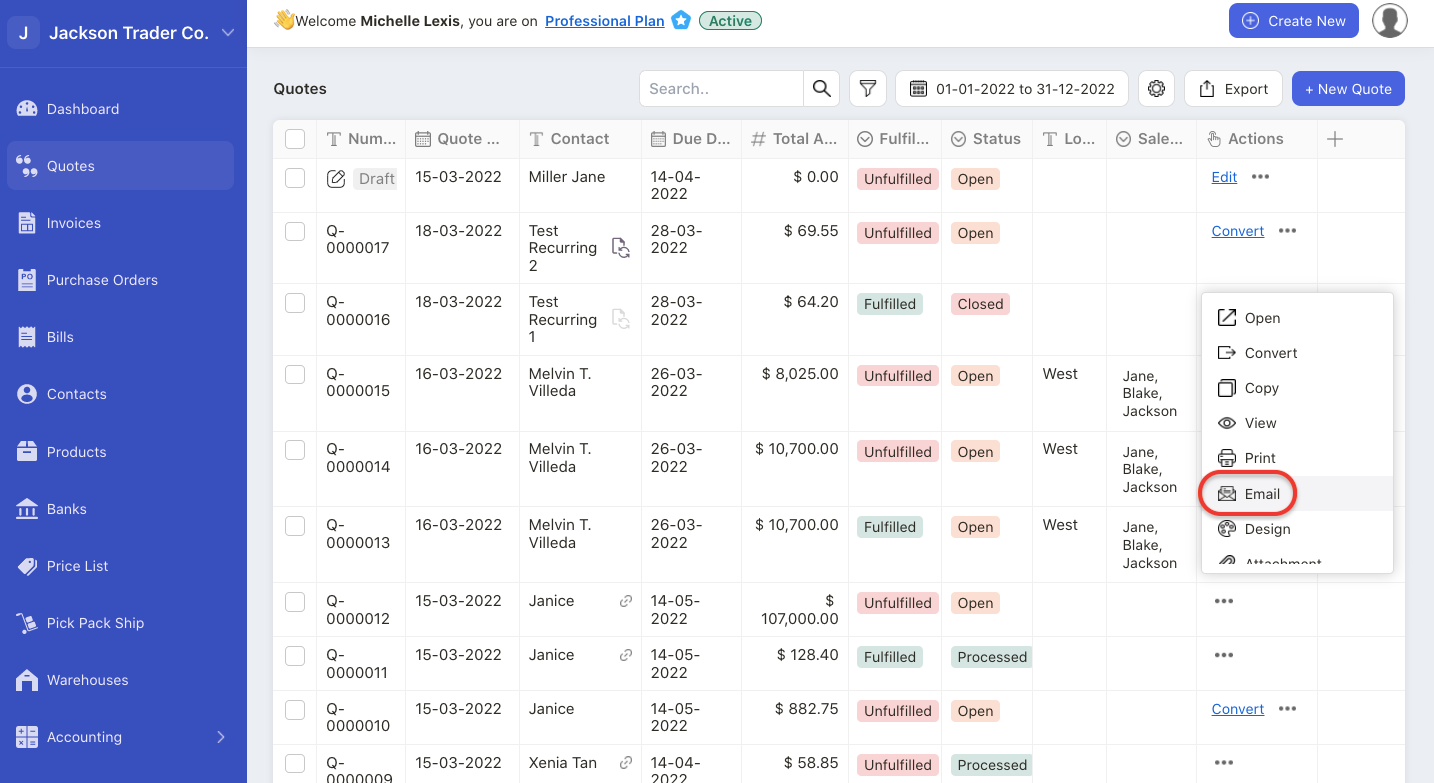
2. Click on the three dots and select email button.
3. This will open the pop-up menu.
4. Next, indicate the sender name, recipient’s email, the reply to email, and the email's subject. You are allowed to edit the fields directly from the pop-up box.
** You may send the documents to multiple emails at a time. Ensure that you indicate a semi-colon(;) to separate the multiple emails.
5. You can also edit the email's body instead of using the default template shown. Click on the + Placeholder button to generate the system field for this email.
6. The Placeholders that you select from are state here; Contact Name, User Name, Invoice Date, Invoice Amount, Due Date, Due Amount, Currency Code, Currency Symbol, Company Name, and Invoice Number.
7. Click on the reset button to reset the email's body.
8. Enable the apply to future emails checkbox to save the email's body. This is to ensure that the same email's body is saved for all the invoices created in the system so you don't have to retype the email content again.
9. Tick the checkbox at the bottom of the screen if you wish to receive a copy of the email.
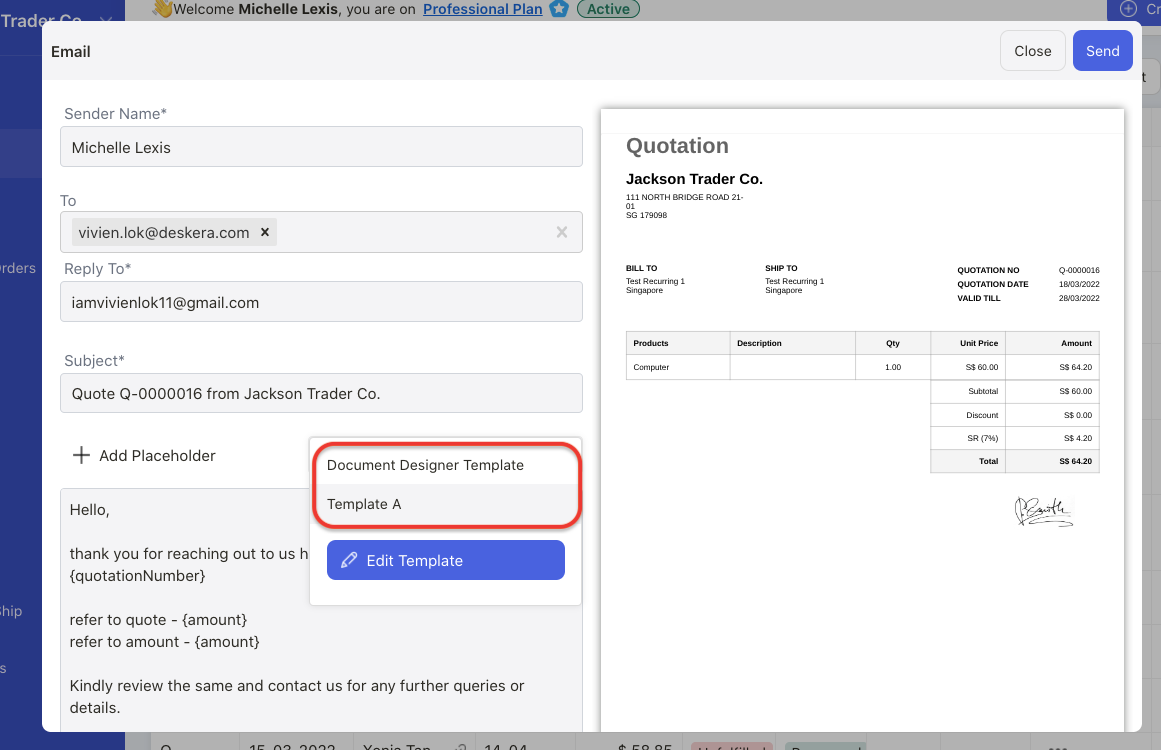
10. To change the document template, click on the drop-down arrow next to document designer template. Choose your preferred template created earlier.
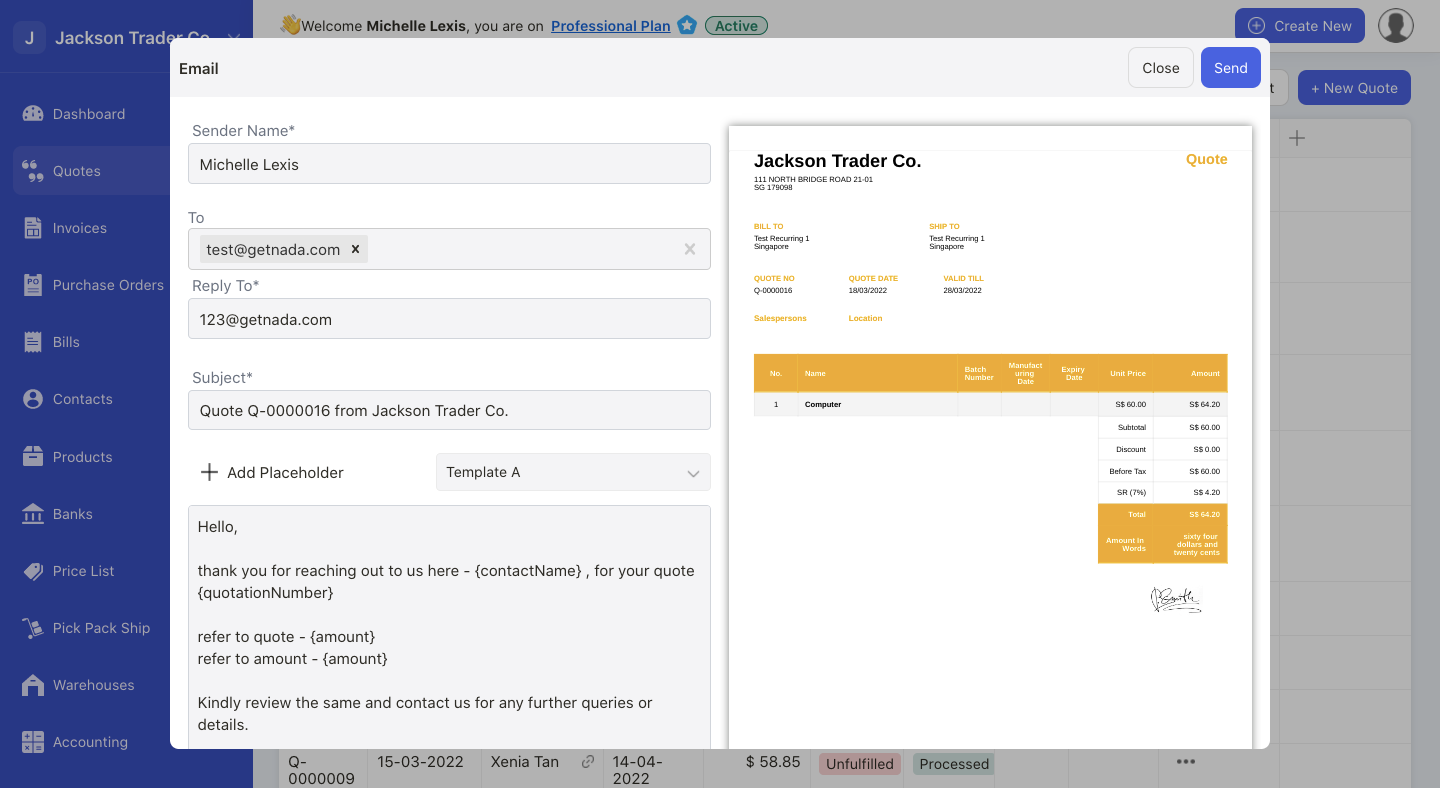
11. After that, you should be able to view the selected document template on the right-hand side panel. Verify the information in the email body, email subject and recipient email ID. Click on the Send button.
12. The recipient will receive your email with the document template attached as per configuration above. If the recipients are not able to view the email in their inbox, please advise them to check their junk and spam folders as well.