

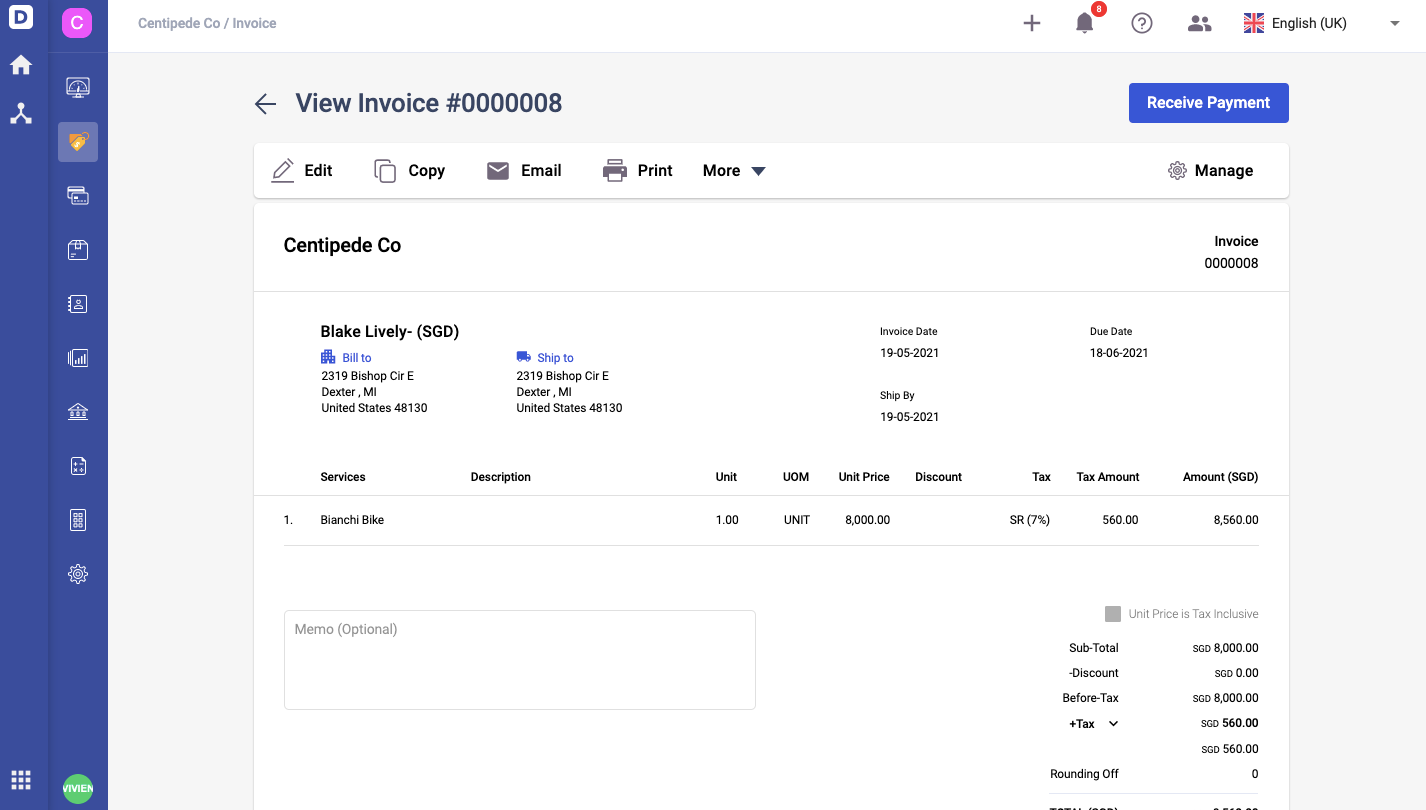
An Invoice is a commercial document issued from a seller to a buyer indicating the list of products/services rendered.
It also presents the products/services' respective costs.
Any Tracked Products sold will reduce the stock inventory recorded in the system.
Invoice Creation on Deskera Books
- Go to the Sell Tab and click Create. Select Invoice.
- Select your customer’s company in the Contact field. If they are not an existing Contact saved in your Contact Master, you can also fill in their company details as a new contact. Click here to find out how to add a Contact into your Contact Master.
- Determine the invoice date and the valid date of the Invoice. By default, this follows the payment terms set for the Contact selected.
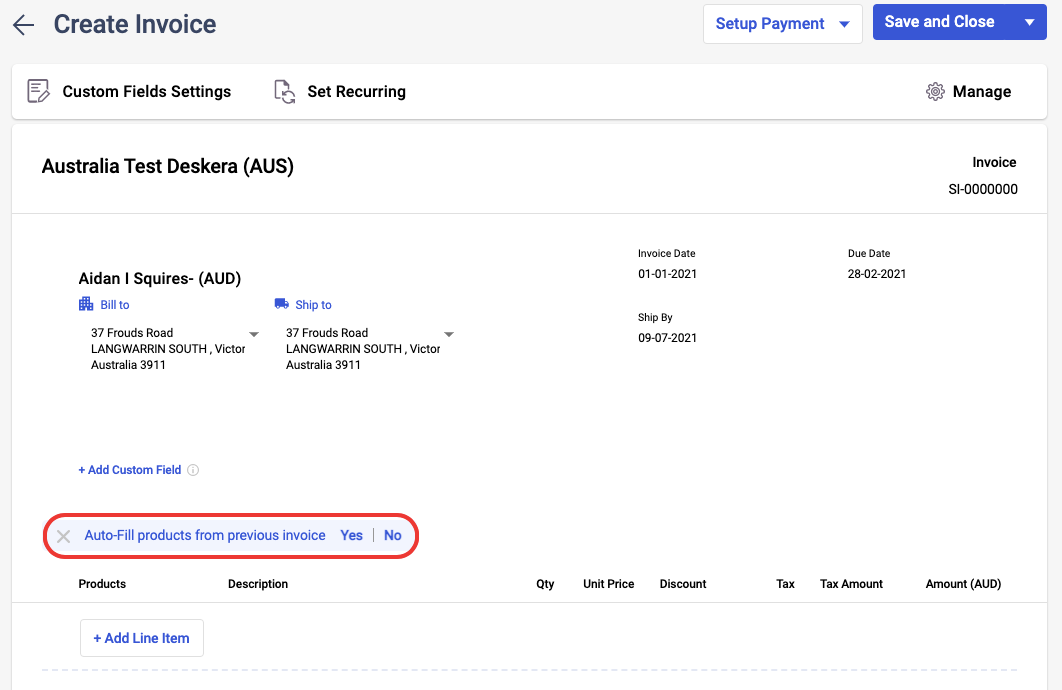
4. You have the option to choose the aut0-filled products from previous invoice for this contact. Click on Yes for the system to populate the data.
5. Select the products ordered by the customer and indicate the product description, quantity, UOM and additional tax wherever applicable. If the product you wish to include does not exist in the Product Master database, you may add a new product from this page.
6. Indicate if the products' unit price is inclusive of Tax (7%).
7. Save the Invoice by clicking the 'SAVE' button at the top right-hand corner of the page.
8. Do note that you can always search for the invoice of your contacts by entering their name and even the document number on the search records fields.
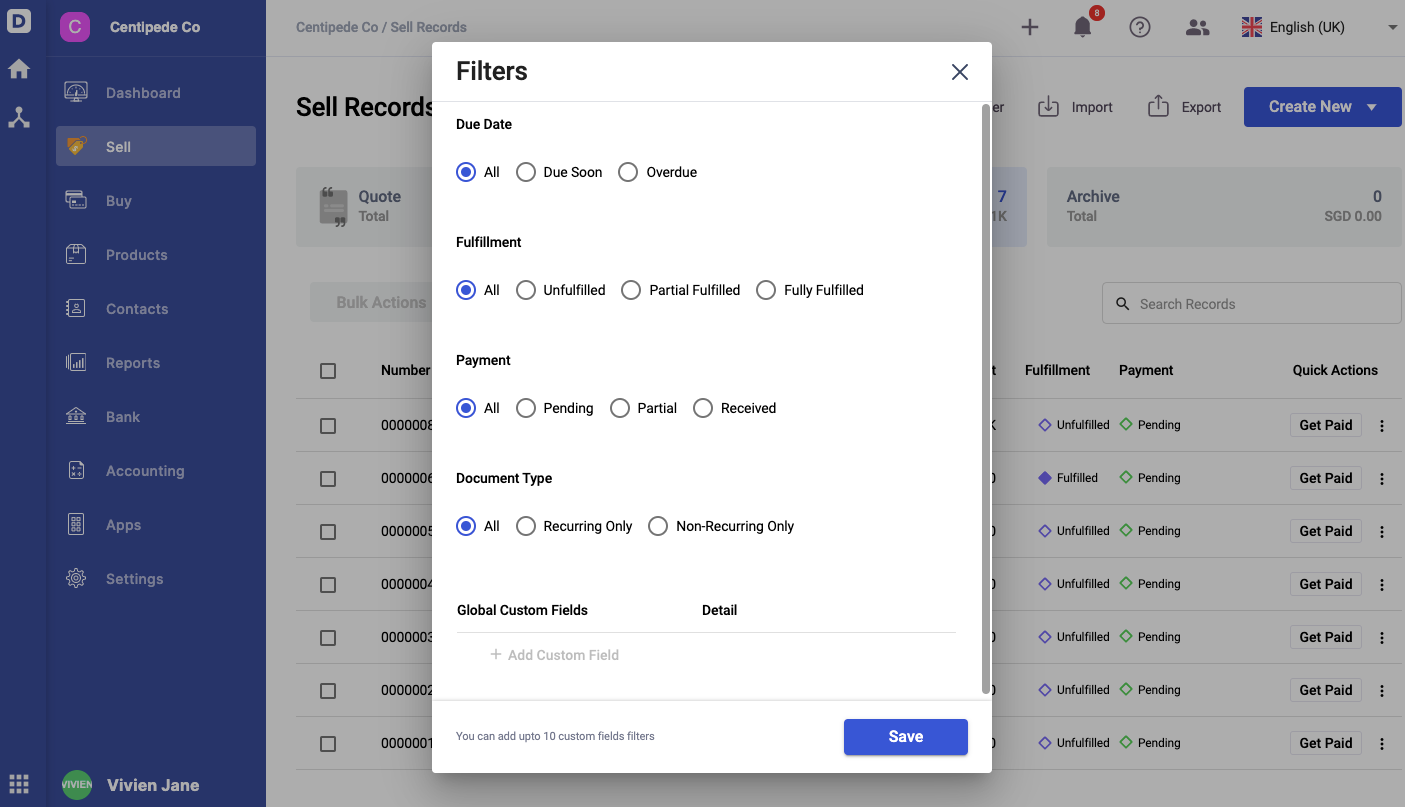
9. Click on the Filter button to filter the invoice document based on dates.
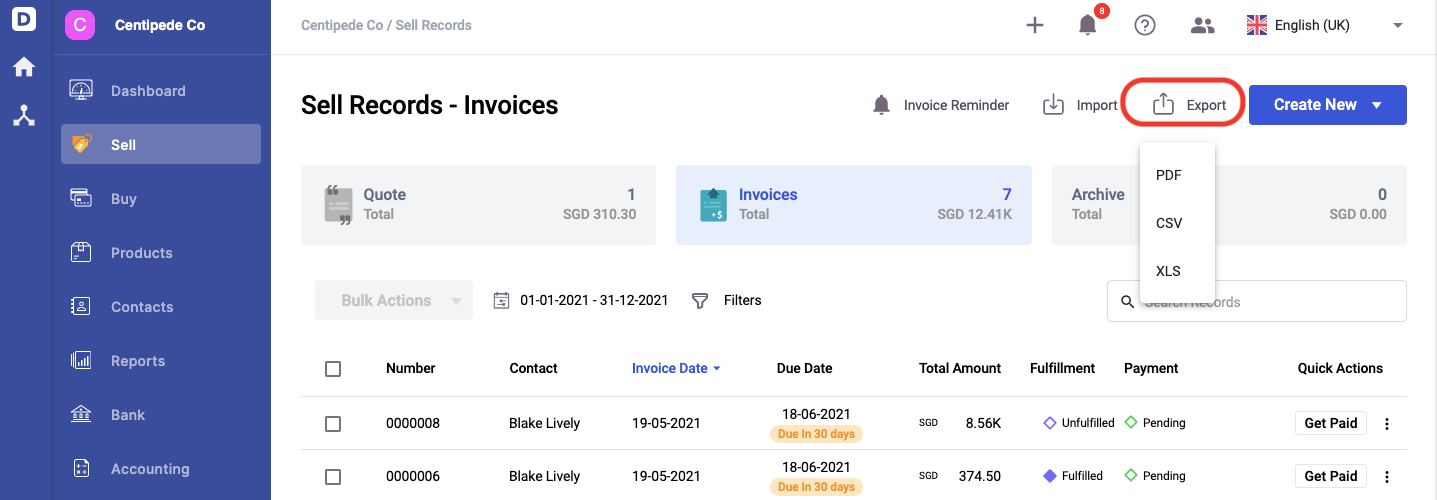
10. Deskera Books users can export the Invoice Summary List and saved them as PDF, Excel, and even CSV files to their desktop.
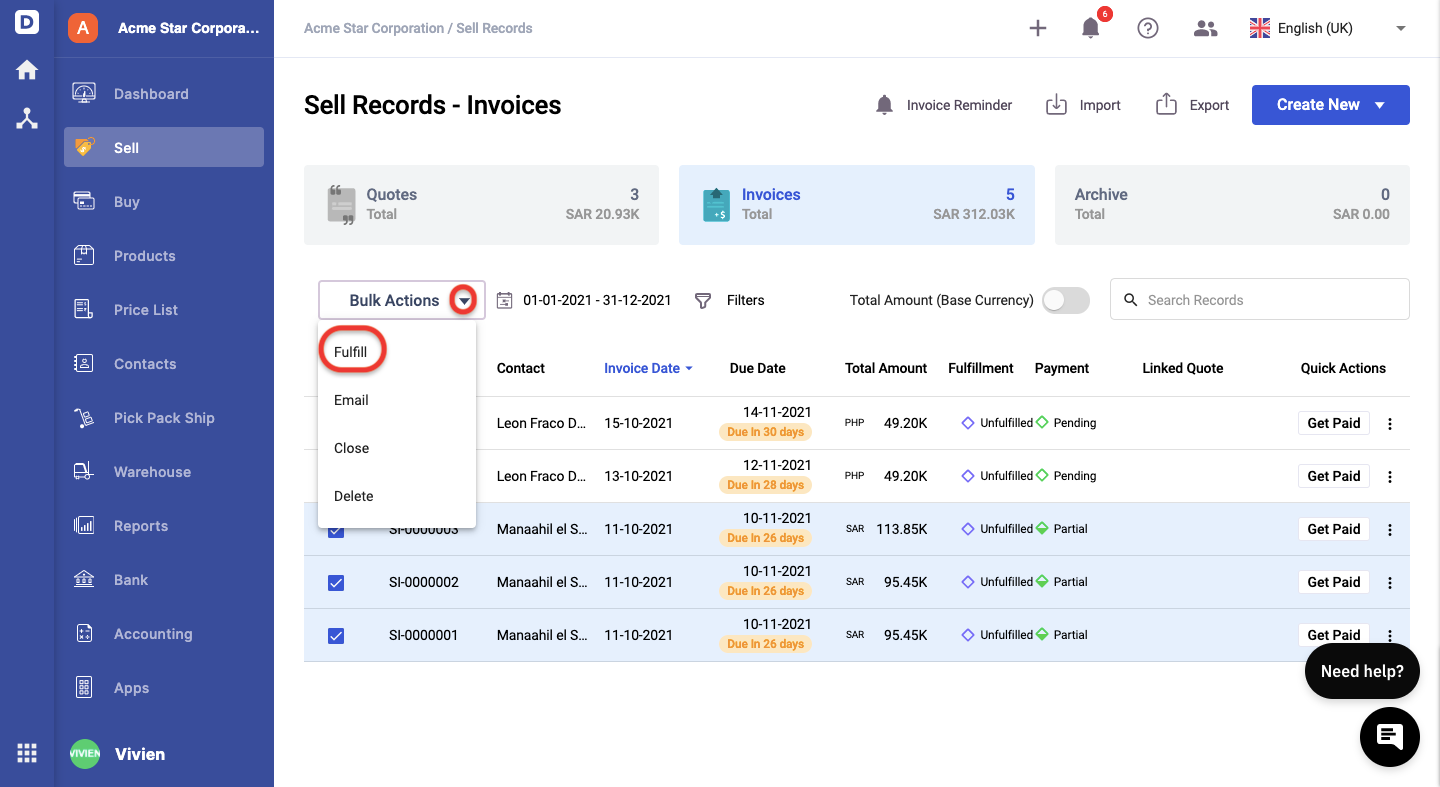
11. You can bulk fulfill the invoices by marking the checkboxes of all the invoices in the Invoice Summary List. You can only select invoices for the same contact for the bulk fulfilment feature.
12. Next, click on the "bulk actions" and choose Fulfill button.
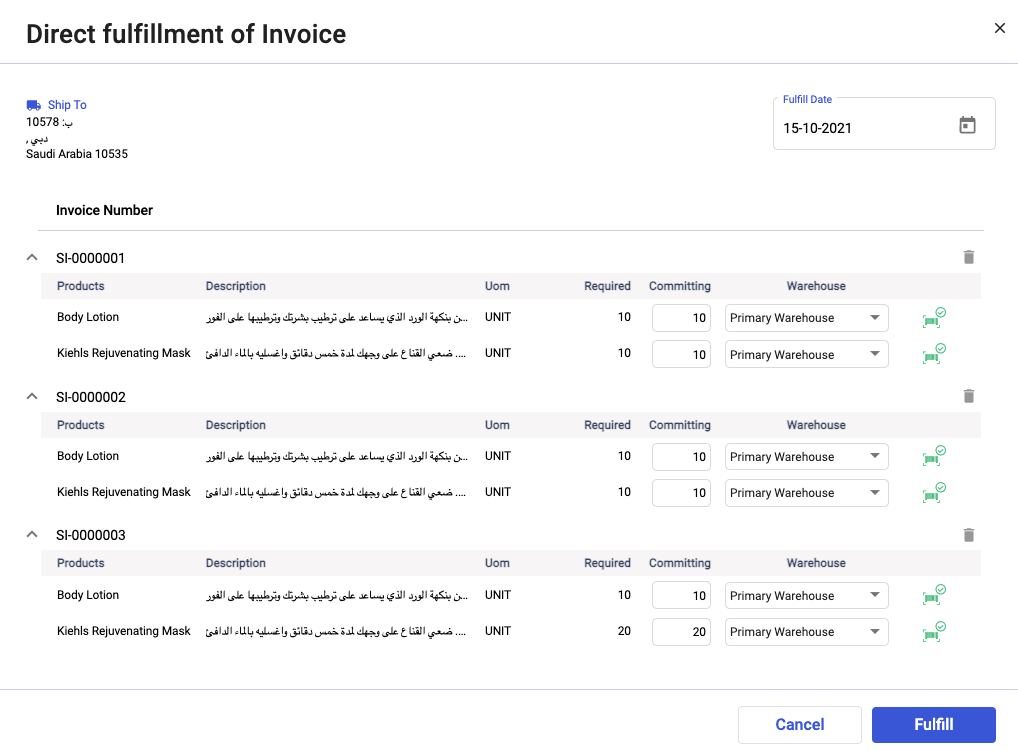
13. A pop-up will appear. Enter the quantity to commit for the line items for each invoice and choose the right warehouse accordingly.
14. Once you have confirmed the data, click on the Fulfil button.
** Please note that you won't be able to view the bulk fulfilment button if you do not have sufficient quantity for any of the invoices that you have selected.
Congratulations! You have successfully created an Invoice.