

The employees of every company will submit their expense claims daily, if not monthly. Once they’ve submitted their expense claims, the admin of the company will take the next step of action either to approve or reject the claims.
There are few different kinds of expense claims such as claims for a food, traveling, accommodation, healthcare, etc.
Create Expense Claims
To create new expense claims, tap on the Expense Claims on the dashboard. Next, you should be able to view the screen as shown below:
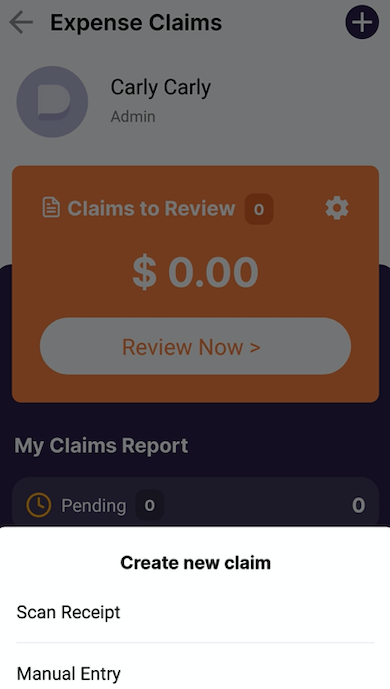
Both admins and users in the organization are allowed to create a new expense claim in the mobile app. Once you tap on the "+" icon, there are two options that you can choose to add new expense claims:
a) Scan Receipt
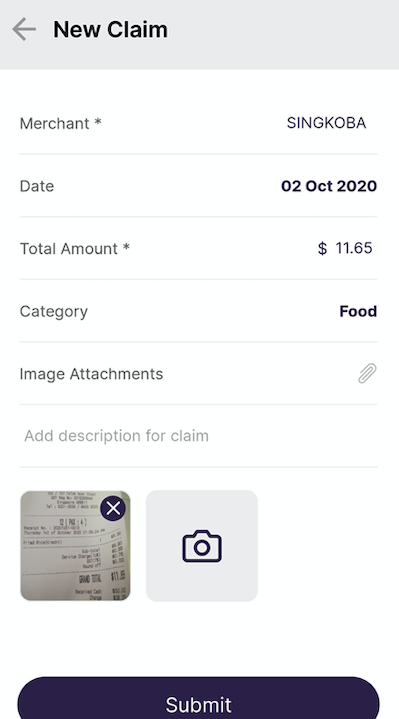
1. Once you click on Scan Receipt, choose from "take photo" or "choose photo from library", to scan your receipt.
2. Our system will automatically read the information on the receipt such as the amount and the merchant name. The receipt will be attached to the expense claims during the submission.
3. Users are given the flexibility to edit the information on the scanned receipt.
4. You will have to select the category of the expense claims and once done, click on the Submit button.
b) Manual Entry
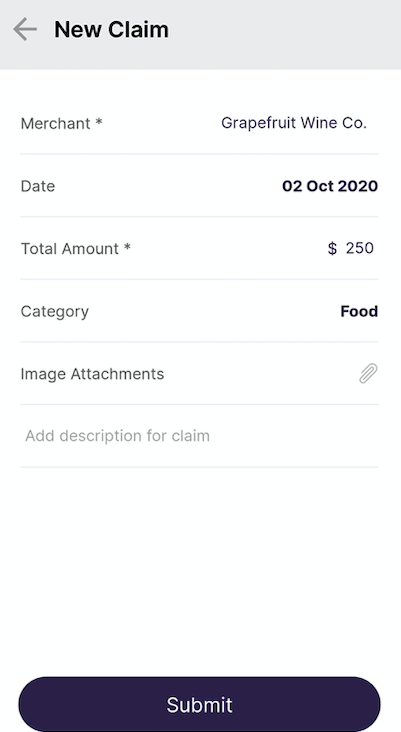
To submit the expense claims manually, you will have to fill in the merchant's name, the date of submission, the total amount to claim, the category of the claim, and attach any images or descriptions, if you wish. Once done, tap on the Submit button.
Once your expense claims have been submitted, the expense claims admin will view all the claims submission and decide to approve or reject the claims.