

Have you ever wondered how you can complete your endless work tasks using the shortest time and strike that off by night falls?
It can be stressful and overwhelming to complete a big pile of work, mainly if you have limited resources and time.
That's why you need automation to do the work for you.
Automation helps you perform your daily repetitive tasks efficiently.
You can focus on other areas of your work that need more attention, hence improving your overall work productivity.
Let us introduce you to Deskera Workflow Engine - the software that helps you automate your daily nitty-gritty tasks to achieve more in a single day.
What is a workflow engine on Deskera?
What is a workflow?
A workflow is a series of recurring tasks that you need to perform daily to achieve your business goal.
Business workflow is the process set that guides your employees to achieve a smoother, more standardized, and consistent operational flow.
With Deskera Workflow Engine, you can design your business processes and automate a series of recurring tasks that fit your business requirements and needs.
Once you have designed the workflow, the Deskera application will take cues from the designated workflow and execute them based on the preset rules.
How do I access to the workflow engine?
Follow the steps below to access to the workflow engine in Books+:
- Login to your Books+ account.
- Go to Automations via the sidebar menu.
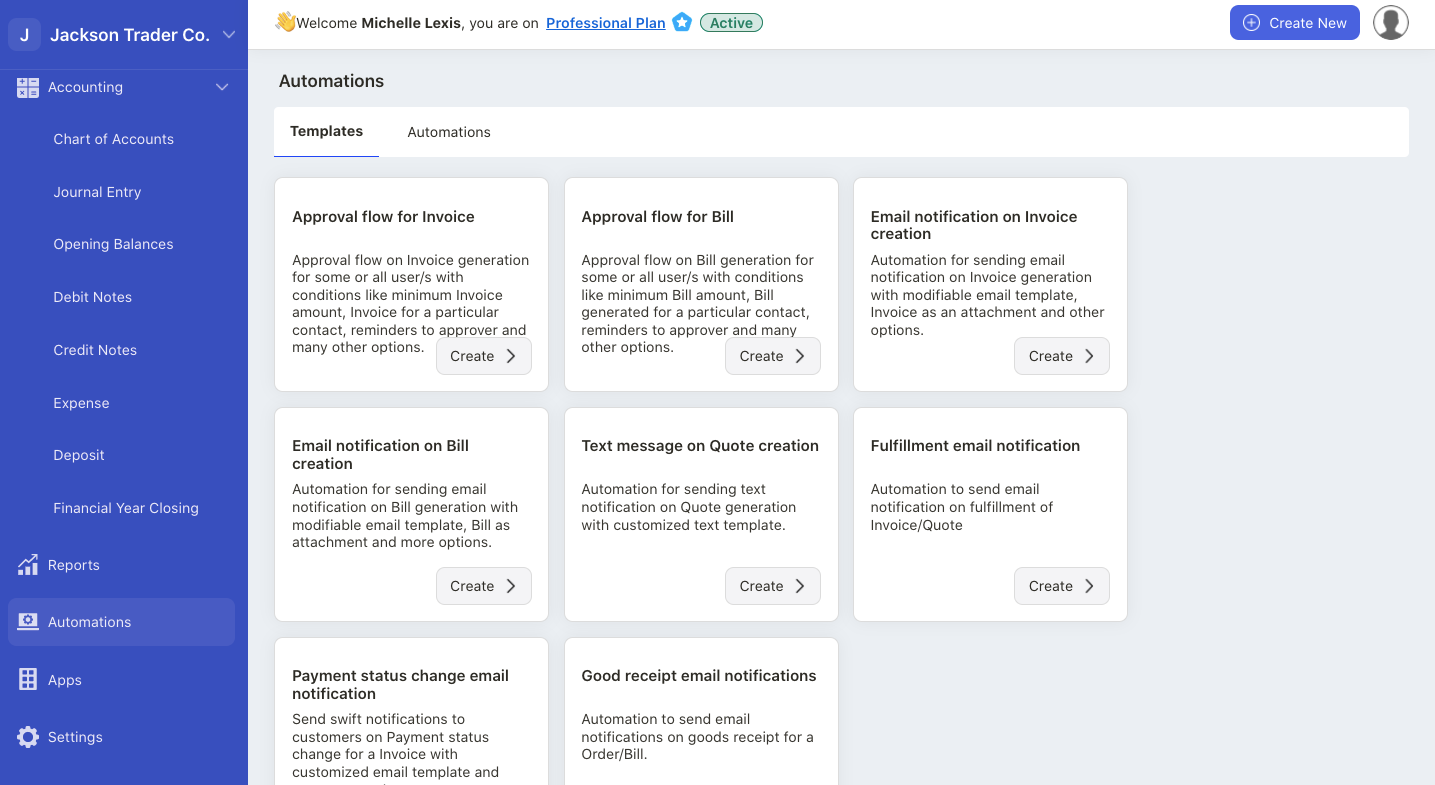
3. On this page, you can view all pre-defined automations set in the system.
4. Select the automation template that fits your requirement.
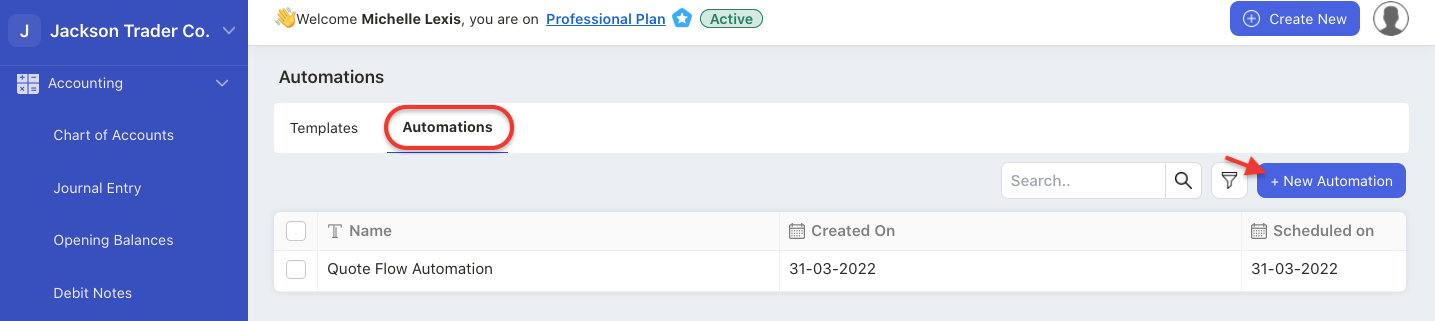
5. If not, you can always create a new automation by clicking on the automation tab. Select "+ New Automation" button.
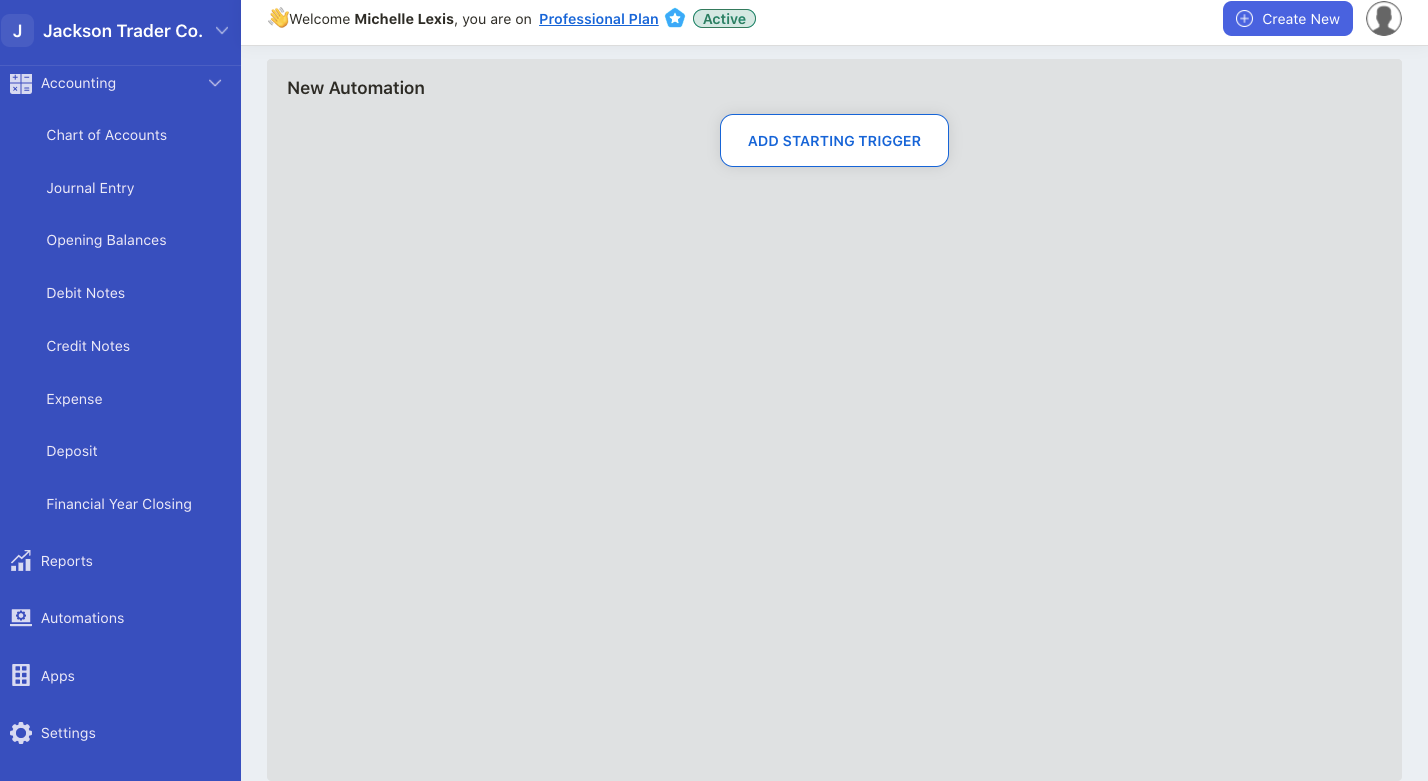
6. Next, click on the add starting trigger button.

7. A pop-up message will appear. You can choose the trigger that activates the workflow as per the image above.
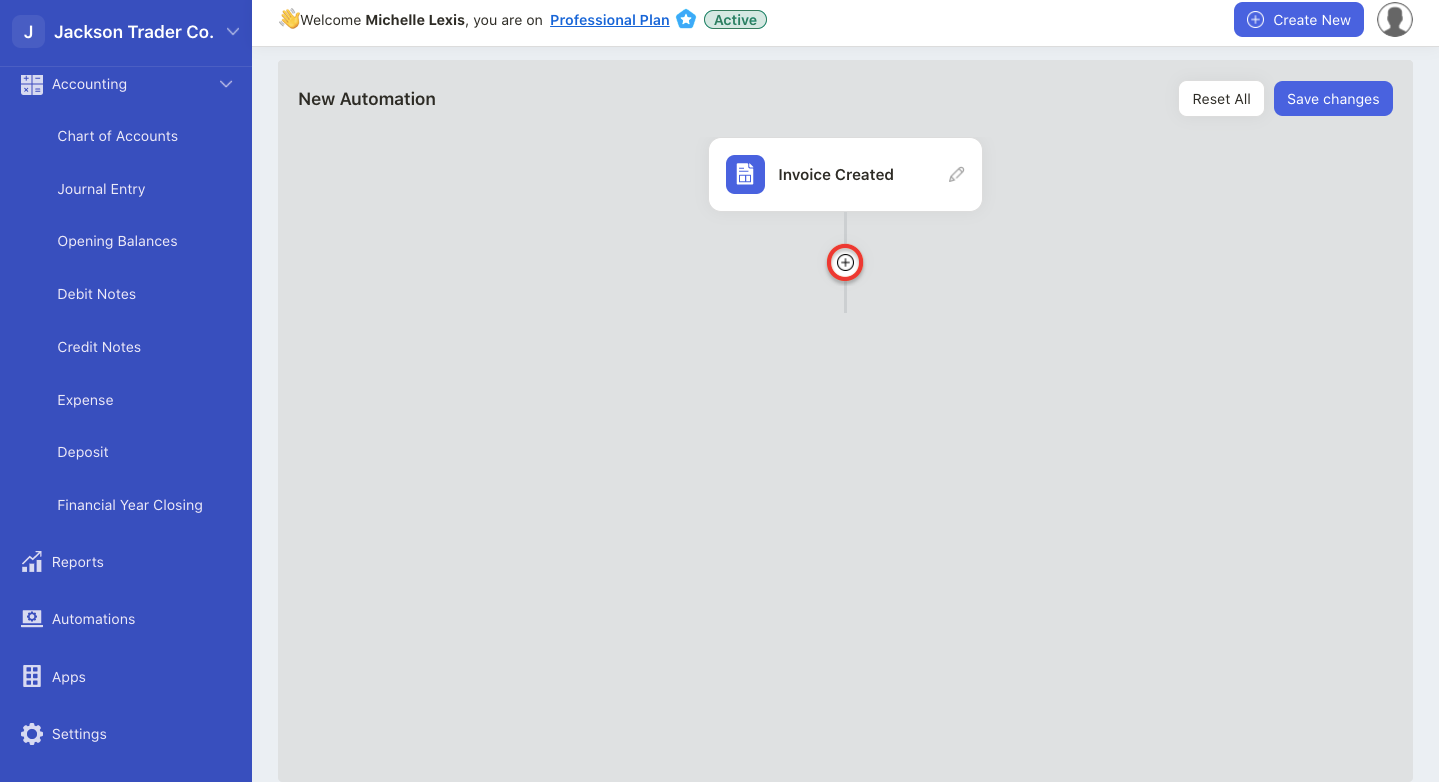
8. Once you have selected the trigger, click on the + icon.
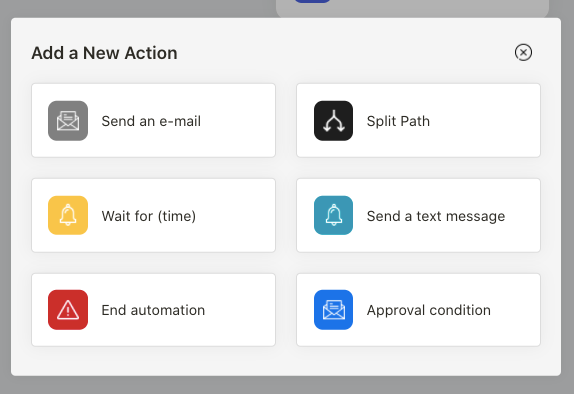
9. Choose the action after the trigger, You can choose from:
- send an email - configure the email subject and email body after the trigger is activated
- split path - split into two action based on the conditions configured
- wait for (time) - set the time for the system to trigger the next action
- send a text message - send a text message to the respective contact after the trigger
- approval condition - configure the approvers conditions before the next step of action. If the conditions are not met, then you can end the automation.
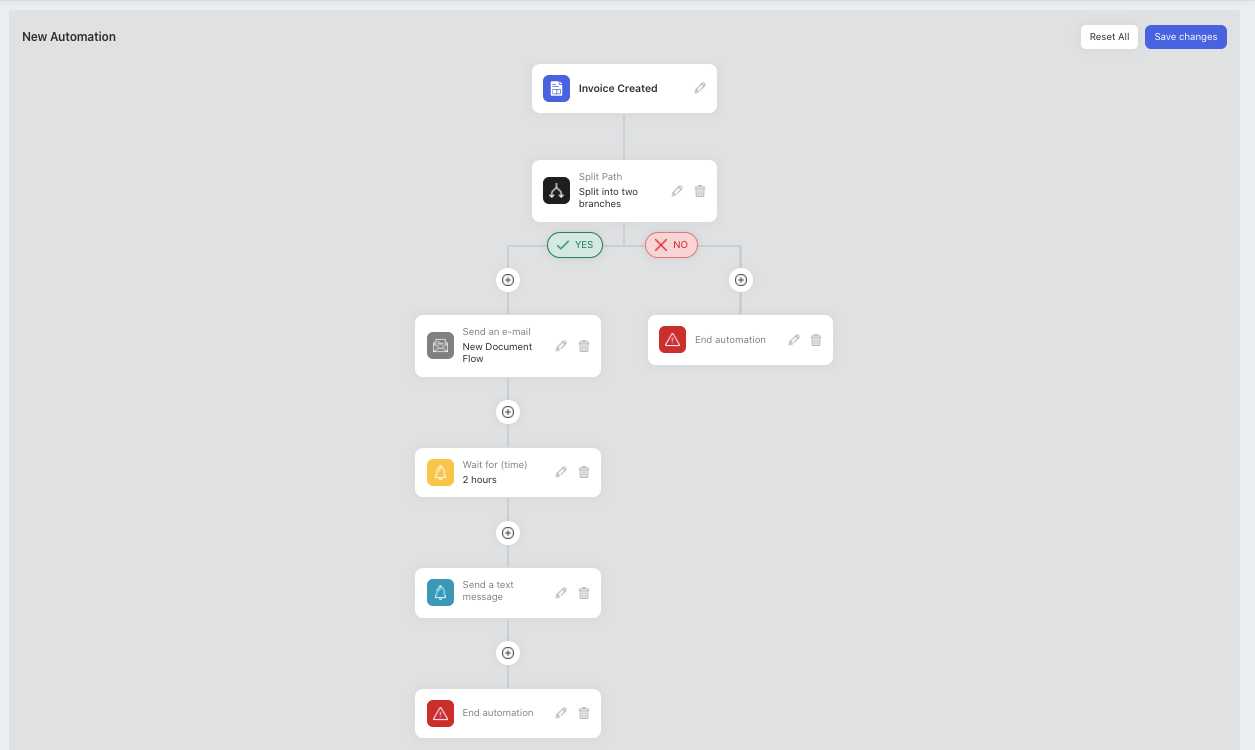
10. You should be able to view the workflow configured. Please note that you should end the automation after all the conditions are met.
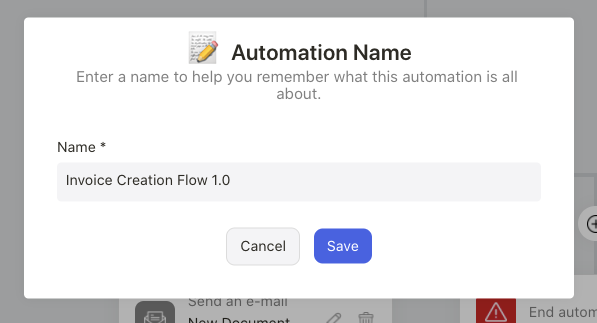
11. Click on the save button. Name the automation and save it.
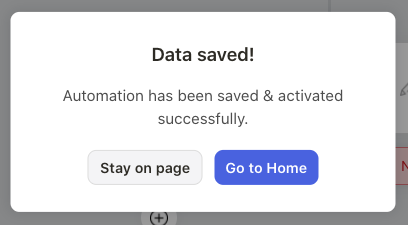
12. The system will prompt a message that the automation has been saved. Click on the Go to Home button.
13. You can view the workflow creation earlier.
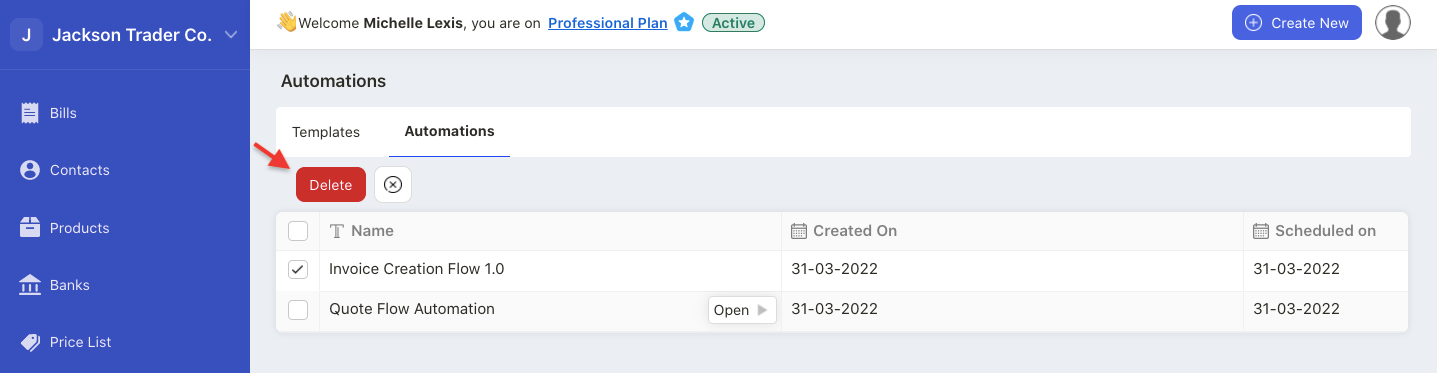
14. Select the checkbox and select the delete button to remove this automation.
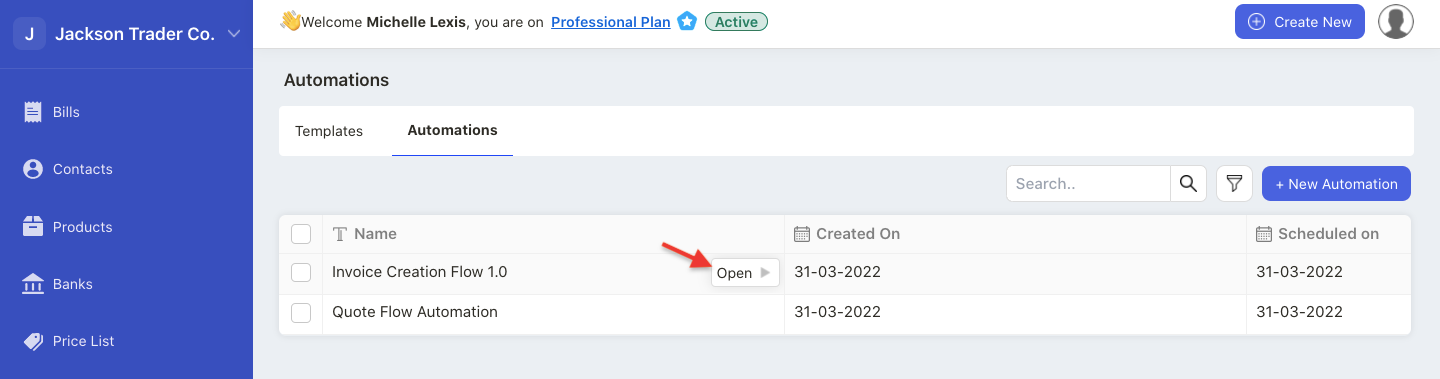
15. To view the workflow, click on the open button. You can make changes to the workflow configured earlier and save it.