
On Deskera App Store, users can track and monitor their inventory using the Stock Transfer and Stock Adjustment App. Deskera builds the Stock Transfer and Stock Adjustment App for organizations to monitor their stock more efficiently.
To integrate with Stack Transfer, follow the steps mentioned below:
- On Deskera Books select the organization which you want to connect the Stock Transfer Application.
- Next, in your Stock transfer App, you should be able to map all the Track Products, Warehouse, inventory details, and Invoice information to Deskera Books.
- Click on the App on the sidebar menu.
- Click on the Stock Transfer integration app and select the 'Get This App' button.
- Next, click on the Connect button and enter Deskera's Book credentials.
- Then select the organization and click Authorize.
- You will see a green tick, that represents you have successfully connected to your organization.
- On the sidebar menu click on the Stock transfer which will take you the page where you can create a new Stock Transfer for the selected organization and product.
- On the top right side of the screen, click on the New Stock transfer button for creating a new transfer
- A window will appear, where you need to fill in the required below fields:
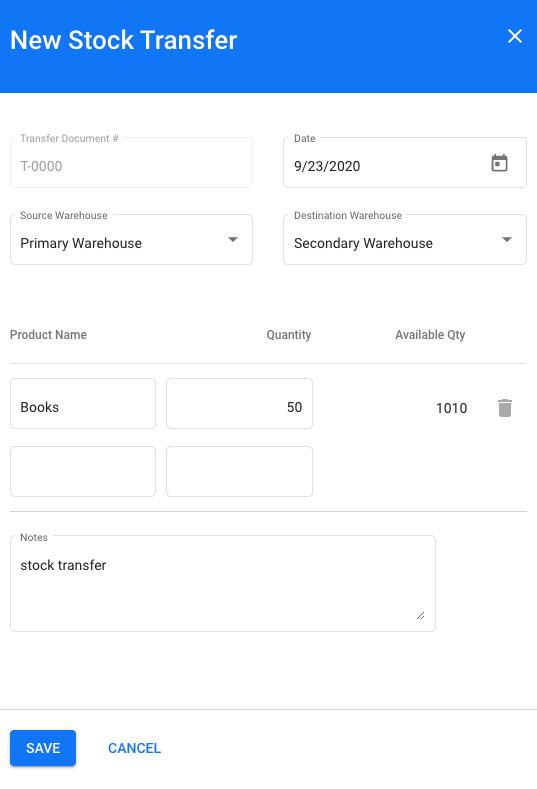
- Date - Select the Stock transfer date from the calendar
- Source warehouse - Select the source warehouse from where you need to make the transfer
- Destination Warehouse - Select the warehouse where the transfer has to be made from the source warehouse.
- Product Name: Select the product name mapped as per product created on Deskera Books
- Quantity - Add the number of stocks to be transferred to selected destination warehouse
- Available Quantity - it is the total of Total stock available in the Source warehouse - Total number of stock transferred
- Notes - Mention the stock transfer notes if any
11. Lastly, click on the Save button to create a new stock transfer.
This stock transfer will get reflected in the invoice created for the product selected, once you do the fulfillment of the invoice.
Edit Stock Transfer Information

After creating the Stock transfer, and if you want to make any changes, you have an option to Edit the Stock transfer information.
Click on the three vertical dots on the created Stock transfer on the right side corner, an Edit option will appear where you will be able to change the information.
By clicking on the Print button you will be able to print the Stock transfer assessment form.
Export Report
On the top right side of the page, you can see an Export option where you can fetch the stick transfer details in an Excel format.
Filter Information
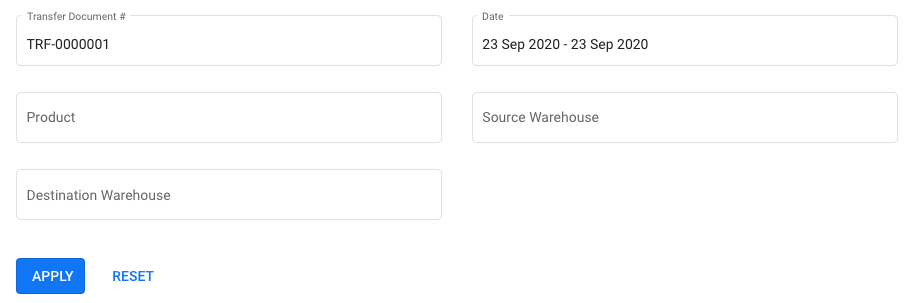
You will be able to view the Stock Adjustment information either with Transfer document number, Date, Product, Source Warehouse, and Destination Warehouse by clicking on the Filter button.
Once you have selected the above filter options click on the Apply button to view the details.
You also can set the different filters by just clicking the Reset button.
Stock Transfer for Batch and Serial Goods
If you have created batch and serial goods in the product module, you can perform stock transfer for these goods.
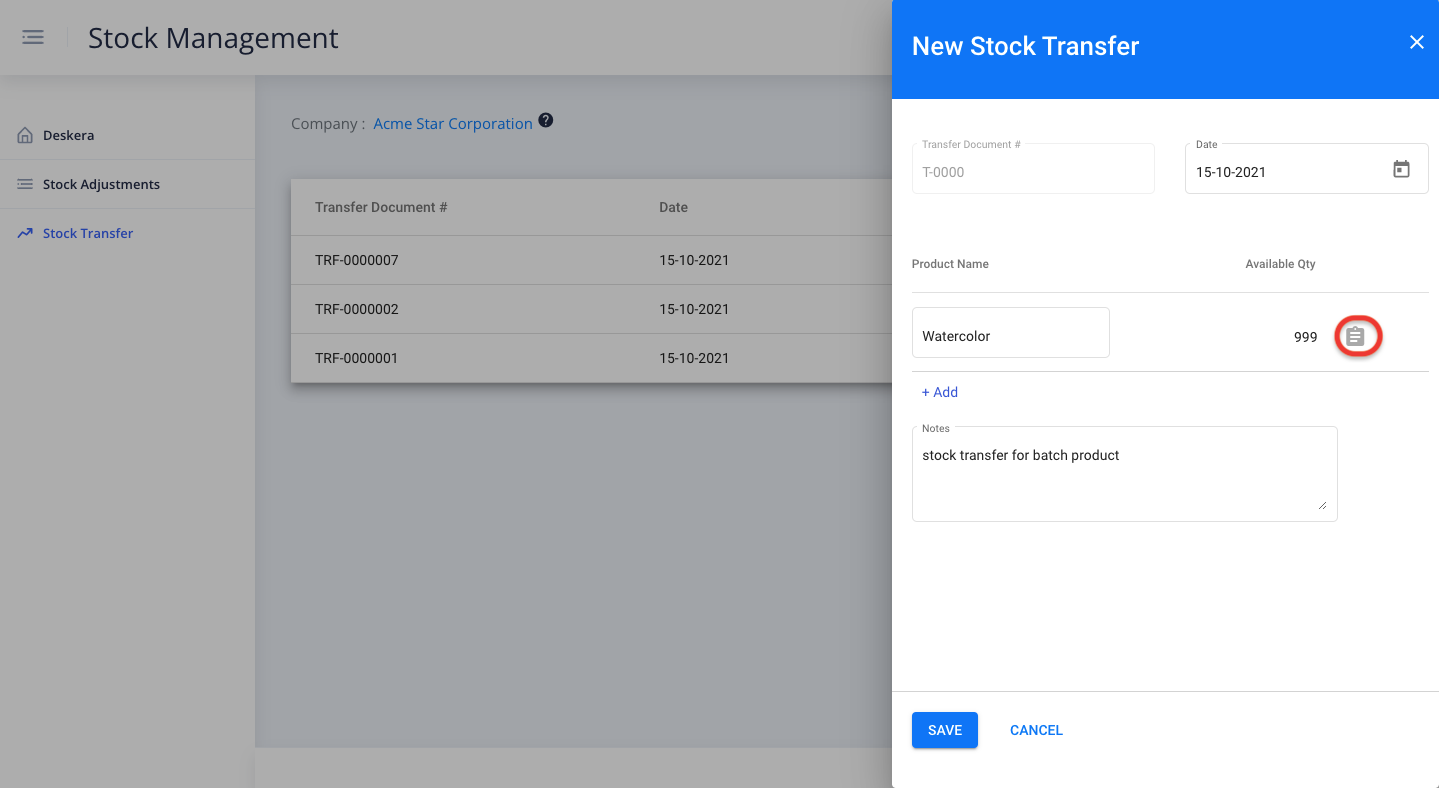
- Create a new stock transfer.
- Enter the date, product name (can be batch or serial goods), and click on the note icon.
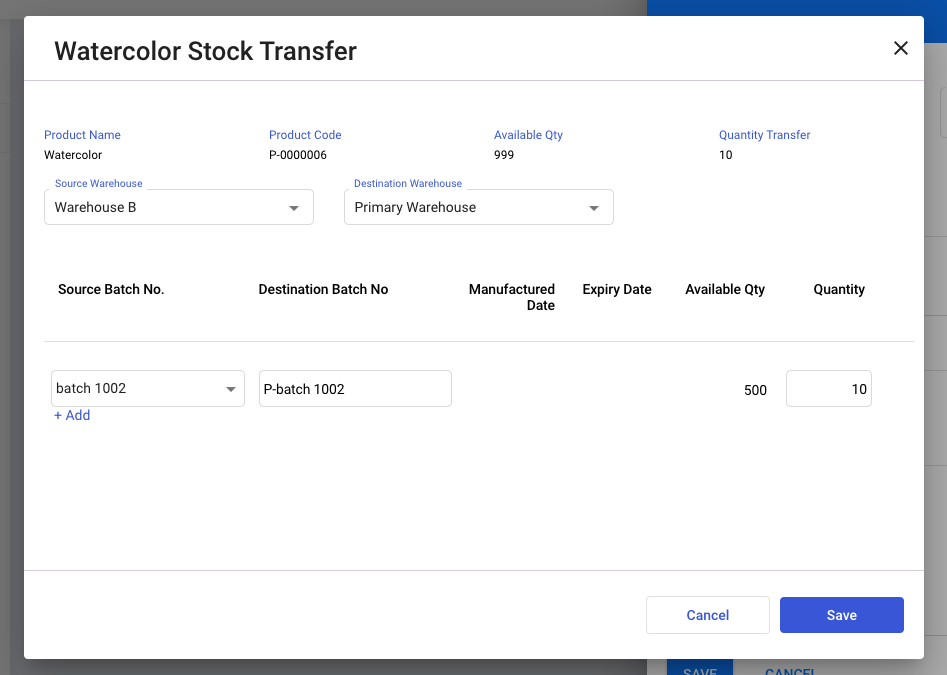
3. A pop-up will appear. Enter the source warehouse and the destination warehouse. Enter the source batch number, destination batch number, and the quantity to transfer the goods.
4. Click on the Save button.
5. The note icon will turn green, meaning there is sufficient stock available in the warehouse. If the icon doesn't turn green, you will need to check the stock availability in the warehouse for the respective goods.
6. Click on the Save button.