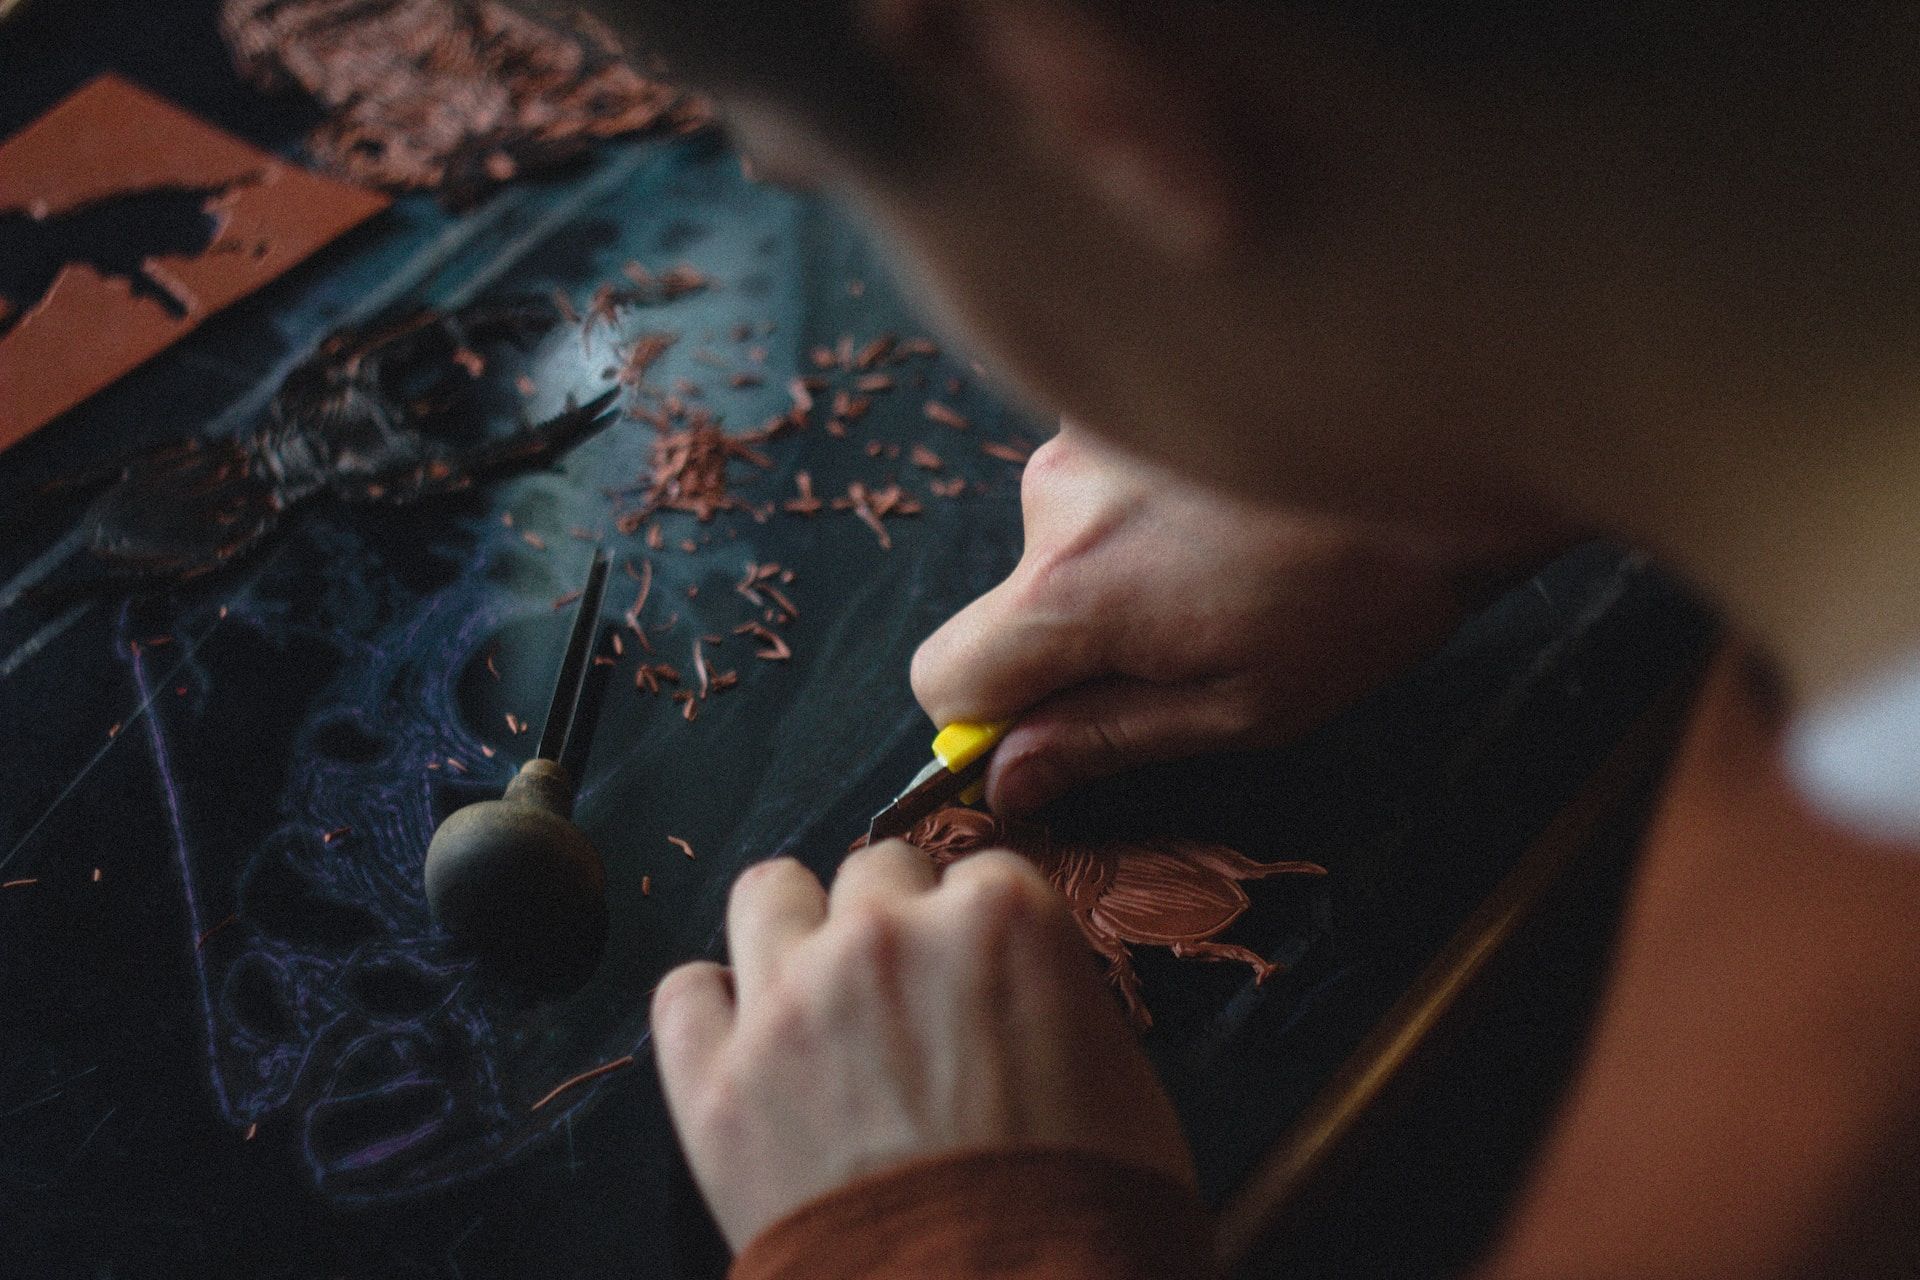

An age-old craft that has been practiced for thousands of years is leatherworking. Even now, leather goods are prized for their elegance, toughness, and adaptability. By using carving and stamping processes, craftspeople can give leather goods a distinctive personality and aesthetic appeal.
Leather carving involves cutting and shaping the surface of the leather to create intricate designs, while stamping involves pressing patterns or designs onto the leather using special tools. These techniques can be used to create a wide range of leather products, including belts, wallets, bags, shoes, and more.
In this article, we will explore the world of leather carving and stamping in detail. Let's take a look at the table of content:
- Meaning of Leather Carving and Stamping
- Significance of Leather Carving and Stamping
- Tools and Materials
- Leather Carving Techniques
- Leather Stamping Techniques
- Tips and Tricks for Successful Carving and Stamping
- Applications of Carving and Stamping Techniques
- Frequently Asked Questions (FAQs) on Leather Carving and Stamping Techniques
- Wrapping Up
- How Deskera Can Assist You?
Let’s get started!
Meaning of Leather Carving and Stamping
Leather carving and stamping are two techniques used in leatherworking to create decorative designs, patterns, and images on leather surfaces.
Leather carving involves cutting and shaping leather with specialized tools such as knives, swivel knives, and bevelers to create intricate designs and patterns. Furthermore, this technique is often used to create three-dimensional designs that add depth and texture to leather products.

On the other hand, leather stamping involves using various tools such as stamps, punches, and mallets to create embossed or imprinted designs on leather surfaces. This technique involves pressing a stamp or tool onto the leather surface with force to create a raised or recessed pattern.
Both techniques are popular in the leatherworking industry and are used to create a wide variety of leather products such as belts, wallets, bags, and shoes. They require a high level of skill and precision to produce high-quality results, and many leatherworkers specialize in these techniques to create unique and beautiful designs.
Significance of Leather Carving and Stamping
Leather carving and stamping are significant techniques in leatherworking for a variety of reasons:
Aesthetic Appeal: Leather carving and stamping can add unique and beautiful designs to leather products, enhancing their overall aesthetic appeal. This makes them popular in fashion and interior design industries, where decorative leather products are highly sought after.
Customization: These techniques allow for customization of leather products, enabling customers to personalize their leather goods with unique designs and patterns.
Value Addition: The addition of carved or stamped designs to leather products can increase their value, making them more desirable to customers and potentially increasing their price.
Traditional Craft: Leather carving and stamping are traditional crafts that have been used for centuries. The techniques have been refined and passed down through generations, preserving traditional knowledge and craftsmanship.
Skill Development: These techniques require a high level of skill and precision, making them challenging and rewarding for leatherworkers. Developing these skills can lead to mastery of the craft and a sense of pride in creating high-quality, handcrafted products.
Overall, leather carving and stamping are significant techniques that enhance the value, aesthetic appeal, and customization options of leather products while preserving traditional craftsmanship and providing a challenging skill-building opportunity for leatherworkers.
Tools and Materials
Leather carving and stamping require specific tools and materials. Following, we’s discussed thoroughly. Let’s learn:
List of Essential Tools Required for Leather Carving and Stamping
Following, we've discussed a list of essential tools required for leather carving and stamping:
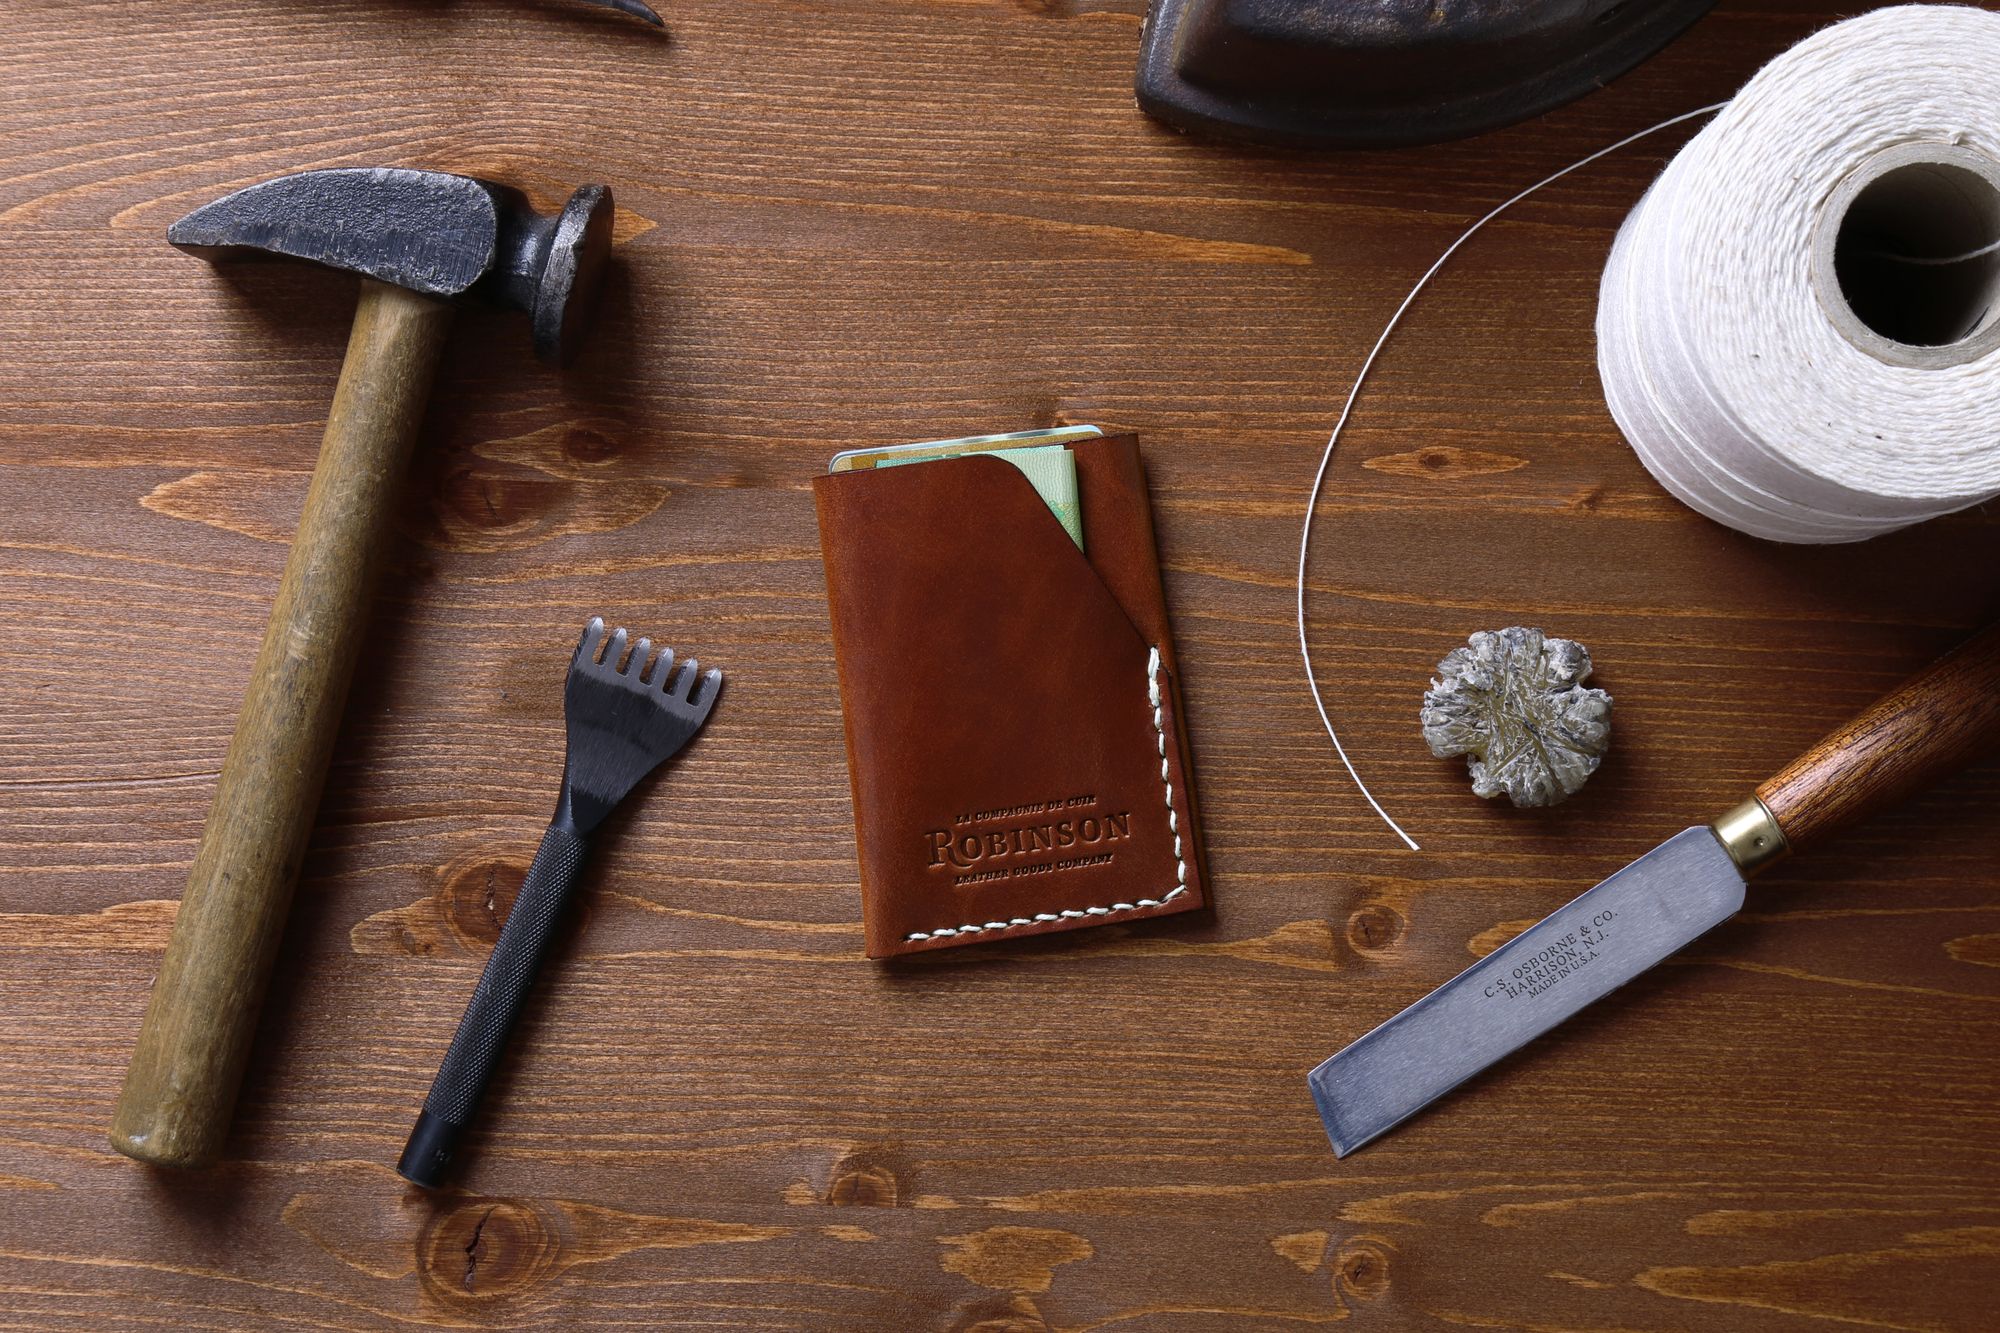
- Swivel Knife: A sharp knife used for making precise cuts in leather. It has a blade that can rotate, making it easier to cut curves and intricate designs.
- Beveler: This tool is used to create a three-dimensional effect by beveling the edges of a design.
- Mallet: A mallet is used with bevelers and stamps to create impressions on the leather. It can be made of rawhide, wood, or plastic.
- Cutting Mat: A cutting mat is used to protect the work surface and prevent damage to the blade of the swivel knife.
- Stamps: Stamps are used to create patterns and designs on leather. They come in various shapes and sizes, including geometric shapes, letters, and animals.
- Punches: Punches are used to create holes in leather for stitching or to add decorative elements.
- Edge Beveler: This tool is used to bevel the edges of leather to create a polished, finished look.
- Edge Slicker: This tool is used to burnish the edges of leather, giving them a smooth and finished appearance.
- Cutting Tools: Scissors or a rotary cutter can be used to cut leather into the desired shape and size.
- Ruler or Measuring Tape: Used to measure and mark the leather for cutting and stamping.
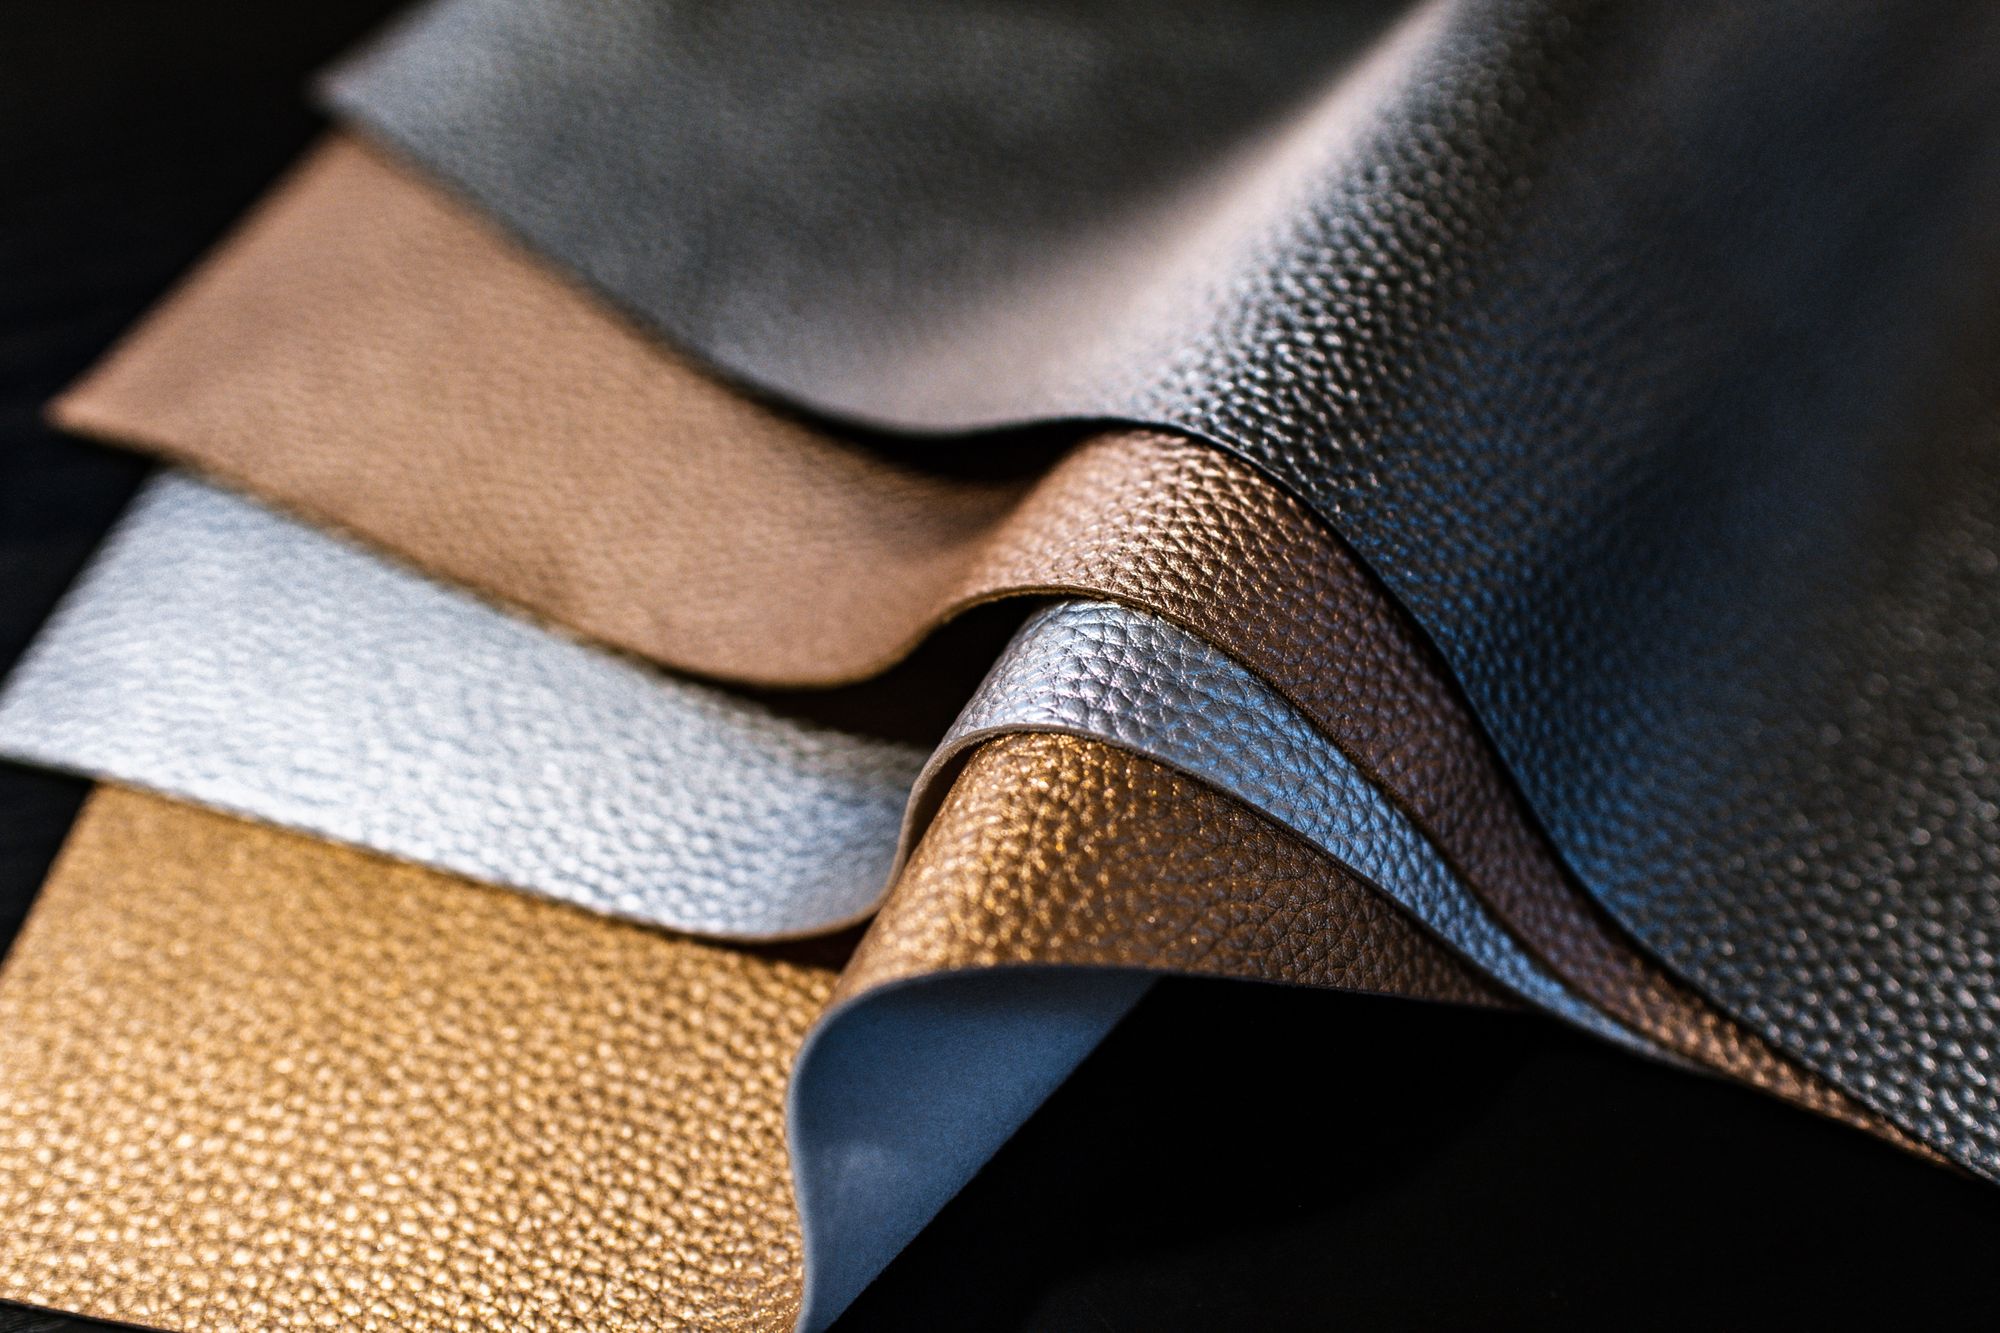
- Dyes and Finish: Dyes are used to color the leather, while finish is applied to protect and give the leather a glossy or matte finish.
- Water: Water is used to dampen the leather before carving or stamping. This makes the leather more pliable and easier to work with.
These are the essential tools required for leather carving and stamping. There are many other tools and materials that can be used for more advanced techniques and designs.
Types of Leather Suitable for Carving and Stamping
Not all types of leather are suitable for carving and stamping. Following, we've discussed some of the most commonly used types of leather that are suitable for these techniques:
- Vegetable-tanned Leather: Vegetable-tanned leather is the best type of leather for carving and stamping. It is stiff and has a smooth surface that makes it easier to carve and stamp. It is also more durable and can hold its shape well.
- Cowhide: Cowhide is a popular choice for leather carving and stamping. It is thick and durable, making it suitable for creating durable leather products that will last for a long time.
- Tooling Leather: Tooling leather is a type of vegetable-tanned leather that is specifically made for carving and stamping. It is available in different thicknesses, and the surface is smooth and free of blemishes, making it easier to work with.
- Kangaroo Leather: Kangaroo leather is a strong and lightweight leather that is popular for carving and stamping. It has a tight grain and is easy to work with, making it ideal for intricate designs.
- Calfskin: Calfskin is a soft and supple leather that is often used for creating high-end leather products. It is suitable for carving and stamping, but it requires more skill to work with due to its softness.
- Goatskin: Goatskin is a lightweight and durable leather that is commonly used for creating small leather goods. It is suitable for carving and stamping, and it has a unique texture that can add character to leather products.
In summary, vegetable-tanned leather, cowhide, tooling leather, kangaroo leather, calfskin, and goatskin are some of the most commonly used types of leather that are suitable for carving and stamping. It is important to choose the right type of leather for the specific project to achieve the best results.
Preparation of Leather Before Starting the Carving and Stamping Process
Preparing the leather before starting the carving and stamping process is crucial to ensure the best results. Here are the steps to follow for leather preparation:
- Choose the Right Leather: Select the type of leather that is suitable for carving and stamping. As mentioned earlier, vegetable-tanned leather is the best option, but other types such as cowhide, kangaroo leather, calfskin, and goatskin are also suitable.
- Cut the Leather: Cut the leather into the desired shape and size for the project. Use a rotary cutter or scissors to make clean cuts. It is essential to have a sharp blade to prevent the leather from getting damaged.
- Dampen the Leather: Dampen the leather by applying water to it. This makes the leather more pliable and easier to work with. It is important not to oversaturate the leather as this can cause it to shrink or become misshapen.
- Smooth the Leather: Use a leather slicker or bone folder to smooth out any wrinkles or creases in the leather. This ensures a smooth surface for carving and stamping.
- Create a Design: Sketch out the design on the leather with a pencil or use a stencil to create a pattern. Make sure the design is symmetrical and proportionate to the size of the leather.
- Transfer the Design: Transfer the design onto the leather using a stylus or tracing paper. This will help create a clear outline of the design, making it easier to carve and stamp.
- Carve the Leather: Use a swivel knife to carve the design into the leather. Take care not to cut too deeply as this can damage the leather.
- Stamp the Leather: Use a mallet and stamps to create impressions on the leather. Start with the larger stamps and work towards the smaller ones, filling in the details of the design.
- Finish the Leather: Apply a dye or finish to the leather to protect it and give it a polished look. Make sure to follow the instructions on the dye or finish product to avoid damaging the leather.
By following these steps, you can ensure that the leather is properly prepared for carving and stamping. This will result in a high-quality finished product that is durable and visually appealing.
Leather Carving Techniques
Leather carving is the process of creating designs and patterns on leather by cutting and shaping the surface of the leather. It is a popular technique used in leatherworking to add texture and depth to leather products such as belts, wallets, bags, and shoes.
There are several techniques used in leather carving, including:
Cutting: This technique involves cutting into the leather's surface to create a pattern or design. A swivel knife is used to make precise cuts, and the depth of the cut is determined by the pressure applied to the blade. This technique is often used to create intricate and detailed designs.
- Draw the design onto the leather using a pencil or a stylus.
- Use a swivel knife to make precise cuts along the design, adjusting the depth of the cut as necessary.
- Make sure to keep the knife blade perpendicular to the leather surface to avoid any unintended cuts or scratches.
Beveling: Beveling is a technique used to create a raised and rounded edge on the leather. A beveling tool is used to cut the edge of the leather at an angle, removing a small amount of leather and creating a slope. This technique is often used to create a decorative edge on leather items such as belts, wallets, and bags.
- Draw the design onto the leather using a pencil or a stylus.
- Use a beveling tool to cut the edge of the design at an angle, creating a slope.
- Make sure to keep the beveling tool perpendicular to the leather surface to create a smooth and consistent slope.
Outlining: Outlining involves cutting around the outside edge of a design, creating a raised border. This technique is often used to make a design stand out and to create a cleaner edge. Outlining can be done using a swivel knife or a specialized outlining tool.
- Draw the design onto the leather using a pencil or a stylus.
- Use a swivel knife or an outlining tool to cut around the outside edge of the design, creating a raised border.
- Make sure to keep the knife blade or outlining tool perpendicular to the leather surface to create a clean and even outline.
Stamping: Stamping is a technique used to create raised designs or patterns on the leather's surface. Stamps come in various shapes and sizes and are used with a mallet to make impressions on the leather. This technique is often used to add texture and depth to leather items such as belts, wallets, and bags.
- Choose the stamp or tool you want to use to create the design on the leather.
- Place the stamp onto the leather surface and strike it with a mallet to create an impression.
- Repeat the process, adjusting the stamp's position as necessary, to create the desired pattern or design.
Embossing: Embossing involves creating a raised design on the leather's surface using heat and pressure. A metal stamp or die is heated and then pressed into the leather, creating a permanent impression. This technique is often used to create logos or other branding on leather items.
- Choose the metal stamp or die you want to use to create the design on the leather.
- Heat the stamp or die using a heat source such as a flame or a heat gun.
- Place the heated stamp or die onto the leather surface and apply pressure with a press or a mallet to create an impression.
- Repeat the process, adjusting the stamp's position as necessary, to create the desired pattern or design.
Incising: Incising is a leather carving technique that involves cutting or scratching the leather's surface to create a design or pattern. Here are the steps for incising:
- Draw the design onto the leather using a pencil or a stylus. You can use a tracing paper to transfer the design onto the leather.
- Use a swivel knife or a small blade to make shallow cuts or scratches along the design lines. Make sure to apply consistent pressure to create even cuts. You can adjust the depth of the cuts to create different effects, such as shadowing or texture.
- Use a modeling spoon or a stylus to press down the edges of the cuts, creating a raised edge around the design. This will help the design stand out and give it more definition.
- Finish the design by adding any additional details or textures using other leather carving techniques such as stamping or beveling.
- Dye or stain the leather to highlight the design and bring out its colors and details.
Filling: This involves using a stamp or tool to make impressions on the leather and then filling the impressions with dye or paint to create a contrast with the surrounding leather. Here are the steps for filling:
- Draw the design onto the leather using a pencil or a stylus. You can use a tracing paper to transfer the design onto the leather.
- Use a swivel knife or a small blade to cut away the material from the areas inside the design lines. Make sure to apply consistent pressure and keep the knife blade perpendicular to the leather surface.
- Use a modeling spoon or a stylus to press down the edges of the cuts, creating a raised edge around the design. This will help the design stand out and give it more definition.
- Apply a filler material such as a leather putty or a mixture of gum tragacanth and water to the cut-out areas. Use a small brush or a spatula to spread the filler material evenly and smoothly across the surface.
- Allow the filler material to dry completely, following the manufacturer's instructions. The drying time may vary depending on the type and amount of filler used.
- Sand the surface of the leather with a fine-grit sandpaper or a burnishing tool to smooth out any rough edges and bring out the details of the design.
- Dye or stain the leather to highlight the design and bring out its colors and details.
These are just a few of the many techniques used in leather carving. Leather carving requires a steady hand, a sharp swivel knife, and a variety of carving tools. It is a time-consuming process that requires a lot of practice and patience to master, but the end result is a beautiful and unique leather product.
Remember: Practice on a scrap piece of leather before working on your final project to get comfortable with the tools and techniques involved. Also, make sure to use a sharp blade and work in a well-lit area to avoid any accidental injuries or mistakes.
Leather Stamping Techniques
Leather stamping is a technique used to create designs or patterns on leather by impressing or pressing a stamp into the surface of the leather. Furthermore, it is a popular technique used in leatherworking for creating intricate and decorative designs on a variety of leather items such as belts, wallets, and bags.
Leather stamps are available in various shapes and sizes, and can be used in combination to create unique and complex designs.
Various Leather Stamping Techniques
There are several leather stamping techniques that can be used to create different effects and designs. Here are some of the most common techniques:
Impression stamping: This technique involves using a stamp with a flat surface to create a clean and even impression on the leather. It is often used for creating borders or patterns that require a consistent and symmetrical design.
Here is a step-by-step guide for impression stamping:
- Choose the stamp that you want to use for your design. Make sure that it is clean and free of any dirt or debris that may affect the impression.
- Wet the surface of the leather with a sponge or a damp cloth. This will make it easier for the stamp to create a clean and even impression.
- Position the stamp on the leather where you want to create the design. Use a mallet or a hammer to gently tap the stamp onto the leather, applying even pressure across the surface of the stamp.
- Lift the stamp off the leather to reveal the impression. Check the impression to make sure that it is even and consistent.
- Repeat the process with the same stamp to create a pattern or design, or switch to a different stamp to create a different effect.
- If you want to create a continuous border or pattern, use a stamping wheel to create a guide line on the leather. Then use the impression stamp to create a consistent and symmetrical design along the guide line.
- Once you have finished stamping, allow the leather to dry completely before applying any finishing products or dyes.
Background stamping: This technique involves using a stamp with a textured or patterned surface to create a background design on the leather. It is often used to add depth and dimension to a design and create a more interesting and unique look.
Here is a step-by-step guide for background stamping:
- Choose the stamp that you want to use for your background design. Background stamps usually have a textured or patterned surface that can create interesting and unique effects on the leather.
- Wet the surface of the leather with a sponge or a damp cloth. This will make it easier for the stamp to create a clean and even impression.
- Position the stamp on the leather where you want to create the background design. Use a mallet or a hammer to gently tap the stamp onto the leather, applying even pressure across the surface of the stamp.
- Lift the stamp off the leather to reveal the impression. Check the impression to make sure that it is even and consistent.
- Repeat the process with the same stamp to create a continuous background design, or switch to a different stamp to create a different effect.
- Once you have finished background stamping, you can use impression stamping, beveling, or other techniques to add additional designs or details to your project.
- Allow the leather to dry completely before applying any finishing products or dyes.
It is important to experiment with different background stamps and combinations of stamps to create unique and interesting designs.
Beveling: This technique involves using a beveler stamp to cut away the edges of the design and create a raised border around it. Furthermore, it is often used to add definition and make the design stand out.
Here is a step-by-step guide for beveling:
- Choose the area of the leather that you want to bevel. Beveling is often used to create a raised border or outline around a design, or to add depth and dimension to a flat area.
- Wet the surface of the leather with a sponge or a damp cloth. This will make it easier for the beveling tool to glide smoothly over the surface of the leather.
- Choose the beveling tool that you want to use. Beveling tools come in a variety of shapes and sizes, and each one creates a different type of beveled edge.
- Hold the beveling tool at a 45-degree angle to the leather, with the beveled edge facing down. Apply even pressure to the tool as you drag it along the edge of the design, creating a smooth and even beveled edge.
- Repeat the process along the entire edge of the design, making sure to maintain a consistent angle and pressure with the beveling tool.
- If you want to create a more pronounced beveled edge, you can use a modeling tool to press down on the beveled edge, creating a deeper and more defined angle.
- Once you have finished beveling, you can use other techniques such as impression stamping or dyeing to add additional details to your design.
- Allow the leather to dry completely before applying any finishing products or dyes.
Matting: This technique involves using a matting stamp to create a textured surface on the leather. It is often used to create a more rustic or rugged look and add character to a design.
Here is a step-by-step guide for matting:
- Choose the area of the leather that you want to mat. Matting is often used to add texture or create a roughened surface to the leather.
- Wet the surface of the leather with a sponge or a damp cloth. This will make it easier for the matting tool to create an even and consistent texture.
- Choose the matting tool that you want to use. Matting tools come in a variety of shapes and sizes, and each one creates a different type of texture.
- Hold the matting tool at a 90-degree angle to the leather, with the textured surface facing down. Apply even pressure to the tool as you drag it along the surface of the leather, creating a textured pattern.
- Repeat the process across the entire area that you want to mat, making sure to maintain a consistent pressure and angle with the matting tool.
- If you want to create a more pronounced texture, you can use a modeling tool to press down on the textured surface, creating a deeper and more defined pattern.
- Once you have finished matting, you can use other techniques such as impression stamping or dyeing to add additional details to your design.
- Allow the leather to dry completely before applying any finishing products or dyes.
Pearling: This technique involves using a pearling stamp to create a series of small dots or pearls on the leather. It is often used to add a decorative touch to a design and create a more elegant and refined look.
Here is a step-by-step guide for pearling:
- Choose the area of the leather that you want to pearl. Pearling is often used to create a raised dot pattern or to add texture to a flat surface.
- Wet the surface of the leather with a sponge or a damp cloth. This will make it easier for the pearling tool to glide smoothly over the surface of the leather.
- Choose the pearling tool that you want to use. Pearling tools come in a variety of shapes and sizes, and each one creates a different type of raised dot pattern.
- Hold the pearling tool at a 90-degree angle to the leather, with the pointed end facing down. Apply even pressure to the tool as you press it into the surface of the leather, creating a raised dot.
- Repeat the process across the entire area that you want to pearl, making sure to maintain a consistent pressure and spacing with the pearling tool.
- If you want to create a more intricate design, you can use different sizes and shapes of pearling tools to create a varied pattern.
- Once you have finished pearling, you can use other techniques such as impression stamping or dyeing to add additional details to your design.
- Allow the leather to dry completely before applying any finishing products or dyes.
Embossing: This technique involves using a stamp with a raised design to create a three-dimensional effect on the leather. It is often used to add depth and texture to a design and create a more dramatic and eye-catching look.
Here is a step-by-step guide for embossing:
- Choose the area of the leather that you want to emboss. Embossing is often used to create a raised or indented design on the surface of the leather.
- Wet the surface of the leather with a sponge or a damp cloth. This will make it easier for the embossing tool to create an even and consistent texture.
- Choose the embossing tool that you want to use. Embossing tools come in a variety of shapes and sizes, and each one creates a different type of design.
- Place the leather onto a hard surface, such as a workbench or table, and place a piece of cardboard or paper under the area you want to emboss.
- Hold the embossing tool at a 90-degree angle to the leather, with the desired design facing down. Apply even pressure to the tool as you press it into the surface of the leather, creating a raised or indented design.
- Repeat the process across the entire area that you want to emboss, making sure to maintain a consistent pressure and spacing with the embossing tool.
- If you want to create a more intricate design, you can use different sizes and shapes of embossing tools to create a varied pattern.
- Once you have finished embossing, you can use other techniques such as dyeing or painting to add additional details to your design.
- Allow the leather to dry completely before applying any finishing products or dyes.
These techniques can be combined and used in different ways to create a wide range of designs and patterns on leather. Experimenting with different techniques and stamps can help you develop your own unique style and create one-of-a-kind leather items.
Tips and Tricks for Successful Carving and Stamping
To help you achieve successful results with leather carving and stamping, check the following segments. Let’s learn:
Tips for Achieving Clean and Precise Cuts While Carving
Achieving clean and precise cuts while carving leather is crucial to the overall quality of your project. Here are some tips to help you achieve the best results:
- Use a sharp blade: Always use a sharp blade when carving leather. A dull blade can cause jagged edges and uneven cuts. Make sure to sharpen your blades regularly or replace them when they become dull.
- Use the right blade: Different types of blades are suited for different tasks. For example, a swivel knife is great for making curved cuts, while a straight blade is ideal for making straight lines.

- Use a cutting mat: A cutting mat will not only protect your work surface but also provide a surface that will allow the blade to glide smoothly.
- Start with light cuts: Begin by making light cuts and gradually increase the pressure. This will help you maintain control over the blade and prevent over-cutting.
- Use a ruler or straight edge: When making straight cuts, use a ruler or straight edge to guide your blade. This will ensure clean, straight lines.
- Keep your blade at a consistent angle: Try to keep the blade at a consistent angle while cutting. This will help you achieve a uniform depth and prevent uneven cuts.
- Practice: Like with any skill, practice is key. Take the time to practice cutting on scrap leather before working on your final project.
By following these tips, you can improve your cutting skills and create clean and precise cuts while carving leather.
Tricks for Creating Detailed and Intricate Designs Through Stamping
Creating detailed and intricate designs through stamping can be challenging, but with some tricks and techniques, you can achieve beautiful and precise results. Here are some tips:
- Choose the right stamping tool: Different stamping tools produce different effects. For example, a beveler is ideal for creating 3D designs, while a matting tool can add texture and depth to your design.
- Plan your design: Before you start stamping, plan your design carefully. Consider the placement, spacing, and size of your stamps. Sketch your design on paper or use a tracing paper to transfer it onto the leather.
- Practice on scrap leather: Use scrap leather to practice your design and experiment with different combinations of stamps and techniques.
- Use a light touch: When stamping, use a light touch to avoid pressing too hard and causing unwanted impressions or uneven marks.
- Stamp in stages: Break your design into smaller sections and stamp each section individually. This will help you maintain consistency and accuracy.
- Use a stamping mat: A stamping mat will provide a consistent and even surface for stamping, preventing uneven marks or distortions.
- Use a mallet: Use a mallet to apply even pressure and ensure a clean and uniform impression. Make sure to hold the stamp firmly and strike it at a 90-degree angle.
- Experiment with shading: To add depth and dimension to your design, experiment with shading techniques. You can achieve shading by varying the pressure and angle of your stamp or by using a different size or shape of stamp.
By following these tips, you can create intricate and detailed designs through stamping and take your leatherworking skills to the next level.
Common Mistakes to Avoid while Working on Leather
Here are some common mistakes to avoid while working on leather:
Not preparing the leather properly: Skipping the preparation process can cause the leather to become uneven and cause issues during carving or stamping.
Using the wrong tools: Using the wrong tools can lead to poorly executed work or even damage the leather.
Applying too much pressure: Applying too much pressure while carving or stamping can result in distorted and uneven marks on the leather.
Not planning the design: Not planning the design beforehand can result in a lack of coherence and unity in the finished product.
Rushing the process: Rushing can cause errors and oversights in the design and the execution of the carving or stamping.
Using low-quality materials: Using low-quality materials can cause issues during carving or stamping and lead to a poor quality finished product.
Not practicing on scrap leather: Not practicing on scrap leather can lead to expensive mistakes on the final product.
Not allowing enough drying time: Not allowing enough drying time can cause the design to become distorted or for the leather to become weakened.
By avoiding these common mistakes, you can ensure that your finished leatherwork is of the highest quality possible.
Applications of Carving and Stamping Techniques
Leather carving and stamping techniques are widely used in various industries, such as fashion, interior decoration, and leather goods manufacturing. Here are some examples of their applications:
- Fashion industry: In the fashion or apparel industry, leather carving and stamping techniques are used to create unique and decorative elements for clothing and accessories, such as jackets, bags, shoes, and belts. These techniques add texture, dimension, and personalization to fashion items, making them stand out in a crowded marketplace.
- Interior decoration industry: In the interior decoration industry, leather carving and stamping techniques are used to create beautiful and unique home decor items, such as leather coasters, placemats, wall hangings, and lampshades. Furthermore, these techniques offer a wide range of design possibilities, allowing interior decorators to create personalized and stylish pieces that enhance the look and feel of any room.
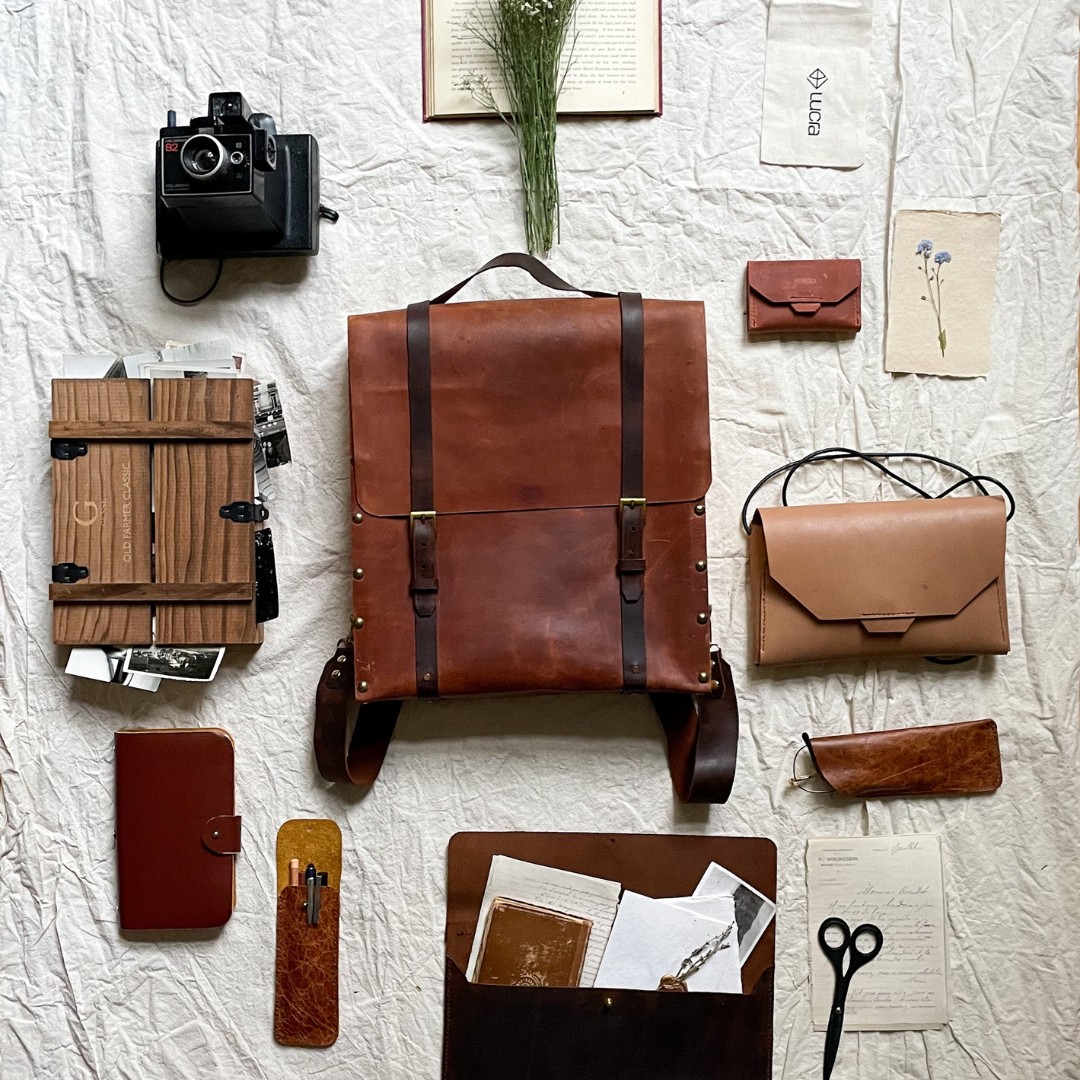
- Leather goods manufacturing industry: In the leather goods manufacturing industry, carving and stamping techniques are used to create intricate and detailed designs on leather goods, such as wallets, purses, belts, and other accessories. Moreover, these techniques add value and beauty to leather goods, making them more appealing to consumers who are looking for high-quality and unique products.
- Fine art industry: In the fine art industry, leather carving and stamping techniques are used to create beautiful and unique pieces of art, such as sculptures, paintings, and mixed media artwork. These techniques offer artists a versatile and tactile medium to work with, allowing them to create one-of-a-kind pieces that are both beautiful and functional.
Overall, leather carving and stamping techniques are widely used in various industries, offering designers, decorators, manufacturers, and artists a versatile and creative medium to work with.
Examples of Products that Can be Made Using These Techniques
There are numerous products that can be made using leather carving and stamping techniques. Here are some examples:
Leather belts: Leather carving and stamping techniques can be used to create intricate designs on leather belts, adding visual interest and unique character to an otherwise simple accessory.
Leather wallets and purses: Leather carving and stamping techniques can be used to create beautiful designs and patterns on leather wallets and purses, making them stand out in a crowded marketplace.
Leather shoes: Leather carving and stamping techniques can be used to create unique and decorative elements on leather shoes, adding texture and depth to the design.
Leather jackets: Leather carving and stamping techniques can be used to create beautiful and intricate designs on leather jackets, making them one-of-a-kind and highly desirable.
Leather furniture: Leather carving and stamping techniques can be used to create beautiful and unique upholstery for chairs, sofas, and other furniture pieces, adding texture and visual interest to the design.
Leather wall hangings: Leather carving and stamping techniques can be used to create beautiful and unique wall hangings, adding a touch of elegance and sophistication to any room.
Leather coasters and placemats: Leather carving and stamping techniques can be used to create beautiful and unique coasters and placemats, making them perfect for special occasions or everyday use.
Overall, the possibilities for products that can be made using leather carving and stamping techniques are endless. These techniques offer designers and manufacturers a versatile and creative medium to work with, allowing them to create beautiful and unique products that are highly desirable to consumers.
Frequently Asked Questions (FAQs) on Leather Carving and Stamping Techniques
Following, we've discussed some frequently asked questions about leather carving and stamping:
Que 1: What kind of leather is best for carving and stamping?
Ans: Leather that is vegetable-tanned and has a smooth, even surface is best for carving and stamping. Cowhide and vegetable-tanned leather are popular choices.
Que 2: What tools do I need for leather carving and stamping?
Ans: Essential tools for carving include a swivel knife, beveler, mallet, and cutting mat. Stamping tools include stamps, punches, and mallets.
Que 3: How do I prepare leather for carving and stamping?
Ans: Leather should be dampened with water to make it more pliable and easier to work with. It is also important to clean the leather surface of any debris or dirt before starting the carving or stamping process.
Que 4: How do I create designs for carving or stamping?
Ans: Designs can be created using pencils, paper, or computer software. Designs can then be transferred to the leather surface using tracing paper, transfer paper, or a light box.
Que 5: How do I achieve clean cuts while carving leather?
Ans: It is important to use a sharp knife and to cut slowly and carefully. Practice and experience can help improve cutting skills.
Que 6: How do I create a three-dimensional effect when carving leather?
Ans: Beveling the edges of the design and using different depths of cuts can create a three-dimensional effect.
Que 7: How do I create depth and texture when stamping leather?
Ans: Stamping tools with different shapes and sizes can be used to create depth and texture. Hammering the stamp with different pressure can also create variation in the design.
Que 8: What are some common mistakes to avoid when carving and stamping leather?
Ans: Common mistakes include cutting too deeply, using dull tools, and not properly dampening the leather before working on it.
Que 9: What are some popular products that use leather carving and stamping techniques?
Ans: Products that commonly use these techniques include belts, wallets, bags, shoes, and other leather accessories.
Que 10: How long does it take to become proficient in leather carving and stamping?
Ans: It can take several months to a few years to become proficient in these techniques, depending on the individual's dedication and practice.
Wrapping Up
Leather carving and stamping are two techniques that offer endless possibilities for creative expression in leatherworking. These techniques have been used for centuries to add unique character and beauty to leather products.
By using the right tools and techniques, it is possible to create stunning and intricate designs on leather surfaces, transforming simple pieces of leather into works of art.
In this article, we have covered various aspects of leather carving and stamping, including their significance in leatherworking, the types of leather suitable for these techniques, tools and materials required, and step-by-step guides for each technique.
We have also provided tips and tricks for achieving clean and precise cuts while carving, creating detailed and intricate designs through stamping, and avoiding common mistakes while working on leather.
Finally, we have discussed the various applications of these techniques in different industries such as fashion, interior decoration, and leather goods manufacturing.
From leather belts and wallets to furniture upholstery and wall hangings, leather carving and stamping techniques offer a versatile and creative medium for designers and manufacturers to work with, allowing them to create beautiful and unique products that are highly desirable to consumers.
How Deskera Can Assist You?
Deskera's integrated financial planning tools allow investors to better plan their investments and track their progress. It can help investors make decisions faster and more accurately.
Deskera Books enables you to manage your accounts and finances more effectively. Maintain sound accounting practices by automating accounting operations such as billing, invoicing, and payment processing.

Deskera CRM is a strong solution that manages your sales and assists you in closing agreements quickly. It not only allows you to do critical duties such as lead generation via email, but it also provides you with a comprehensive view of your sales funnel.
Deskera People is a simple tool for taking control of your human resource management functions. The technology not only speeds up payroll processing but also allows you to manage all other activities such as overtime, benefits, bonuses, training programs, and much more. This is your chance to grow your business, increase earnings, and improve the efficiency of the entire production process.
Final Takeaways
We've arrived at the last section of this guide. Let's have a look at some of the most important points to remember:
- Leather stamping involves using various tools such as stamps, punches, and mallets to create embossed or imprinted designs on leather surfaces. This technique involves pressing a stamp or tool onto the leather surface with force to create a raised or recessed pattern.
- Tooling leather is a type of vegetable-tanned leather that is specifically made for carving and stamping. It is available in different thicknesses, and the surface is smooth and free of blemishes, making it easier to work with.
- Outlining involves cutting around the outside edge of a design, creating a raised border. This technique is often used to make a design stand out and to create a cleaner edge. Outlining can be done using a swivel knife or a specialized outlining tool.
- Impression stamping: This technique involves using a stamp with a flat surface to create a clean and even impression on the leather. It is often used for creating borders or patterns that require a consistent and symmetrical design.
- Pearling: This technique involves using a pearling stamp to create a series of small dots or pearls on the leather. It is often used to add a decorative touch to a design and create a more elegant and refined look.
- In the fashion industry, leather carving and stamping techniques are used to create unique and decorative elements for clothing and accessories, such as jackets, bags, shoes, and belts. These techniques add texture, dimension, and personalization to fashion items, making them stand out in a crowded marketplace.
- In the leather goods manufacturing industry, carving and stamping techniques are used to create intricate and detailed designs on leather goods, such as wallets, purses, belts, and other accessories.
Related Articles