Quality assurance is an important process in the plastics manufacturing sector. It helps to ensure that the end product meets customer expectations and standards. Ensuring quality requires effective inspection, which can be difficult and time-consuming.
The plastics industry is one of the fastest-growing sectors in the economy. There is a huge demand for plastic products, and manufacturers are racing to meet this demand with high-quality products. However, meeting quality requirements takes a lot of work.
Quality assurance in the plastics manufacturing sector requires effective inspection. Inspection can be difficult and time-consuming, which is why it is important to have a good strategy for doing it.
This article will provide an in-depth analysis of quality assurance and inspection in plastic manufacturing. We’ll thoroughly cover everything associated with quality assurance and plastic manufacturing inspection.
Let’s take a look at the table of content below:
- An Overview: Quality Assurance and Inspection in Plastic Manufacturing
- Possible Defects in Plastic Manufacturing
- Steps Involved in Quality Assurance
- Tools and Techniques Used in Quality Assurance
- Inspection in Plastic Manufacturing
- Case Studies
- Wrapping Up
- How Deskera Can Assist You?
Let's get started!
An Overview: Quality Assurance and Inspection in Plastic Manufacturing
Plastic manufacturing is a critical industry that produces a wide variety of products that we use every day. These products include items such as packaging materials, medical devices, toys, automobile parts, and more.
The quality of these products is essential to ensure consumer safety, product reliability, and business success. Quality assurance and inspection play a vital role in ensuring that plastic products meet the necessary standards and requirements.
Quality assurance is the process of ensuring that products meet the necessary quality standards throughout the manufacturing process.
It involves several steps, including;
- quality planning,
- quality control, and
- quality improvement.
In quality planning, the manufacturer sets quality objectives and identifies the processes necessary to achieve these objectives.
Further, in quality control, the manufacturer monitors the production process to ensure that it meets the set quality objectives.
Finally, in quality improvement, the manufacturer identifies areas of improvement and implements corrective measures to ensure continuous improvement.
Tools and techniques used in quality assurance include statistical process control, failure mode and effects analysis, and Six Sigma.
Statistical process control involves using statistical methods to monitor and control the manufacturing process. Failure mode and effects analysis involves identifying and evaluating potential failure modes in the manufacturing process and taking corrective actions to prevent or mitigate these failures.
Six Sigma is a data-driven approach to quality control that aims to reduce defects and improve the quality of products.
Inspection is the process of examining the products to ensure that they meet the necessary quality standards. It further involves several steps, including:
- in-process inspection and
- final inspection.
Eventually, quality assurance and inspection are essential in plastic manufacturing to ensure that products meet the necessary quality standards. Failure to ensure quality in plastic manufacturing can result in product failures, consumer harm, and reputational damage to the manufacturer.
As such, companies must prioritize quality assurance and inspection to ensure that their products meet the necessary quality standards and maintain customer satisfaction.
Possible Defects in Plastic Manufacturing
There are many possible defects that can occur in plastic manufacturing, some of which include:
Flashing:
This is excess plastic material that extends beyond the intended part edge or mold line. It can occur when the mold is not properly closed or when there is excessive injection pressure.
Sink Marks:
These are depressions or craters on the surface of the part that are caused by uneven cooling. They can occur when the part is too thick, the cooling time is too short, or the cooling rate is uneven.
Warpage:
This is the distortion or bending of the part, which can occur when the part cools too quickly or unevenly. It can also occur when the injection temperature is too high or when there is uneven packing of the mold.
Weld Lines:
These are lines or marks on the surface of the part where two flow fronts meet. They can occur when the plastic material cannot flow around a core or insert, causing the flow fronts to meet and create a visible line.
Voids:
These are air pockets or bubbles in the part that can occur when the plastic material does not completely fill the mold.
Brittleness:
This is a defect that can occur when the plastic material is too cold or when the cooling rate is too fast.
Burn Marks:
These are dark spots or discoloration on the surface of the part that can occur when the plastic material is exposed to excessive heat or when there is a buildup of gas in the mold.
These are just a few examples of the possible defects that can occur in plastic manufacturing. Proper quality assurance and inspection can help to identify and correct these defects, ensuring that the final product meets the necessary quality standards and tolerances.
Steps Involved in Quality Assurance
Quality assurance is a process that ensures that products meet the necessary quality standards throughout the manufacturing process.
The following are the steps involved in quality assurance:
Quality Planning: In this step, the manufacturer sets quality objectives and identifies the processes necessary to achieve these objectives. Quality planning involves the following activities:
a. Identifying the customer's quality requirements and translating them into measurable specifications.
b. Identifying the processes necessary to achieve the quality objectives.
c. Defining the quality standards that must be met during the manufacturing process.
d. Identifying the resources required to achieve the quality objectives.
e. Developing a quality plan that outlines the steps required to achieve the quality objectives.
Quality Control: In this step, the manufacturer monitors the production process to ensure that it meets the set quality objectives. Quality control involves the following activities:
a. Monitoring the production process to ensure that it meets the quality standards set during the planning stage.
b. Collecting data to measure the quality of the products and the performance of the production process.
c. Analyzing the data to identify trends and patterns in the production process.
d. Identifying areas of the production process that require improvement.
e. Implementing corrective actions to improve the production process.
Quality Improvement: In this step, the manufacturer identifies areas of improvement and implements corrective measures to ensure continuous improvement. Quality improvement involves the following activities:
a. Identifying areas of the production process that require improvement.
b. Developing improvement plans that outline the steps required to address the identified issues.
c. Implementing the improvement plans.
d. Evaluating the effectiveness of the improvement plans.
e. Continuously monitoring and improving the production process.
In summary, quality assurance is a process that involves planning, monitoring, and improving the production process to ensure that products meet the necessary quality standards. By following these steps, manufacturers can ensure that their products meet the necessary quality standards and maintain customer satisfaction.
Tools and Techniques Used in Quality Assurance
Quality assurance involves using various tools and techniques to monitor and control the manufacturing process and ensure that products meet the necessary quality standards. The following are some of the commonly used tools and techniques in quality assurance:
Statistical Process Control (SPC):
SPC involves using statistical methods to monitor and control the manufacturing process.
Furthermore, the process involves collecting data at various stages of the manufacturing process and analyzing it to identify any variations from the set quality standards.
By analyzing the data, manufacturers can identify any problems and take corrective actions to ensure that the production process remains within the set quality standards.
Failure Mode and Effects Analysis (FMEA):
FMEA is a systematic approach to identify and evaluate potential failure modes in the manufacturing process and take corrective actions to prevent or mitigate these failures.
Further, the process involves identifying potential failure modes, assessing their severity, determining their causes, and identifying potential corrective actions.
Root Cause Analysis (RCA):
RCA is a problem-solving technique used to identify the underlying causes of problems in the manufacturing process. The process involves identifying the problem, collecting data, analyzing the data, and identifying the root cause of the problem. Once the root cause is identified, corrective actions can be taken to prevent the problem from recurring.
Six Sigma:
Six Sigma is a data-driven approach to quality control that aims to reduce defects and improve the quality of products. The process involves defining, measuring, analyzing, improving, and controlling the manufacturing process to ensure that products meet the necessary quality standards.
Furthermore, manufacturers can improve the quality of their products by identifying and removing the sources of defects through the use of statistical methodologies.
Lean Manufacturing:
Lean manufacturing is a production approach that focuses on eliminating waste and improving efficiency. The process involves identifying and eliminating non-value-added activities in the manufacturing process. It includes overproduction, waiting time, unnecessary transportation, excess inventory, overprocessing, and defects.
Total Quality Management (TQM):
TQM is a management approach that focuses on continuous improvement of the manufacturing process to ensure that products meet the necessary quality standards.
Furthermore, the process involves involving all employees in the quality control process, setting quality objectives, and monitoring and improving the manufacturing process.
So overall, quality assurance involves using various tools and techniques to monitor and control the manufacturing process and ensure that products meet the necessary quality standards.
Moreover, with the help of these tools and techniques, manufacturers can improve the efficiency of the manufacturing process, reduce defects, and improve the quality of products.
Inspection in Plastic Manufacturing
Inspection is an important aspect of quality assurance in plastic manufacturing. The inspection process involves visually inspecting the products to ensure that they meet the necessary quality standards.
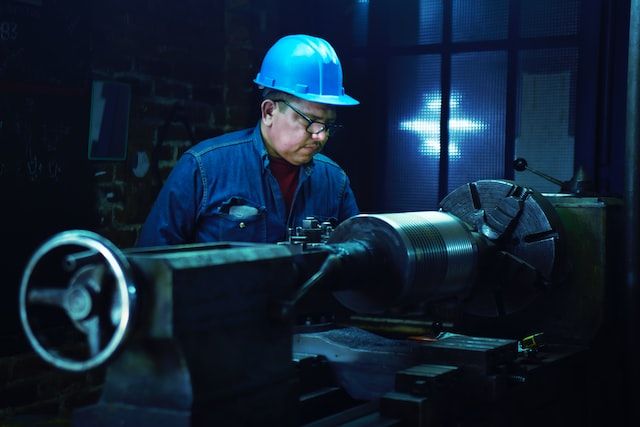
The following are the steps involved in the inspection process:
Pre-inspection: This step involves preparing the products for inspection by cleaning and arranging them in an organized manner. The inspector should also ensure that the inspection area is clean and well-lit to facilitate the inspection process.
Visual Inspection: In this step, the inspector visually examines the products for any defects or anomalies. The inspection process may involve checking the dimensions, color, texture, and overall appearance of the product. The inspector may use specialized tools such as magnifying glasses, colorimeters, and gauges to aid in the inspection process.
Sampling: Sampling involves selecting a representative sample of products from the production batch for inspection. The sample size should be sufficient to provide a statistically significant representation of the production batch.
Acceptance/Rejection: Based on the inspection results, the products may be accepted or rejected. If the products meet the necessary quality standards, they are accepted and released for sale. If the products fail to meet the quality standards, they are rejected and sent back for rework or disposal.
Documentation: It is important to document the inspection process and results to ensure traceability and accountability. The documentation should include the inspection results, the sample size, the inspection methods used, and any corrective actions taken.
Ultimately, inspection is an important aspect of quality assurance in plastic manufacturing. The inspection process involves visually examining the products to ensure that they meet the necessary quality standards. The process also involves sampling, acceptance/rejection, and documentation.
Moreover, by implementing an effective inspection process, manufacturers can ensure that their products meet the necessary quality standards and maintain customer satisfaction.
Types of Inspection
There are two types of inspection commonly used in manufacturing, including plastic manufacturing. We’ve discussed them in detail:
In-process Inspection:
In-process inspection involves inspecting the products at various stages of the manufacturing process to ensure that they meet the necessary quality standards. This type of inspection is conducted during the production process and helps identify any issues before they become more difficult and expensive to fix.
Furthermore, in-process inspection may involve checking the product's dimensions, material composition, and overall quality at various stages of production.
Moreover, in-process inspection helps ensure that the final product meets the necessary quality standards and can reduce the likelihood of defects and errors.
Final Inspection:
Final inspection involves inspecting the finished product before it is released for sale or shipment to ensure that it meets the necessary quality standards.
This type of inspection is conducted once the product has been completed and ensures that the final product meets the specifications and requirements set by the customer.
Final inspection may involve checking the product's dimensions, material composition, visual appearance, packaging, and labeling. Final inspection helps ensure that the final product is of high quality and meets the customer's expectations.
In summary, in-process inspection and final inspection are two additional types of inspection used in manufacturing, including plastic manufacturing. Both types of inspection are important for ensuring that the products meet the necessary quality standards and help reduce the likelihood of defects and errors.
Tools and Techniques Used in Inspection
Following, we’ve discussed tools and techniques used in inspection. Let’s learn:
Visual Inspection
Visual inspection is one of the most common types of inspection used in plastic manufacturing. It involves visually examining the product to ensure that it meets the necessary quality standards.
Moreover, visual inspection is typically performed using the naked eye, but inspectors may also use specialized tools such as magnifying glasses, colorimeters, and gauges to aid in the inspection process.
During visual inspection, the inspector will look for various defects such as surface blemishes, dimensional errors, and color variations. Some of the defects that may be identified during visual inspection include scratches, dents, warping, cracking, and discoloration. Visual inspection may also involve checking the product for proper assembly, such as making sure that all the parts are correctly aligned and attached.
To ensure that visual inspection is effective, it is important to have a well-trained and experienced inspector who is familiar with the product's design and specifications. The inspector should also have a well-lit and clean workspace to minimize distractions and ensure that all defects are easily visible.
Visual inspection is particularly important for products that have aesthetic requirements, such as consumer goods and packaging materials. It is also important for products that have strict dimensional requirements, such as medical devices and aerospace components.
So, visual inspection is an essential type of inspection used in plastic manufacturing. It involves visually examining the product to identify defects and ensure that it meets the necessary quality standards.
Moreover, by performing effective visual inspection, manufacturers can ensure that their products are of high quality and meet customer expectations.
Dimensional Inspection
Dimensional inspection is a type of inspection used in plastic manufacturing to ensure that the product's dimensions meet the necessary specifications and tolerances. This type of inspection is particularly important for products that require precise and accurate dimensions, such as medical devices, automotive parts, and aerospace components.
During dimensional inspection, the inspector will use specialized tools and equipment to measure various features of the product, such as length, width, height, and thickness. The tools used for dimensional inspection may include calipers, micrometers, gauges, coordinate measuring machines (CMMs), and optical comparators.
The inspector will take multiple measurements at different points on the product to ensure that it meets the necessary specifications and tolerances. If any dimensions are found to be out of specification, the product may need to be reworked or rejected to ensure that it meets the necessary quality standards.
To ensure that dimensional inspection is effective, it is important to have well-maintained and calibrated measuring tools and equipment. The inspector should also be properly trained and experienced in using the tools and interpreting the measurements.
Dimensional inspection is critical for ensuring that the product meets the necessary quality standards and performs its intended function. Even small variations in dimensions can have significant consequences, particularly for products that require precise fit or function.
By performing effective dimensional inspection, manufacturers can ensure that their products meet the necessary specifications and tolerances and are of high quality.
All in all, dimensional inspection is a crucial type of inspection used in plastic manufacturing to ensure that the product's dimensions meet the necessary specifications and tolerances. By using specialized tools and equipment to measure the product's dimensions, manufacturers can ensure that their products are of high quality and meet customer expectations.
Non-Destructive Testing
Non-destructive testing (NDT) is a type of inspection used in plastic manufacturing to test the product's quality without damaging or destroying it.
Furthermore, NDT methods are used to detect internal and surface defects in plastic products without causing any damage, making it a valuable testing technique for plastic products that cannot be easily replaced.
There are various methods used for NDT in plastic manufacturing, including:
Ultrasonic Testing: Ultrasonic testing involves the use of high-frequency sound waves to detect internal defects in the product. A probe is used to generate sound waves that pass through the product and are then received by a detector. Any changes in the sound waves as they pass through the product can indicate the presence of defects such as cracks, voids, and delamination.
X-ray Inspection: X-ray inspection involves the use of high-energy radiation to examine the product for internal defects such as voids, inclusions, and cracks. X-ray inspection is particularly useful for products with complex geometries or those that are difficult to access.
Magnetic Particle Inspection: Magnetic particle inspection involves the use of magnetic fields and magnetic particles to detect surface and near-surface defects such as cracks and porosity. The product is magnetized, and magnetic particles are applied to the surface. Any magnetic particles that are attracted to defects can indicate the presence of a defect.
Visual Inspection: Visual inspection can also be used as an NDT method in plastic manufacturing. This involves visually examining the product using specialized lighting and magnification to detect any surface defects such as scratches, dents, and surface cracks.
NDT is an important technique in plastic manufacturing as it allows defects to be detected and repaired before the product is used, ensuring that the product is safe and of high quality. It is particularly useful for products that are difficult or expensive to replace or repair, such as medical devices, aerospace components, and automotive parts.
Therefore, NDT is a valuable type of inspection used in plastic manufacturing to test the product's quality without damaging or destroying it. Various methods, such as ultrasonic testing, x-ray inspection, magnetic particle inspection, and visual inspection, can be used for NDT to detect internal and surface defects in the product.
By using NDT methods, manufacturers can ensure that their products meet the necessary quality standards and perform their intended function.
Challenges and Solutions in Inspection
Inspection in plastic manufacturing can present several challenges, such as the complexity of the product, the need for precision and accuracy, and the need to detect defects that may not be immediately visible.
However, there are several solutions to these challenges that can ensure effective inspection and quality control.
Use of automated inspection systems: Automated inspection systems can help overcome the challenges of inspecting complex products and ensuring precision and accuracy. These systems use specialized sensors and software to inspect the product and detect defects quickly and accurately.
Calibration and maintenance of inspection equipment: To ensure accurate inspection, it is important to calibrate and maintain inspection equipment regularly. This can help detect any issues with the equipment and ensure that it is functioning properly.
Trained and experienced inspectors: Inspectors should be properly trained and experienced in the inspection techniques and equipment used in plastic manufacturing. This can help ensure that inspections are performed accurately and consistently.
Implementing quality control procedures: Implementing quality control procedures can help ensure that products meet the necessary quality standards and tolerances. These procedures may include regular inspections, testing, and validation of the manufacturing process.
Collaboration with suppliers: Collaborating with suppliers can help ensure that the raw materials used in plastic manufacturing meet the necessary quality standards. This can help prevent defects in the final product and reduce the need for inspection and rework.
By addressing these challenges and implementing effective solutions, manufacturers can ensure that their products meet the necessary quality standards and perform their intended function. Effective inspection and quality control can help prevent defects, reduce waste and costs, and improve customer satisfaction.
Case Studies
Following, we’ve discussed some crucial case studies associated with quality assurance and inspection. Let’s learn:
A. Example 1: Quality assurance and inspection in injection molding
Injection molding is a common plastic manufacturing process used to produce a wide range of products, including automotive components, medical devices, and consumer goods. Quality assurance and inspection are critical in injection molding to ensure that the products meet the necessary quality standards and tolerances.
A case study of a manufacturer of automotive components highlights the importance of quality assurance and inspection in injection molding. The manufacturer was experiencing high rejection rates of their products due to defects such as warpage, sink marks, and flash. They implemented several quality control measures, including:
- Regular calibration and maintenance of injection molding machines and equipment
- Implementation of statistical process control (SPC) techniques to monitor and control the manufacturing process.
- In-process inspection using automated inspection systems to detect defects early in the manufacturing process
- Final inspection using visual inspection and dimensional inspection to ensure that the products met the necessary quality standards and tolerances.
By implementing these measures, the manufacturer was able to reduce the rejection rates of their products by over 50%, resulting in significant cost savings and improved customer satisfaction.
B. Example 2: Quality assurance and inspection in extrusion
Extrusion is another common plastic manufacturing process used to produce products such as tubing, profiles, and sheeting. Quality assurance and inspection are critical in extrusion to ensure that the products meet the necessary quality standards and tolerances.
A case study of a manufacturer of medical tubing illustrates the importance of quality assurance and inspection in extrusion. The manufacturer was experiencing high rejection rates of their products due to defects such as wall thickness variations, ovality, and surface defects. They implemented several quality control measures, including:
- Equipment and tools for extrusion should be calibrated and maintained on a regular basis.
- The production process is monitored and managed using SPC techniques.
- To discover faults early in the production process, automated inspection systems are utilised for in-process inspection.
- Using dimensional inspection and visual inspection, the goods underwent a final inspection to ensure they met the necessary quality standards and tolerances.
By implementing these measures, the manufacturer was able to reduce the rejection rates of their products by over 60%, resulting in significant cost savings and improved customer satisfaction.
C. Example 3: Quality assurance and inspection in blow molding
Blow molding is a plastic manufacturing process used to produce products such as bottles, containers, and tanks. Quality assurance and inspection are critical in blow molding to ensure that the products meet the necessary quality standards and tolerances.
A case study of a manufacturer of plastic bottles highlights the importance of quality assurance and inspection in blow molding. The manufacturer was experiencing high rejection rates of their products due to defects such as wall thickness variations, blowouts, and surface defects. They implemented several quality control measures, including:
- Equipment and tools used in blow moulding should be constantly calibrated and maintained.
- The production process is monitored and managed using SPC techniques.
- To discover faults early in the production process, automated inspection systems are utilised for in-process inspection.
- Using dimensional inspection and visual inspection, the goods underwent a final inspection to ensure they met the necessary quality standards and tolerances.
By implementing these measures, the manufacturer was able to reduce the rejection rates of their products by over 40%, resulting in significant cost savings and improved customer satisfaction.
Wrapping Up
In conclusion, quality assurance and inspection are essential aspects of plastic manufacturing to ensure that the final products meet the necessary quality standards and tolerances.
Quality assurance involves a series of steps, including the development of quality control plans, regular calibration and maintenance of equipment, implementation of statistical process control techniques, and in-process and final inspection.
Visual inspection, dimensional inspection, and non-destructive testing are the three primary types of inspection used in plastic manufacturing, with each having its advantages and limitations. While visual inspection is relatively straightforward and inexpensive, it may not detect certain defects that require more sophisticated techniques such as non-destructive testing.
The challenges faced in inspection in plastic manufacturing include the need for specialized equipment, the complexity of the manufacturing process, and the potential for human error. However, these challenges can be overcome through the implementation of appropriate quality control measures, regular calibration and maintenance of equipment, and training of personnel.
The case studies presented in this article highlight the importance of quality assurance and inspection in injection molding, extrusion, and blow molding. By implementing appropriate quality control measures and inspection techniques, these manufacturers were able to significantly reduce the rejection rates of their products, resulting in cost savings and improved customer satisfaction.
In conclusion, quality assurance and inspection are critical in plastic manufacturing to ensure that the final products meet the necessary quality standards and tolerances. By implementing appropriate quality control measures and inspection techniques, manufacturers can achieve significant cost savings and improved customer satisfaction, making them more competitive in the marketplace.
How Deskera Can Assist You?
Deskera's integrated financial planning tools allow investors to better plan their investments and track their progress. It can help investors make decisions faster and more accurately.

Deskera Books enables you to manage your accounts and finances more effectively. Maintain sound accounting practices by automating accounting operations such as billing, invoicing, and payment processing.
Deskera CRM is a strong solution that manages your sales and assists you in closing agreements quickly. It not only allows you to do critical duties such as lead generation via email, but it also provides you with a comprehensive view of your sales funnel.
Deskera People is a simple tool for taking control of your human resource management functions. The technology not only speeds up payroll processing but also allows you to manage all other activities such as overtime, benefits, bonuses, training programs, and much more. This is your chance to grow your business, increase earnings, and improve the efficiency of the entire production process.
Final Takeaways
We've arrived at the last section of this guide. Let's have a look at some of the most important points to remember:
- Quality assurance and inspection are essential in plastic manufacturing to ensure that products meet the necessary quality standards. Failure to ensure quality in plastic manufacturing can result in product failures, consumer harm, and reputational damage to the manufacturer.
- SPC involves using statistical methods to monitor and control the manufacturing process. Furthermore, the process involves collecting data at various stages of the manufacturing process and analyzing it to identify any variations from the set quality standards.
- RCA is a problem-solving technique used to identify the underlying causes of problems in the manufacturing process. The process involves identifying the problem, collecting data, analyzing the data, and identifying the root cause of the problem.
- Visual Inspection: In this step, the inspector visually examines the products for any defects or anomalies. The inspection process may involve checking the dimensions, color, texture, and overall appearance of the product. The inspector may use specialized tools such as magnifying glasses, colorimeters, and gauges to aid in the inspection process.
- Dimensional inspection is a type of inspection used in plastic manufacturing to ensure that the product's dimensions meet the necessary specifications and tolerances. This type of inspection is particularly important for products that require precise and accurate dimensions, such as medical devices, automotive parts, and aerospace components.
- Magnetic particle inspection involves the use of magnetic fields and magnetic particles to detect surface and near-surface defects such as cracks and porosity. The product is magnetized, and magnetic particles are applied to the surface. Any magnetic particles that are attracted to defects can indicate the presence of a defect.
- Implementing quality control procedures can help ensure that products meet the necessary quality standards and tolerances. These procedures may include regular inspections, testing, and validation of the manufacturing process.
Related Articles

